|
|
Post by peter92 on Nov 27, 2011 21:34:22 GMT 10
hi alex, yeah, i was thinking on that but have to find our shower first before i get the ply
always seems to be not enough room to put everythink
regards peter
|
|
Deleted
Deleted Member
Posts: 0
|
Post by Deleted on Dec 5, 2011 10:10:09 GMT 10
few more pictures for you....... new drawbar and front checkerplate: 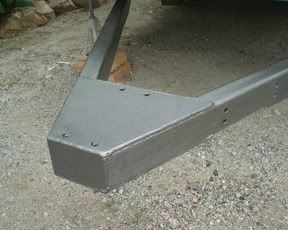 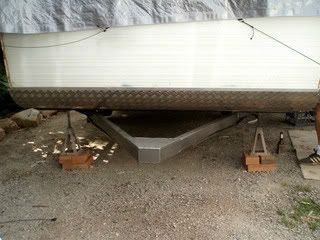 new tow hitch and jockey wheel: 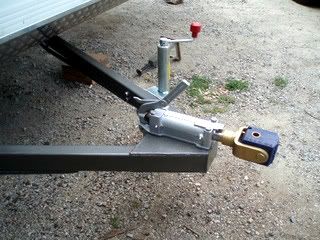 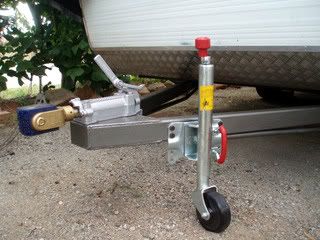 new back legs: 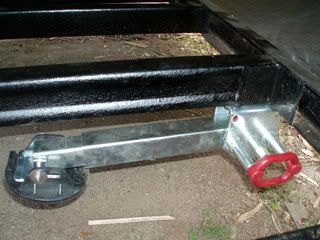 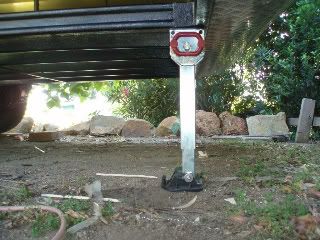 regards Jean |
|
|
|
Post by peter92 on Dec 5, 2011 21:16:33 GMT 10
hi jean and alex
great job on the draw bar and i like the new legs alex
its coming along great
whats next
regards peter
|
|
Deleted
Deleted Member
Posts: 0
|
Post by Deleted on Dec 5, 2011 21:49:38 GMT 10
thanks Peter,
going to have to put the caravan to one side for a few weeks, have to put down some decking and make a dining table before christmas!! Hopefully will get quite a bit over the holidays, want to do the hand brake cable, water tank and gas lines next, then I can get the floor down.
cheers
Alex
|
|
Deleted
Deleted Member
Posts: 0
|
Post by Deleted on Dec 6, 2011 0:19:25 GMT 10
|
|
Deleted
Deleted Member
Posts: 0
|
Post by Deleted on Dec 11, 2011 10:55:25 GMT 10
thanks Peter,
I hope santa does stop I need bits and pieces for the caravan, I did ask him nicely.
Having withdrawal symptoms this weekend but sons decking is now finished and starting dining table today, so hopefully back to the caravan next week.
Good luck with the shower and tanks, look forward to seeing the photos.
cheers
Alex
|
|
Deleted
Deleted Member
Posts: 0
|
Post by Deleted on Jan 3, 2012 19:37:33 GMT 10
Hope everyone had a great christmas and new year.  Even though Alex has been really busy over the holidays he has still managed to get the sides on the caravan, so here are a few photos to show you how its going. 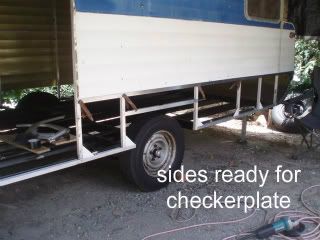 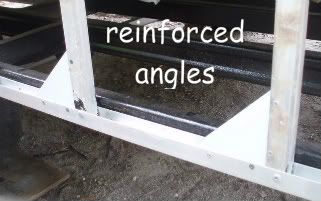 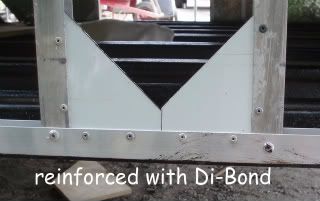 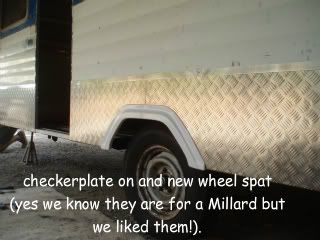 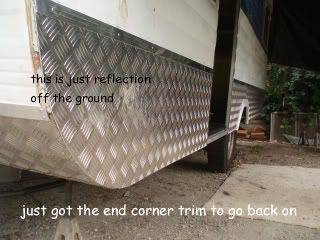  he got the step welded back in too but I haven't taken a photo of that yet. regards Jean |
|
|
|
Post by millard1399 on Jan 3, 2012 20:10:51 GMT 10
Wow, how good is that!   Makes me want to get out there and polish the Millard up so it shines like a mirror. No, wait...on second thought...makes me want to go out and put dynamite under the Millard, and then go buy a Viscount! ;D ;D Great going there guys! This will be one shmick caravan when it's finished. cheers, Al. |
|
Deleted
Deleted Member
Posts: 0
|
Post by Deleted on Jan 3, 2012 22:10:07 GMT 10
thanks Al, don't do anything too drastic ha ha you're Millard is lovely. We are having great fun doing the caravan, it is so go to be putting bits on at last.
regards
Jean
|
|
|
|
Post by peter92 on Jan 5, 2012 6:45:02 GMT 10
hi jean and alex
the van looks really great, love the checker plate
if thats how it looks on the out side, cant wait to see the inside when you both start. i can see why YOU LIKE IT
also the holes in your tank are to let air in as the water is taken out
great work
regards peter
|
|
Deleted
Deleted Member
Posts: 0
|
Post by Deleted on Jan 5, 2012 16:35:03 GMT 10
Before Alex gets to the stage of putting the new flooring in, I wouldn't mind talking with you about the roof a bit more. Can you get Alex to have a look on the top of the van, and see if there are any "lock-seam joints" where the roof sheeting is joined together? They look like this... 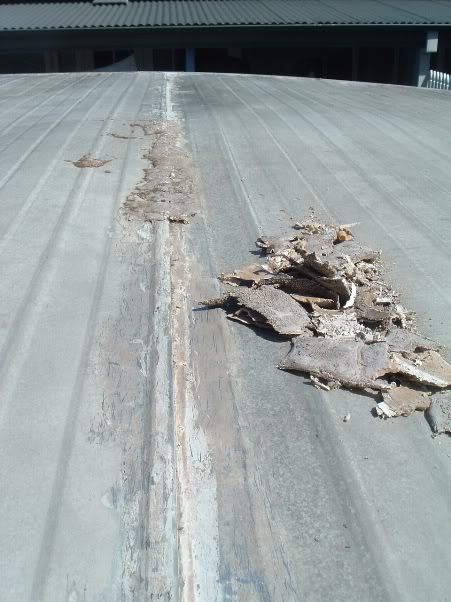 Can you let me know please, because I'd like to get you to do a couple of things to these joints to ensure you end up with a leak-proof van. cheers, Al. Well the time has come and we have taken the cover off partially and are about to make new hatches. The roof looks pretty messy. Al - what was it you wanted to tell Alex re the roof? regards Jean |
|
Deleted
Deleted Member
Posts: 0
|
Post by Deleted on Jan 5, 2012 18:26:17 GMT 10
|
|
|
|
Post by millard1399 on Jan 5, 2012 21:35:08 GMT 10
G'day Jean, Read your PM, and yes I wanted to say something about your roof when the time came for you to work on it. And here we are. If you look closely at the roof sheeting joints, you'll be able to tell how the two sheets have been interlocked together. One thing I've noticed on these old caravan roofs is that the joint is not always positioned so that rainwater flows over the joint rather than into the joint. This diagram shows how the roof sheets are interlocked together. In reality, the joint is crimped flat rather than as I've actually drawn it, but you get the idea. You'll see in the diagram how if the mouth of the joint faces uphill, water will want to flow into the joint... 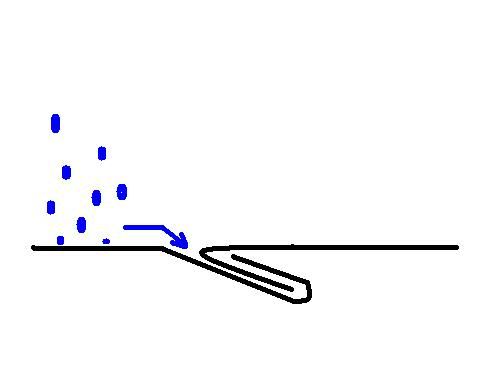 When I restored the actual poptop roof cladding on the Millard, I decided to run a bead of Sika sealant along the underside of the roof joints. My reasoning was that if water did eventually seep into the joint, the sealant on the underside would prevent it from entering the van... 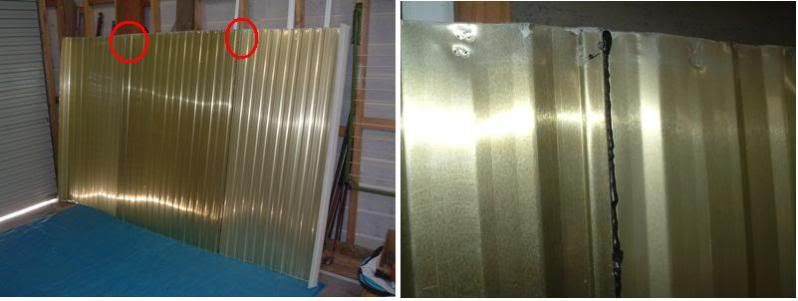 You can often see spots of corrosion on the underside of roof cladding either side of the joint. These spots are a white powderish appearance where the aluminium has oxidised. If any of these spots are evident, it's a sure sign that water is seeping through the joint. I think any extra effort you put into making sure the roof joints are absolutely waterproof is time worthwhile spent. There's a 1982 Millard currently on ebay, and the seller says the roof exterior has been coated in Eternabond, a brand originating in the USA. I've not heard of the products before, but a quick search of the internet seems to show favourable reports. They might be a group of products that we could explore further for our old vans. cheers, Al. |
|
|
|
Post by gavo on Jan 5, 2012 21:53:09 GMT 10
That roof hatch looks just like mine did. In order to be sure of sealing the joints I have removed the extra piece of aluminum angles front and rear of each hatch so that I can reseal between them and reseal the rivets - be sure to use sealed rivets for the job. I can take a pic of the removed sections tomorrow and post it. The removal of the flange requires the rivets to be drilled out and carefully cut in under the flange while trying not to put the flange totally out of shape. Al is spot on about the seams in the roof, mine have sections under them that show where the water has made its way through the joint. Sealing under the seam will stop the water getting through. Water has a funny knack of getting into where it is not wanted. When I was coach building I would often see tracks of water that had apparently made its way up hill  . What Winding mechanisms do you have ordered for the roof hatches and where are you getting them from? I am looking at making some for mine. Cheers Gavo. |
|
Deleted
Deleted Member
Posts: 0
|
Post by Deleted on Jan 6, 2012 19:54:48 GMT 10
Hi Al and Gav, thanks for your input and info, its always good to know you are not the only one daft enough to tackle these jobs! We took the tarp off completely today so we could have a good look at the roof. After some debate and trying to remove the various types of silicone, paints, sealants, and some other lumps of goo that looked like soft cement (either that or this van's been parked under the flight path of one very sick seagull!!) we decided it will be faster and easier to replace the ally with some new sheets. This also means we can replace the hatches with off the shelf ones, as the supplier who was getting our hatch winders phoned to say they are no longer available, (this is after taking our order  So thats the roof on hold for now I will just have to amuse myself with some other job, mmm what will it be? refurb windows, door, wiring, painting,............. Where,s my beer!!!!! Cheers Alex |
|
|
|
Post by peter92 on Jan 6, 2012 20:34:01 GMT 10
hey alex, i no you will do a great job of it and cant wait to see what you do next
after all the choices you have , you really need that icy cold beer
look forwards to the pics, keep all you info coming
regards peter
|
|
Deleted
Deleted Member
Posts: 0
|
Post by Deleted on Feb 15, 2012 17:53:34 GMT 10
wow am I getting slack, can't believe how long it is since I put a post up! Alex as always has been very busy but still has managed to get a few jobs done on the Viscount. 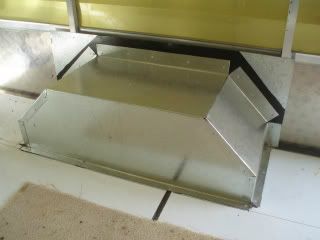 nice shiny new wheel guards. 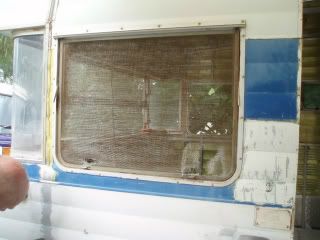 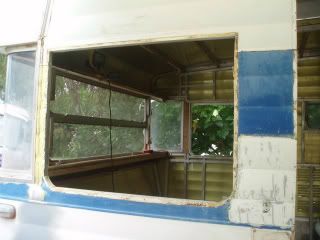 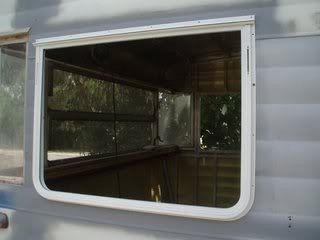 old window frames replaced with nice white ones. 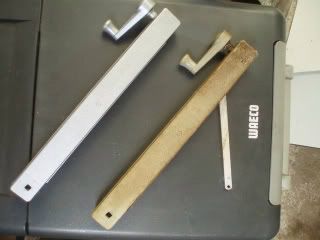 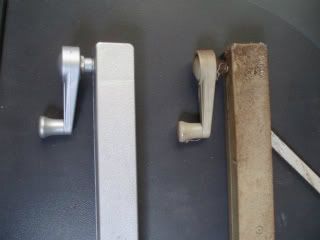 winders resprayed. 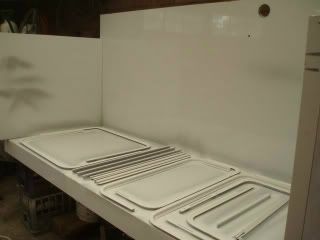 and being Alex, he does nothing by halves - he made up a spray booth in the garage! |
|
Deleted
Deleted Member
Posts: 0
|
Post by Deleted on Feb 27, 2012 12:07:15 GMT 10
got the long end windows out this weekend and removed all the silicone - some previous owner really, really likes silicone! Then sanded them down and gave them a spray of undercoat. Picked up our new flyscreens on Saturday from 'The Caravan Depot' www.caravandepot.com.au and Chris the owner showed us some vans he had in the workshop they were renovating. Very interesting to see how the professionals do it. If anyone wants a new van their new ones are awesome with loads of gadgets. Needless to say I kept saying to Alex 'I want one of them in our Viscount' he just nodded, which usually means - in your dreams!!!! ok back to the spray booth. Hope everyone had a productive weekend. Jean |
|
Deleted
Deleted Member
Posts: 0
|
Post by Deleted on Mar 15, 2012 8:49:17 GMT 10
Well last weekend was quite productive, Alex stripped off the old roof, cleaned off the remaining silicone, cleaned up the old crossbars, added some new ones, he has now put on a nice shiny new roof.
A bit slack I know but I haven't got any photos to show you yet! So watch this space and I will post some next weekend.
Looks awesome! Jean
|
|
Deleted
Deleted Member
Posts: 0
|
Post by Deleted on Mar 21, 2012 12:07:57 GMT 10
|
|
Deleted
Deleted Member
Posts: 0
|
Post by Deleted on Mar 21, 2012 12:10:44 GMT 10
;D ;D ;D ;D ;D
so excited, I have just picked up the tinted acrylic for the windows, all cut to size.
Hurry up weekend I want some windows fitted.
;D ;D ;D ;D ;D
|
|
Deleted
Deleted Member
Posts: 0
|
Post by Deleted on Mar 29, 2012 12:49:43 GMT 10
;D ;D ;D we have just had a kerb side collection in our area and I picked up this kitchen for the caravan.....what do you think? 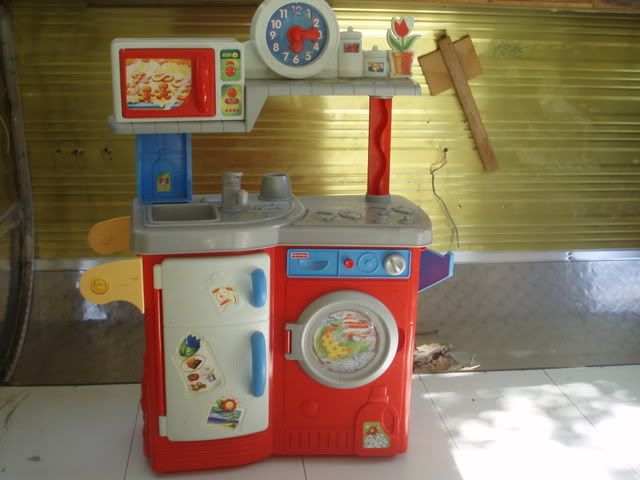 ;D ;D ;D |
|
|
|
Post by gavo on Mar 29, 2012 19:02:42 GMT 10
Great kitchen, very space saving. I do like the built in fridge and washing machine. ;D
BTW great job on the roof, I was able to just re-sealed and paint mine.
Cheers
Gav.
|
|
Deleted
Deleted Member
Posts: 0
|
Post by Deleted on Apr 11, 2012 21:58:25 GMT 10
Yea I like the roof too very neat , how does the weight of the dibond compare to the aluminium ?
I just resealed then painted the existing roof on my van,
Regards
Cameron
|
|
Deleted
Deleted Member
Posts: 0
|
Post by Deleted on Apr 12, 2012 21:32:53 GMT 10
Hi Camich
By my rough caculations over 12sqm the Dibond is about 7 or 8kg heavier compared to unpainted aluminium.
I used it because:
1. It was free!
2. It adds insulation
3. I don't have to paint it, ever, its powdercoated!
Cheers
Alex
|
|