Deleted
Deleted Member
Posts: 0
|
Post by Deleted on Apr 18, 2012 16:33:58 GMT 10
Hi All, Can anyone tell me what this Amp meter/ Junction Box is all about  I'm not sure what all the lights mean 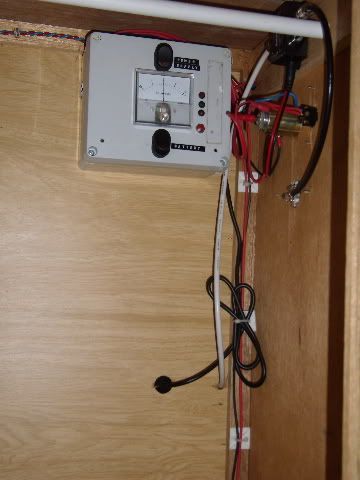 This lot is situated in the wardrobe. I got the 12V working OK but not sure if there is anything to look out for - warning lights for example. Regards Bobbie |
|
Deleted
Deleted Member
Posts: 0
|
Post by Deleted on Apr 24, 2012 11:54:14 GMT 10
Hi All, 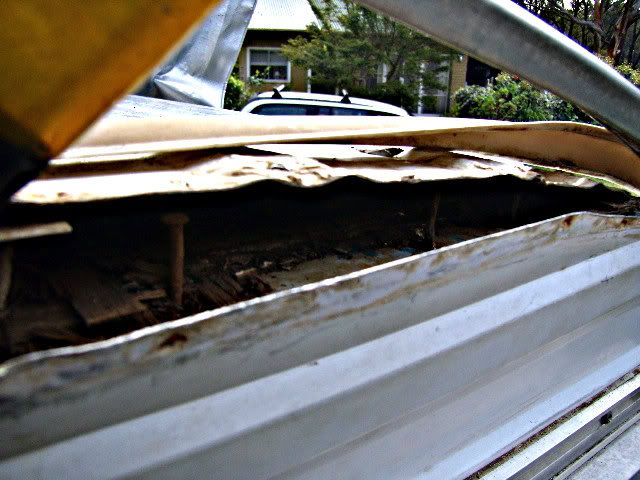 The above pic is the drivers side top corner of 'The Duck', there are 3 x rusty posts that once held the wood support overlay which runs on top of the aluminium frame - note how the posts vary in height to suit the shaped profile of the rotted wood (30 cm removed). I was thinking I could shape some high density foam with slots to accommodate the posts as a temporary fix as I'm reluctant to remove the posts yet - they dictate the height of the profile and now support the roof panel. Note the rotted ply ceiling, I can see light from the inside of the van now. This is a temporary fix. Do you think this may work  Regards Bobbie |
|
|
|
Post by millard1399 on Apr 24, 2012 13:41:50 GMT 10
G'day Bobbie, Lucky you getting the "Special Edition" version with the built-in skylights!!   I don't see any reason why your temporary fix wouldn't work. When you get to the stage of making the permanent repairs, make sure you leave the side cladding in position and take the roof off if necessary. Leaving the side cladding in position will allow you to put a length of timber inside the cladding and trace the outline of the cladding onto the timber. Then you'll know the roof will fit back into position perfectly. It's the big mistake I made when working on my poptop. I took all the side cladding off and then had no idea whether the shape of the repaired frame was matching the cladding exactly. Won't be doing it that way if I ever do anything like it again.   If it's any consolation, imagine what the buyer of this van listed on ebay is going to find when they start looking closely at the van after they've got it home... York PoptopHow about that ceiling in the last photo??!!   cheers, Al. |
|
Deleted
Deleted Member
Posts: 0
|
Post by Deleted on Apr 24, 2012 14:21:42 GMT 10
G'day Al, Thanks for the advice - will it ever stop raining here??? I think I bought the 'Drought Breaker' when I bought 'The Duck' but have become firmly attached to it!  See what you mean about the York, once you get to know what happens with the construction of these vans I guess you tend to steer away from anything with water damage - unless your really keen to spend a few years re-building. That last photo made me feel ill  I see the York has a lot of the Millard fittings (door handles; windows). Regards Bobbie |
|
Deleted
Deleted Member
Posts: 0
|
Post by Deleted on May 8, 2012 18:04:08 GMT 10
Hi All, This weekend I completed the drivers side temporary waterproofing and started on the passenger side by removing the annex sail guide rail and the main aluminium channel strip. Pre-drilled (using a 1/8'' twist drill) the existing channel fixing holes to allow for 10 g 30 mm stainless self tappers to go into the aluminium frame, through the partially rotted wood packing strip ( I packed the missing rotted timber with high density foam). Purchased a 10 m x75 mm Foil and Bitumen adhesive weatherproof tape from Bunnings (it's actually 76 mm). I cut a length of this in half to 38 mm., this covered the roof joint with a 10mm overlap allowance to the siding - added a 25 mm overlap each side in length to overlap the 'C' channels at each end just under the panel joins. On reflection, I should have run it as one continuous strip as the overlap bulks up too much at the 'C' joint- not a disaster. 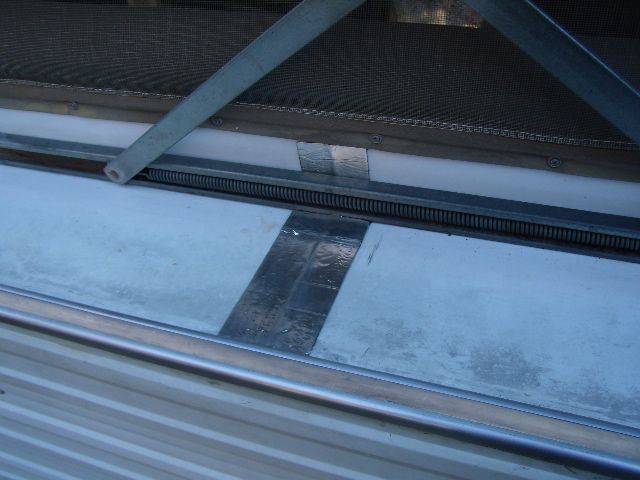 As this is a temp fix, I thought I would experiment - I used a Selley's Blockade in lieu of silicon on one join at the rear drivers side to the pop-top, then covered it after it skinned with a full width of the foil tape. It will be interesting to see what happens in a few years. The rest of the pop-top roof joins are just foil tape. I intend to run a bead of blockade against all the channels after I complete the passenger side repair. 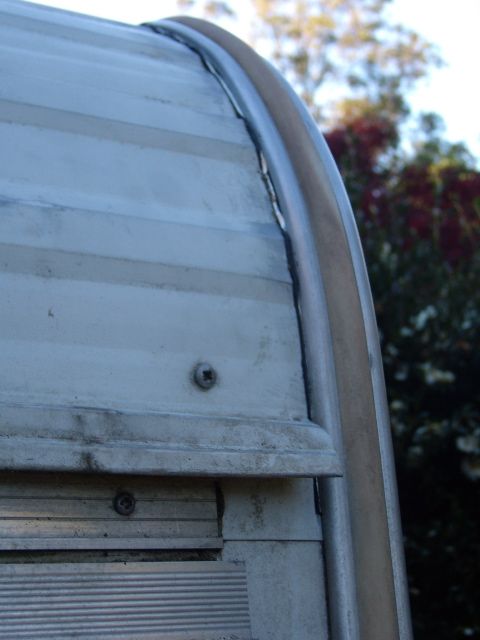 The Foil tape sticks like a sheep dag, so you need to plan well before using it. The channel when affixed with the self tappers, squeezes the bitumen rubber adhesive to form a seal to the van side of the channel which is a benefit, you can trim the excess with a utility knife and clean up with turps. The peaks and valleys of the siding are also partially filled with it as well, I will fill the remaining voids with Blockade. 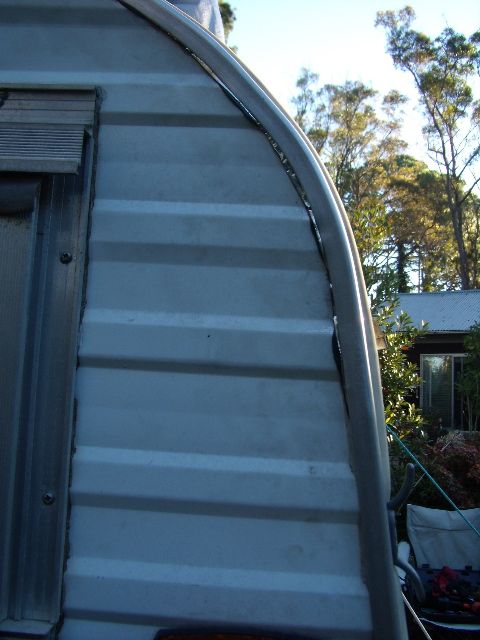 Regards Bobbie |
|
Deleted
Deleted Member
Posts: 0
|
Post by Deleted on May 9, 2012 17:30:12 GMT 10
Passenger side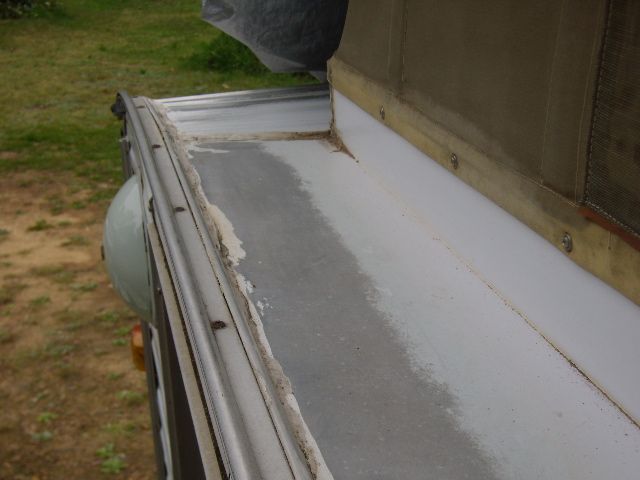 Not as bad as the other side but still crook. 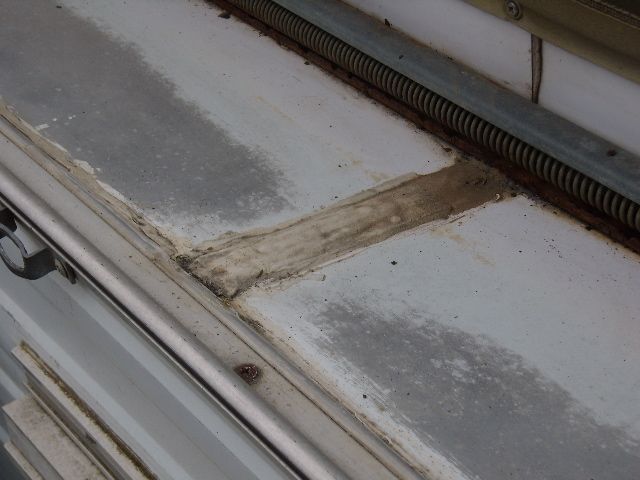 Four layers of silicon 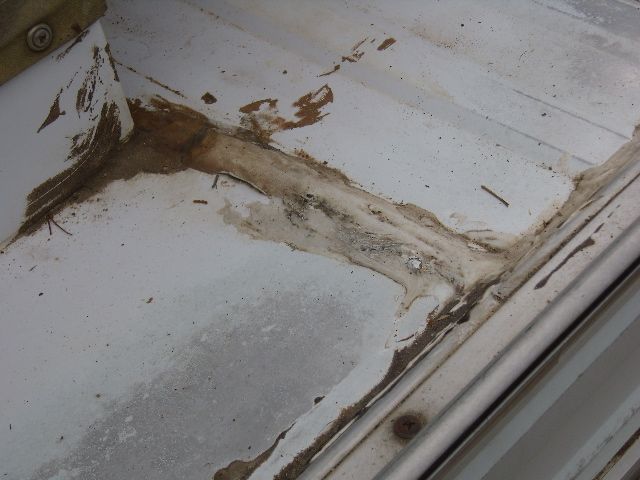 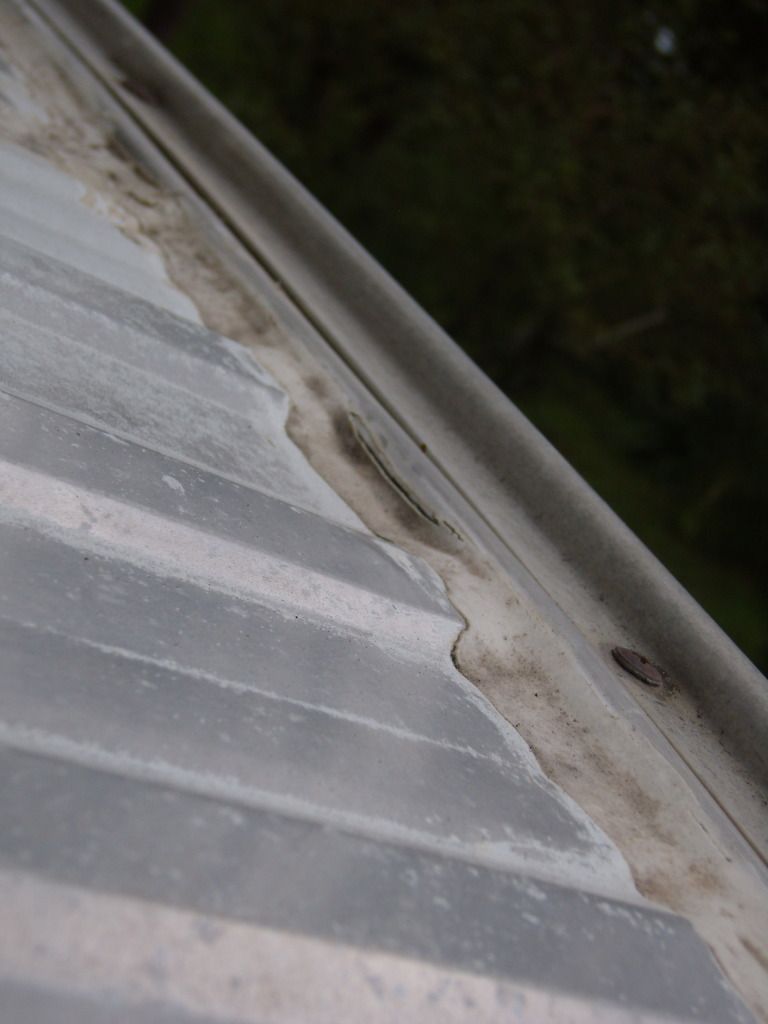 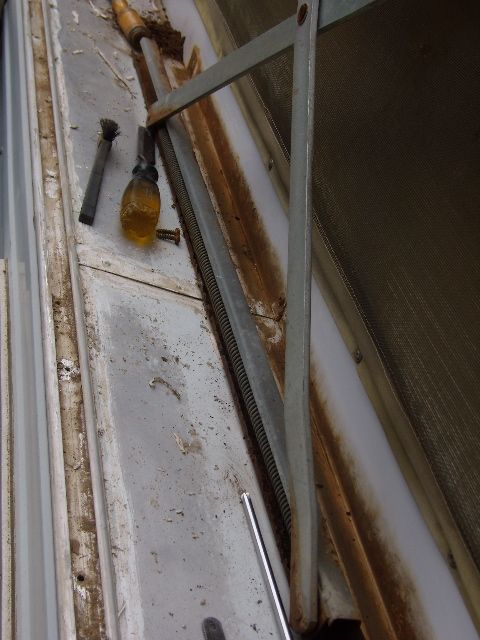 Rusted out pop-up support 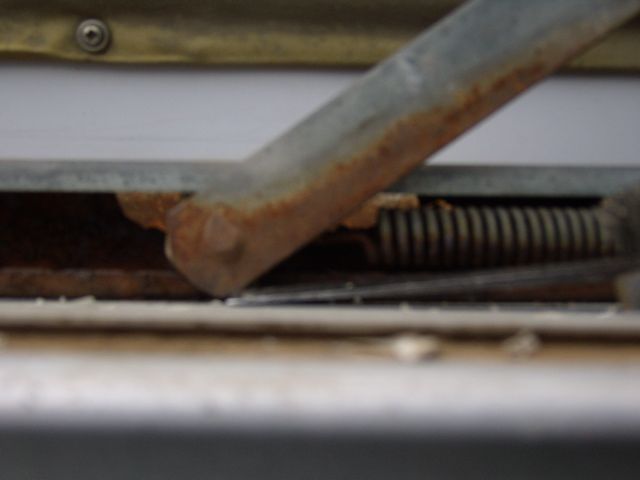 You can see light coming through the back of the bracket. Beats mowing the lawn! ;D Regards Bobbie
|
|
|
|
Post by millard1399 on May 9, 2012 18:24:05 GMT 10
G'day Bobbie, And it sure helps to maintain a sense of humour during the job, ay?!!   Roughly whereabouts are you located? I've got three of those scissor lifts/canopy lifters that I replaced on my poptop with new ones, only because I got new ones cheap at a clearance sale. I cleaned up the old ones and repainted them during the restoration. You're welcome to one, two, or all three of them if you want to pay the postage. New ones cost about $95 - $100 each through CaravansPlus. I like the experimenting you're doing on the van. It's a shame we can't fast-forward five or ten years and see how your ideas work out. I'm still no closer to working out the best way of sealing a van "permanently", so the sorts of things you are doing are really interesting. Keep laughing...   cheers, Al. |
|
|
|
Post by Caprinut on May 9, 2012 21:59:37 GMT 10
The bitumen foil tape is not on my happy list as it is a bugger to remove later and will leave residue that is resistant to Sikaflex or any permanent sealer. As it is tar based it goes soft in full sun and shifts with expansion, and then goes hard at night in cold and cracks. But it is sooo convenient, so user beware.
I was amazed at how much the side panels expand and contract through the seasons. I was advised to preheat the panels before fitting and I thought this was wierd. Then one of the oldies on this site explained how the panels are heated with a gas burner in the factory when fitted. My long panels actually form a wave shape in the really hot days that we can have in Adelaide.
Just info for future use. Peter
|
|
Deleted
Deleted Member
Posts: 0
|
Post by Deleted on May 10, 2012 10:55:53 GMT 10
Hi Al,
Thanks for the encouragement - yes, the three lifts would be much appreciated and I would expect to pay you for them. The front lift is also dodgie by memory and I will check on the rear on the weekend and get back to you. I'm located in the Southern Highlands of NSW, let me know how to get in contact with you Al.
Nothing ventured - nothing gained!
I purchased another van just before we got the 'Duck' - it's a very old ('60s I think) Jennison Pathfinder for $300. It's a full re-build, so what we experience with the 'Duck' should give me incentive with the Pathfinder restoration.
Regards
Bobbie
|
|
Deleted
Deleted Member
Posts: 0
|
Post by Deleted on May 10, 2012 11:04:17 GMT 10
G'day Peter,
Thanks for your input.
Nothing could be worse than removing the grey mastic and bodgie Silicon from a Millard - its the pits!.
As this is a Temporary fix, I'm not looking forward to removing the bitumen adhesive and Blockade either, so I will keep your experiences in mind for the eventual rebuild.
Regards
Bobbie
|
|
|
|
Post by millard1399 on May 10, 2012 11:31:07 GMT 10
G'day Bobbie, Wow!, a Jennison Pathfinder for $300!!!   Jennison produced the "Rolls Royce" of caravans back in those days. Quite a cut above the mass-produced vans from other factories. Can you post a photo of the van yet?? (asks he, slobbering with anticipation   ). Southern Highlands?! Heck, I could have dropped them off last week on the way to the Vintage Nationals in Cowra! Dang!! Before we go ahead with posting them to you, just double-check the length of the bottom rail on yours to make sure we're talking about the same size. Mine are 900mm length. Other than the postage costs, they are free to you. You'll be doing me a favour by clearing some of the stuff clogging up my shed! ;D All three together on the bathroom scales show a tad under 12kgs total weight, so I'll check out the Australia Post website and see what the go is with any restrictions for size, weight, etc., and work out a postage estimate. Send me a Personal Message with your postcode.   cheers, Al. |
|
Deleted
Deleted Member
Posts: 0
|
Post by Deleted on May 10, 2012 15:22:18 GMT 10
Hi Al, Here is the Jennison. 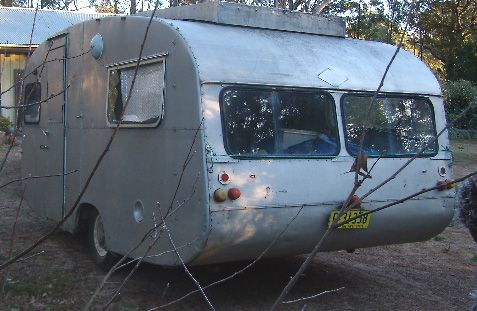 I'll get some more shots to you later on after work. Regards Bobbie |
|
|
|
Post by millard1399 on May 10, 2012 18:39:31 GMT 10
*Groan* Thanks a lot Bobbie... I just short-circuited my keyboard with drool!!   Dang! Are you seriously telling me you got that van for just 300 bucks?!! Man oh man, you don't ever need to win the lottery, you've just done it!   This link will take you to the Vintage forum History section, where you can read up on the history of the Jennison/Jennison Pathfinder businesses. Heck, if you ever decide you don't want that van, give me a call!   And don't tell me it's got a Jones Dolly Wheel on the front of it, or you'll be reading about a bloke from Bellambi who has had an unfortunate "accident"!   cheers, Al. |
|
Deleted
Deleted Member
Posts: 0
|
Post by Deleted on May 10, 2012 18:39:45 GMT 10
|
|
Deleted
Deleted Member
Posts: 0
|
Post by Deleted on May 10, 2012 19:03:54 GMT 10
Hi Al, Jeez....sorry! Yes it has one of those Jones watzies  bobbie |
|
|
|
Post by millard1399 on May 10, 2012 19:18:49 GMT 10
Arrrrrrrrrrgh!! That's it...I'm a goner!!   |
|
Deleted
Deleted Member
Posts: 0
|
Post by Deleted on May 16, 2012 18:37:23 GMT 10
G'day all, Progress continues to the passenger side of the van. 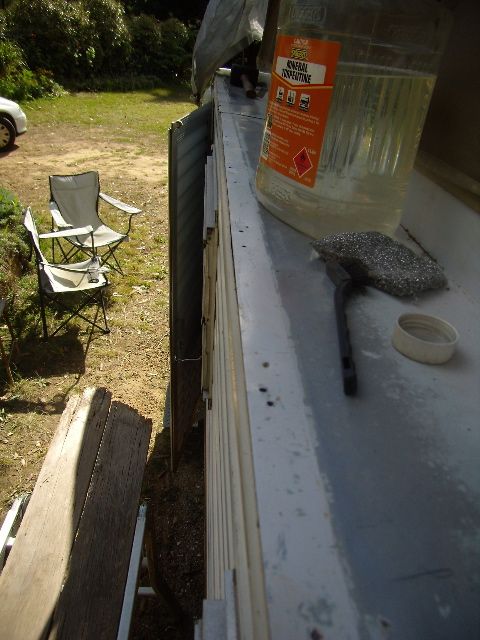 I've got about another 2 days to spend on the waterproofing of the 'Duck'. Al has kindly posted me the 3 spare pop-top lifts which I should have by Friday if I survive unwrapping the parcel ;D - Thanks for the warning Al. Observations:Just looking at how screw holes were drilled and staples inserted in the original assembly - one person worked on one side and a more professional or caring person worked on the other. The mastic used below the channels never settled - it contained air chambers whilst it set, this allowed water to seek entry once it dried out. The absence of flashing. I guess they thought the channel would suffice - well it may have if the mastic used had not deteriorated. Screws were applied on the valleys of the corrugated roofing instead of on the peaks - the reverse may have saved some grief. But, that was a long time ago and methods and materials have progressed. There is light at the end of the tunnel!  Regards Bobbie |
|
Deleted
Deleted Member
Posts: 0
|
Post by Deleted on May 17, 2012 10:36:00 GMT 10
you have a big job ahead of you but wow you are so envied, this is a fantastic find, have fun renovating and keep up with lots of photos, we will be following your progress all the way.
regards
Jean & Alex
|
|
Deleted
Deleted Member
Posts: 0
|
Post by Deleted on May 23, 2012 15:38:27 GMT 10
Hi All Spent most of the weekend 'til Tuesday evening cleaning off mastic from the roof and siding joins, channels and sail guide and removed the passenger side pop-top lift  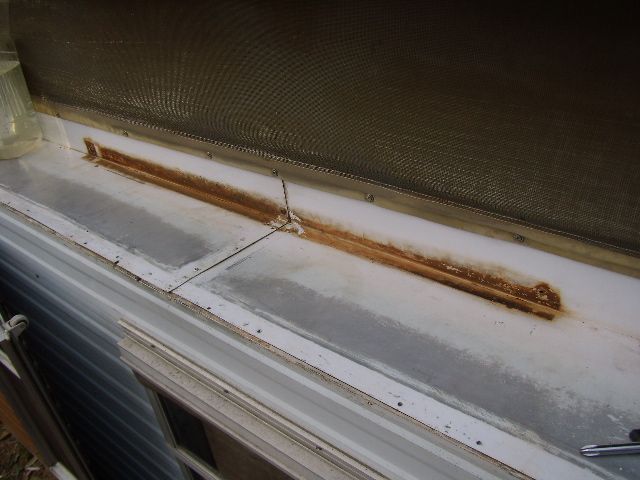 Al's 3 replacement lifts were waiting for me on Friday afternoon. Thanks Al, they were superbly packaged for the trip up the hill - and I remembered what you warned about when opening. Millard must have changed suppliers in '77 as Al's lifts are a heavier gauge of steel than mine. The reason mine had rusted out was due to the use of gal self tappers I think, or a cheaper grade of steel - anyway the holes on the brackets are different positions so the lift installations will have to wait 'til the weekend with another trip to Bunnings for some stainless self tappers.  Two rivets were missing at the joint of the pop-top, so they were replaced - Then I put a small amount of Blockade on the rivets and the seam and covered it with the 76 mm foil tape. 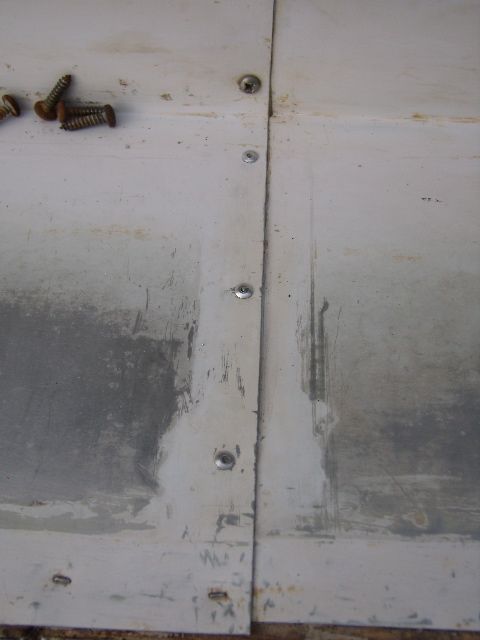 The Bitumen foil tape was applied and the channels refitted over the top. 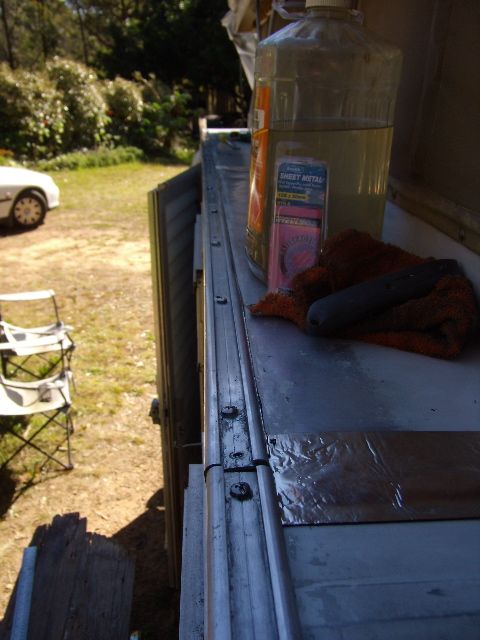 Problem: Problem:The first self tapper on the 'C' channel above the door is 'freewheeling' It's a 10g x 30mm stainless. It's the critical one that holds the channel in line with the roof channel. should I go up to 12g or try a 40 mm 10 g Can someone advise me how to solve this problem  Thanks Regards Bobbie PS: Al, here is a shot of the front of the Jennison 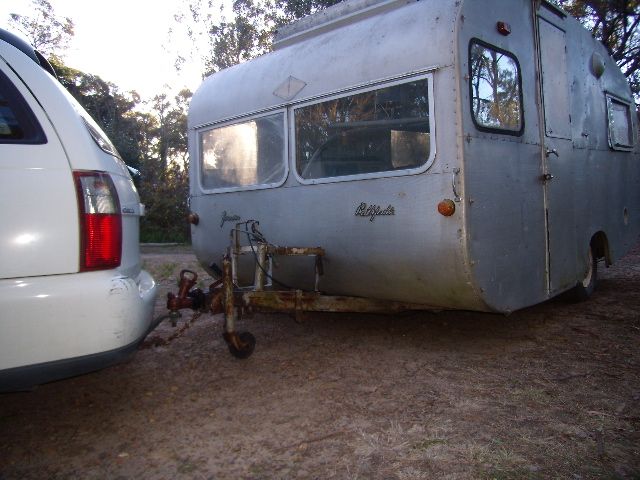 |
|
Deleted
Deleted Member
Posts: 0
|
Post by Deleted on May 23, 2012 20:33:16 GMT 10
thats an awesome van u have there, what a great shape, nice and sleek and love how low it sits,
very very cool,
Cam
|
|
Deleted
Deleted Member
Posts: 0
|
Post by Deleted on May 23, 2012 23:00:15 GMT 10
Hi Cam,
Too scared to look at it yet -The Jennison that is - I think it sits that low 'cause the suspension has failed - it's going to be a long hall with that one - the Millard is my only interest at the moment.
Regards
bobbie
|
|
|
|
Post by millard1399 on May 24, 2012 10:21:50 GMT 10
G'day bobbie, When you say "C channel" do you mean the aluminium edge moulding, or something else? If it's the edge moulding, you should have about 50mm of timber underneath there, so I'd be inclined to go with a longer screw rather than a larger diameter. You could always put some PVA glue down the hole to help in the section where it's freewheeling at the moment. Assuming your framework is exactly the same as mine, in that section it will be a 'sandwich' of two strips of timber with the ceiling plywood in between, as per the photo on the left... 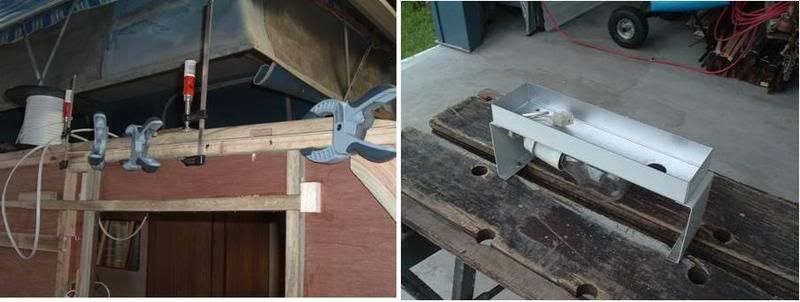 The new lifters I bought also had the locating holes in a slightly different position to the ones I gave to you. They were only half a screw diameter out, which meant I couldn't just drill new holes in the van framework. I had to spend a bit of time with a small round file, and file the holes in the lifters to make them line up with the existing holes in the van. I'll be thinking of you when you put the 'new' lifters in position. When I was refitting mine, I had them tied with string to keep them in the partially open position for attachment. I thought I'd used enough string to overcome the spring force in the lifter, but one of them broke at one end during the process. Then the other end immediately broke as well under pressure. Woulda killed me if I'd been anywhere underneath it!  Damn things explode if they're not tied up securely when partially opened, so be careful.   cheers, Al. |
|
Deleted
Deleted Member
Posts: 0
|
Post by Deleted on May 24, 2012 15:14:14 GMT 10
Hi Al, Thanks for getting back to me. Yes, its the extruded aluminium edge moulding which looks like the letter 'C', I've got around 22 mm of wood then the Aluminium frame. I guess the extra depth of Foil/Bitumen tape created the problem - so I'll take your advice on longer self tappers and buy 10g x 40 mm this time instead of 30 mm. The problem only happens on the front 2 corners, as the roofing overlap to the join is opposite (therefore being a sheet of roofing more in thickness) than the rear corners The self tappers on the front are positioned to go through 2 x layers of roofing - so not much in it!  Photo of top driver side corner see the sheet overlap at LHS of pic. The holes for securing the lifts - hmmmm - by memory I've the same problem as you, only the existing holes will need filling - I'm thinking of running some foil tape the length and at the base of the lower lift bracket to cover the open holes and to stop any future corrosion and cushion them as I noticed some pitting on the roof. See how we go on Saturday! ;D Thanks again! Regards Bobbie |
|
|
|
Post by millard1399 on May 24, 2012 20:36:03 GMT 10
G'day again bobbie, I meant to clear some info up about the Jennison Pathfinder you've got, and my question about the Jones Dolly wheel. These wheels were produced in the 1960s and were retrofitted to vans to reduce the ball weight of the van acting down onto the towbar. Here's a photo of a Jennison Pathfinder with a Jones Dolly wheel. This van is wasting away down the south coast... 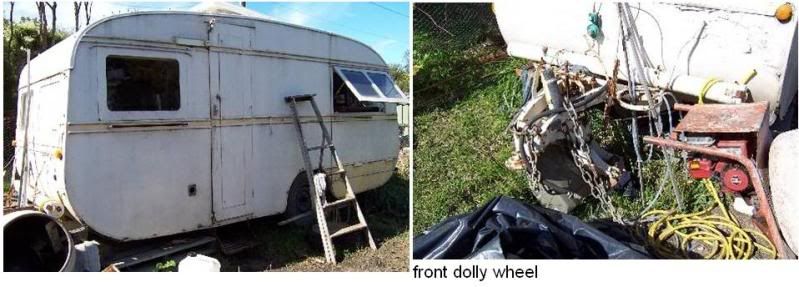 Here's a clearer picture of one that's been fitted to a 1970 Viscount... 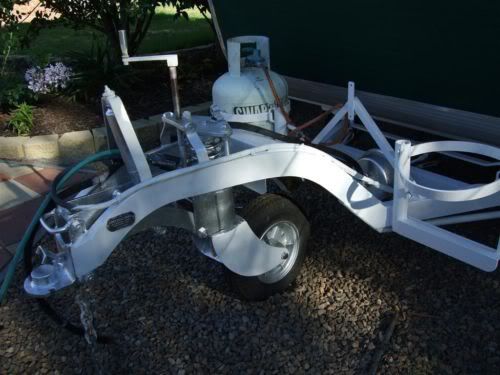 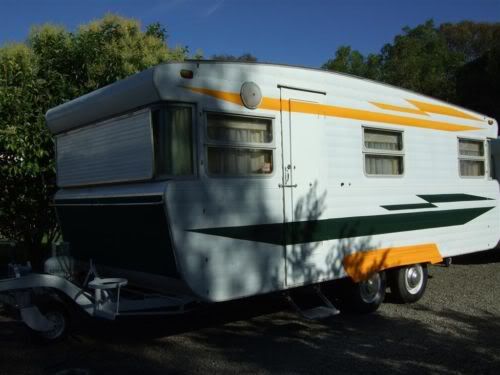 These dolly wheels are well sought after, so any van that's got one fitted is considered to be a "prized find".  ------------------------------------------------------ On a totally separate note, I've just ordered some bits and pieces from the CaravansPlus website, including the plastic insert that goes into the aluminium edge moulding. I notice yours seems to be cream (or aged white?), but I ordered grey. CaravansPlus have put a note at the bottom of the grey listing to say that they won't be able to get any more of the grey colour from their supplier, and when the current stock is gone, that's the end of it. CP also list the white and black colours, and there's no note under either of these colours to say they can't get any more, so it must only be the grey that's being discontinued. Ever since I first bought stuff for the Millard from the CP website in 2008, I notice some products that I could get then are no longer available. As the years roll on, it will become harder and harder to get replacement bits and pieces for these old vans.   cheers, Al. |
|
Deleted
Deleted Member
Posts: 0
|
Post by Deleted on May 25, 2012 18:02:40 GMT 10
|
|