|
|
Post by Mustang on Jul 21, 2017 9:14:00 GMT 10
You are certainly down in the ribs now.
Looking at the roof it may be easier to hire a powerful "Gerni" combined with a gunk stripper.
|
|
|
|
Post by mynewstudio on Jul 21, 2017 18:08:38 GMT 10
Hi Mustang, The roof is being replaced. Hatches are out and I'm ordering some new roofing next week  |
|
|
|
Post by atefooterz on Jul 21, 2017 21:41:32 GMT 10
Awesome mould farm up there, hope you used a mask & cleaned it off with some cloudy ammonia and or bleach. You can just wipe over with an old mop or whatever then allow the sun to kill the spores, more important if you were to spray all that live stuff everywhere with a pressure washer... to re grow around the work zone, later. |
|
|
|
Post by mynewstudio on Jul 22, 2017 5:42:38 GMT 10
Awesome mould farm up there, hope you used a mask & cleaned it off with some cloudy ammonia and or bleach. You can just wipe over with an old mop or whatever then allow the sun to kill the spores, more important if you were to spray all that live stuff everywhere with a pressure washer... to re grow around the work zone, later. Yes it's great isn't it  I'm pretty used to mould but far out, this crop even impressed me! I couldn't quite believe the thickness of some of the growths. Looks like the roof hadn't been touched in many many years. |
|
|
|
Post by atefooterz on Jul 22, 2017 9:18:43 GMT 10
Mine has been static under a tree on a Dairy farm for 20+ years, so huge mould, even layers of lichten over mould then new mould over lichten haha!
My L300 that has sat for years here & there taught me the tricks,no black spot mould since 2001, if you live somewhere you really do not want to spread that imported mould, like pressure blasting will do.
|
|
|
|
Post by mynewstudio on Aug 2, 2017 12:15:16 GMT 10
|
|
|
|
Post by mynewstudio on Aug 22, 2017 11:11:06 GMT 10
Ok guys, couple of questions.
1-Does there need to be a layer of -something- in between the new zincalume roofing and the frame? A membrane of sorts? If I use the thin insulation, could that serve the purpose ? Is the thin insulation normally installed between roof frame and roofing, or between the frame and internal panelling? Does a flexible sealnt application negate the need for this?
2- Which product to use for a seal between frame and new roof sheeting when applying new roof? Or is this even necessary? Stationary van with new trimdek roof.
Looked at the thread with all the sealant/ silicone advice. Considering the van is 6m x 2.5m I would like to avoid Sika products purely for cost and being able to remove in future. I will also be replacing the jrail, which will also need sealant before riveting I'm guessing. Another option is also to run some adhesive sealant tape or liquid waterproofing product over the entire perimeter after attaching the roof and jrail. Thoughts? Thankyou in advance!
|
|
|
|
Post by pisces51 on Aug 22, 2017 21:52:58 GMT 10
G'day m-n-s,
From your first question, I'm somewhat confused about what you are actually going to do on the roof. Are you reinstalling the aluminium cladding, and building a tropical roof over the top of it, or are you leaving the original roof cladding off, and substituting a trimdeck roof in its place? Whichever way you go will have a big bearing on what insulation will work best.
If you ever think you will need to remove a part of a van in future years, any sealant you use "should" be of the type that can be removed easily. That narrows it down to the butyl mastic type of sealants, which remain soft and pliable for many years (the manufacturers will typically give a 10-year promise on these products, but on one van I restored, this type of sealant was still very soft and pliable after 35 years).
cheers,
Al.
|
|
|
|
Post by mynewstudio on Aug 24, 2017 5:59:47 GMT 10
Hi Al, thanks for the reply. I'm removing the old aluminium roofing and entirely replacing with trimdek. Is there a brand that I can look for, for the butyl mastic type sealant? I've noticed not all of them say that.
|
|
|
|
Post by pisces51 on Aug 24, 2017 21:17:55 GMT 10
The insulation is usually placed within the framework of the roof. People who use the cooler box foam type of stuff will cut it up and fit the pieces inside the frame parts. The same applies to the 6.5mm thick insulation sheeting, such as Air-Cell. This means that you would need to have the interior panelling fixed to the roof, and then the insulation pieces are lowered down into the cavity between the roof frame members, and it rests on the top of the panelling. Insulation works best if there is an air gap between the top surface of the insulation sheet and the underside of the roof, although that isn't always possible in every building structure. Another option is the fibreglass insulation blanket that is normally fitted under Colorbond corrugated roofing, but I don't know if that would work with your proposed roof. Butyl mastic is not made by many manufacturers - Selleys is the main supplier. You can buy it at Bunnings (see here ) but it isn't cheap, and you'll need a lot more cartridges for the job than you think. A cheaper alternative is available from Caravans Plus online website at $7.70 (read this article , and partway down the page you'll see them talk about their butyl mastic). From memory, I got about a 3 metre line of sealant out of each cartridge, cutting the nozzle so the sealant came out about 1/4 inch diameter. I used nearly 30 cartridges to do all the windows, door, edge cover moulds, external fixtures,etc, on a 14ft Millard poptop. The 'experts' reckon that if you are not wasting one cartridge in every four, then you are not pumping enough sealant into the job. I certainly ended up with lots of surplus oozing out of the joins when I did mine. Hope this helps, cheers, Al. |
|
|
|
Post by Mustang on Aug 25, 2017 7:47:59 GMT 10
AS other members have responded, there are two groups silicone type products & mastic. Having been the victim of a silicone gun I chose mastic from Caravans Plus (they also have an info page on their site). The windows in our van are sealed with "ribbon mastic" but we also use liquid mastic from the tube. 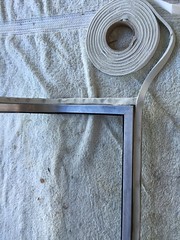 One pledge I made was every process I performed in our restoration could be undone if necessary. Our van has stood in tropical downpours without a leak & is regularly washed after sea side visits. |
|
|
|
Post by mynewstudio on Feb 12, 2018 7:41:22 GMT 10
Well I have been working on bits and pieces around life. The roof is finally finished!!! I have put in one new window so far. Because the studio is permanent it situ, I don't have to worry about dust proof windows etc. I decided to follow my heart and go with the vision of what I wanted, although that is the more difficult path. I rescued some very neglected and poorly maintained french doors from underneath a house. Someone had cut the bottoms off the doors. The putty in the windows is absolutely bloody terrible, there are bodgy bog patches here and there. They have been treated so poorly it almost makes me cry. BUT, with a lot of work and love and attention, they will be my new windows. The existing steel frame had to be cut and welded in order to fit the new, bigger window in. Door was cut down into the window size, new frame and sill, and even though I will have to redo the putty at some point, it has been sealed and painted so at least is not leaking. I absolutely love the look and function of this window, I can't tell you how happy it made me to see this go in I have cleaned up, cut to length, drilled out rivets, cleaned up cladding, in order to reattach the two corner flashings at the front. Two more to do. Many hours work.   window from insideroof flashings finishedWindow from outside (unfinished surfaces) window from insideroof flashings finishedWindow from outside (unfinished surfaces)  |
|
|
|
Post by LGT on Mar 27, 2018 22:22:39 GMT 10
I am not sure if I am way too late but I suggest that the mystery decal on your studio is "Travelite" They built campers and mobile offices and car trailers. My Father had one of the trailers.There is a site on Google which is USA but I think they definitely sold in Australia.One of the ad photos on their web site has a picture very similar to your studio.
Cheers,
LGT.
|
|
|
|
Post by hughdeany on Mar 28, 2018 8:59:44 GMT 10
Hi there,
Just had a look at your mystery sticker and it’s built by Traymark,an Aussie company that builds commercial caravans( among other things)
Cheers
hughdeany
|
|
|
|
Post by mynewstudio on Aug 11, 2018 8:18:15 GMT 10
|
|
|
|
Post by atouchofglass on Aug 14, 2018 21:24:23 GMT 10
Big project.
All the best and hang in there.
Cheers Atog
|
|
|
|
Post by mynewstudio on Mar 1, 2019 19:29:48 GMT 10
|
|
|
|
Post by Mustang on Mar 2, 2019 7:59:47 GMT 10
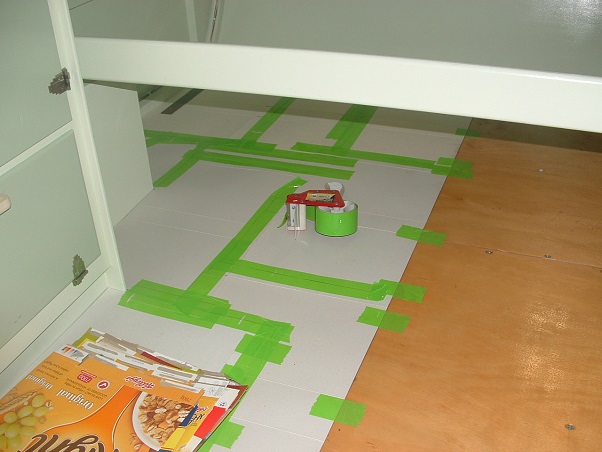
Re your flooring nail image.
I guess it is all done now, but I bought a tool called a renovator from Bunnys & it has been a Godsend for jobs like that.
Keep plugging away & posting.
Cheers
|
|
|
|
Post by mynewstudio on Mar 5, 2019 18:05:00 GMT 10
Re your flooring nail image. I guess it is all done now, but I bought a tool called a renovator from Bunnys & it has been a Godsend for jobs like that. Keep plugging away & posting. Cheers Mustang: That's what I used, absolutely invaluable!
On a different note, I am wanting some input/advice- For those who are starting with a completely gutted van, are the wall sheets done before or after the cupboard fitout? Trying to get my head around it. I realise that by putting in the cupboards first, it would save a hell of a lot of money on sheeting, but that means the cupboards have no back. Does that matter? It also means it would be far more time consuming making templates and cutting sheets to fit. Can someone please give me the pros and cons of doing things a certain way?
Also, how are cupboards attached to the frame? This is an on site van that won't be moving. The other thing I'm trying to get my head around is that if the wall sheets go up first, how do I know where to screw? (please don't throw things at the cabinetry noob ) |
|
|
|
Post by Mustang on Mar 6, 2019 7:37:16 GMT 10
For the small extra cost of interior sheeting I would insulate & sheet the whole interior. This will help keep your cupboards vermin proof.
You can transfer stud/fixing lines out to the floor & ceiling, take photos before with measurements to the centers of your wall fixings.
With paint you can upload measurements over your images.
Cheers
|
|
|
|
Post by mynewstudio on Aug 29, 2019 21:21:06 GMT 10
Hi guys. i would love some tips on how to cut out the holes for the windows when sheeting the van? Also, I will be using a gloss white ply, 4mm. It is fairly expensive in the scheme of things,but will save me a lot of time with not having to paint, and also, will be easy to clean (mould). Is there a jigsaw blade that is better than others to avoid chipping?
|
|
|
|
Post by pisces51 on Aug 29, 2019 21:36:39 GMT 10
G'day mynewstudio,
My advice for cutting wall sheeting is to use a blade designed to cut through metal. The finer the teeth, the smoother the cut edges are. The other advice is to cut from the backside of the sheet, so the blade is cutting the gloss face on the upstroke. This also helps you to end up with a cut that has fairly smooth edges. Try cutting a bit of scrap sheeting from both faces of the sheet, to get a feel for the difference in quality of cut.
Cheers,
Al.
|
|
|
|
Post by mynewstudio on Sept 1, 2019 0:20:20 GMT 10
Thanks Al. I'd love some tips on how to mark out for windows etc? I understand the main concept of it, just can't quite get my head around it.
I'll have to post some pictures up of the new windows. Originally I was going to repair, restore and install old casements, but it just got the better of me. Despite the fact that I LOVED the first one I put in, over time I realised just how long that would take me and I was losing momentum fast. I finally decided to go with aluminium sliders. It was a long and tedious task I tell you, to get them manufactured, but well worth the wait. Seeing the windows in now makes me realise that I might actually be able to finish this thing this year
More photos on camera roll if you follow the flickr link above.
|
|
|
|
Post by pisces51 on Sept 4, 2019 14:11:15 GMT 10
G'day mynewstudio, After trying a number of different ways of determining how to cut sheeting to fit curves and cut-outs, I've become a big fan of the cardboard template method. It's time-consuming to do all the prep work, but I end up with a piece of sheeting that fits "perfectly" into the required space. Here are some examples of what I've achieved using cardboard templates... (a) a splashback behind the sink (laminex): (b) Making a door for the van (plywood):  (c) Cutting a shelf for the cupboard (plywood): (d) Marking out for the vinyl floor sheeting: Every one of those jobs ended up looking like it was done by a 'professional', so it was worth the time and effort to cut up many, many pieces of cardboard and tape them into position until the full template was made. If you've been following 'twocutekelpies' thread on the restoration of her York van, you'll see in this post that she had quite intricate wall panels to cut, including ceiling curves, end curves, window/door/fridge vent openings. Shelley can tell you how she went about marking out the wall panelling to get it to fit neatly, but if I was doing that job I would be using my trusty cardboard template method. Cheers, Al.
|
|
|
|
Post by twocutekelpies on Sept 4, 2019 22:27:33 GMT 10
If you've been following 'twocutekelpies' thread on the restoration of her York van, you'll see in this post that she had quite intricate wall panels to cut, including ceiling curves, end curves, window/door/fridge vent openings. Shelley can tell you how she went about marking out the wall panelling to get it to fit neatly, but if I was doing that job I would be using my trusty cardboard template method.
I clamped a couple of sheets of 2nds 3mm ply to the outside while I had my cladding off and traced the outline of the curves onto them.  I still needed to make a few adjustments afterwards and the cereal boxes definitely came in handy for that. If replacing lining, keeping the old wall panels as templates is also extremely helpful.
When doing windows, I got as close as possible with my mini circular saw and jigsaw then used a trim router after fitting to get a flush cut with the window frame before putting the trim on.
Cheers
Shelley |
|


 I'm pretty used to mould but far out, this crop even impressed me! I couldn't quite believe the thickness of some of the growths. Looks like the roof hadn't been touched in many many years.
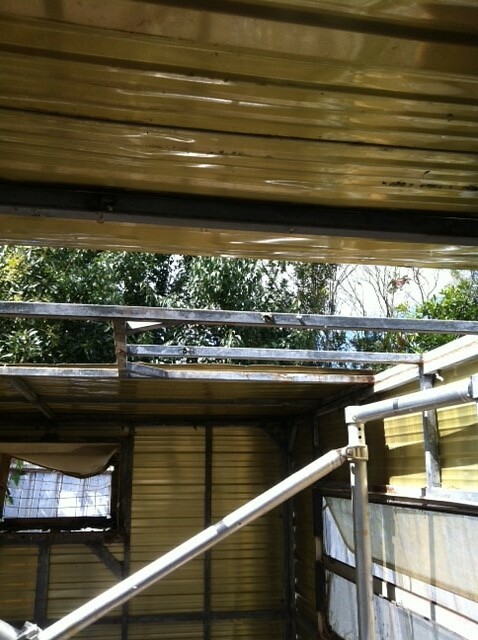


 I still needed to make a few adjustments afterwards and the cereal boxes definitely came in handy for that. If replacing lining, keeping the old wall panels as templates is also extremely helpful.