Carl
In Training
 
Posts: 44 
|
Post by Carl on Dec 2, 2014 20:46:57 GMT 10
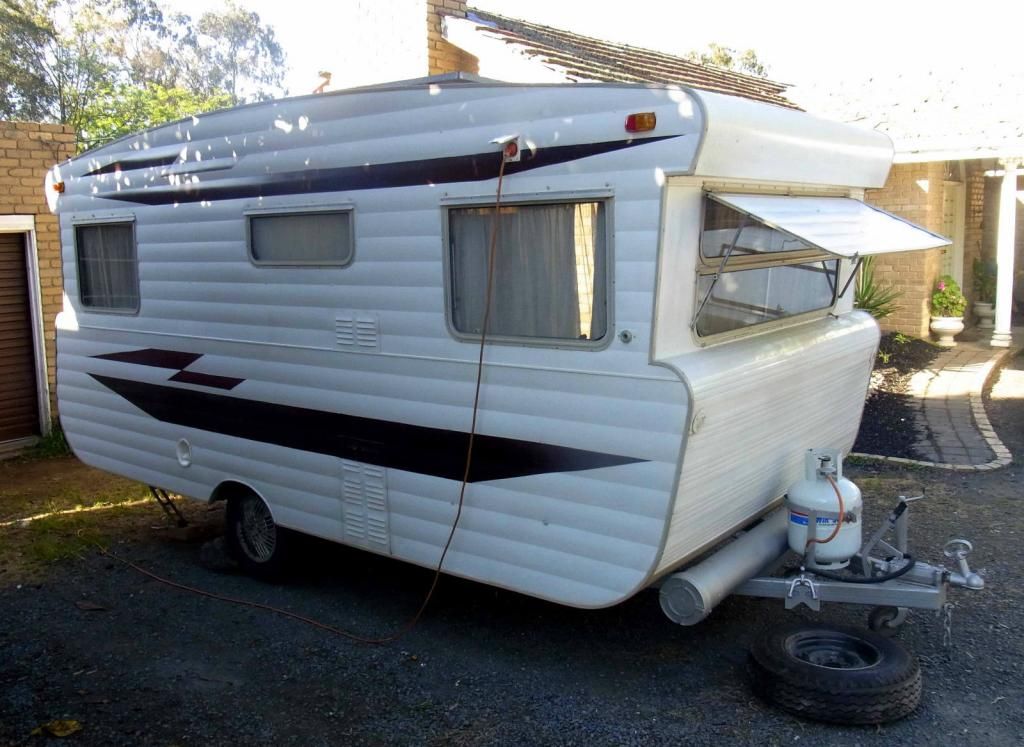
Hi guys, I posted in the general section that I had just bought an old Viscount Ambassador, see attached photos from the Ebay add - some of you might have seen it. Anyhoo, now I'm trying to figure out what sort of decal it should have on the front and rear of it. From reading a lot of posts in the Hall of Fame, I'm pretty sure it should be the older style decal (see below), but my van's chassis number is pretty high for an 'E' series Ambassador, so it's possble that it might have had the later series Ambassador decal from later in 1970. Does anyone know for sure? These decals are reproduced and sold on Ebay for $60 or $70. Pretty exxy for decals, but would really finish off the look of the old girl. I have not found any dates written anywhere, but under one shelf in the kitchen cupboard is written 4571 VAL in pencil or crayon. Does this provide any clues? The original side flash was blue and the interior matches, so one day I'll paint the side flashes blue again. In the mean time I've pulled the original fridge and 'burped' it so it now works great, I've replaced the water tank which leaked, I've stripped back the surface rust off the chassis rails and painted them with silver POR15 and they look brand new. I've also replaced the bent rear jack legs and also replaced the jockey wheel as the knob was missing and it hurt to wind it so I ditched it. I tried to remove the wheels and brake drums to check the brakes, but there was a 'Bearing Buddy' fitted with a grease nipple and I don't know how to remove it to get to the stub axel. Anyone know? I had to 'chisel' off all the dried grease and dirt from the spring shackles and they looked great and only need a squirt of grease to make sure they are good to go. I also noticed that the back of the brake hubs each had two wires coming out that looked like they had been cut off. Are they electric brake wires or something else? The Tare on the last 2011 rego label says 810kg is this heavy enough to need electric brakes? I'm going to tow it with my 1962 Chevy Impala, so I don't really want to fit electric brakes if possible.
|
|
Carl
In Training
 
Posts: 44 
|
Post by Carl on Dec 2, 2014 20:49:10 GMT 10
From reading a lot of posts in the Hall of Fame, I'm pretty sure it should be the older style decal (see below), but my van's chassis number is pretty high for an 'E' series Ambassador, so it's possble that it might have had the later series Ambassador decal from later in 1970. Does anyone know for sure? These decals are reproduced and sold on Ebay for $60 or $70. Pretty exxy for decals, but would really finish off the look of the old girl.
Here is the decal for mid '70 onwards.
|
|
Carl
In Training
 
Posts: 44 
|
Post by Carl on Dec 2, 2014 20:53:27 GMT 10
|
|
Deleted
Deleted Member
Posts: 0
|
Post by Deleted on Dec 3, 2014 9:13:17 GMT 10
Hi Carl,
Nice looking Viscount you have there.
The bottom stickers came out about May or June 1970.
As to the bearing buddies,lose them!
Totally inappropriate for a van,give you a false sense of security due to grease getting past seals and settling on the inside and going hard,any mechanic worth his salt will tell you.
The wire from your hubs sound like electric brakes to me,a van that age would only have the metal cable leading to the handbrake to operate,so I would be re-connecting the electrics,much safer!
The numbers you found under the drawer sound like a manufacture date to me,so going by that you could purchase the bottom stickers.
Btw,I bought 2 of those stickers for my 1973 Viscount and they are well worth it,improve the look of the van no end.
Hope this has been some help to you,
Cheers
hughdeani
|
|
Carl
In Training
 
Posts: 44 
|
Post by Carl on Dec 3, 2014 16:05:01 GMT 10
Hi Hughdeani, do you know how to remove the bearing buddies, I'd rather do it myself if possible. The brakes are cable operated drums and the hand brake works so the brakes are functional and look to be original, I'm just not sure why such a small van (T 810kg) would need electric brakes, and now I'm a bit worried that I'll have to have them connected for rego and my old Chevy is not set up for electric brakes that's for sure. Does anyone know the NSW rego requirements for vans regarding electric brakes?
As far as the decals are concerned, I like the look of the later decal, but the early version looks more retro and dates the van as earlier and is not as common as the newer version. I'll see what others think before I make a decision and go with the consensus.
Cheers, Carl
|
|
|
|
Post by youngdazza on Dec 3, 2014 17:28:03 GMT 10
When electric brakes are installed usually they replace the overrider hitch with a regular hitch so this means you would need electric brakes installed in your car to legally tow it to the garage for rego... If that's the case I personally wouldn't risk the fine and hassles with insurance if you have an accident.
|
|
Deleted
Deleted Member
Posts: 0
|
Post by Deleted on Dec 3, 2014 18:14:04 GMT 10
Hi Carl,
sorry,dont know how to remove bearing buddies,maybe you could ask a boat trailer mechanic as that is what they are made for.
Your cable operated drums with hand brake will work as they are as mechanical overide brakes.
Only you can decide when you tow and stop if that is good enough!I have never known a rego office to check,as long as they look ok they will pass you.
Dont forget you can load 300 kg into your van with water,gas,food etc,so your 810kg van becomes much heavier.I always think that your van only weighs its tare weight (810kg)once,and thats on its first trip home with its new owner,until you start adding stuff!
Cheers
hughdeani
|
|
Carl
In Training
 
Posts: 44 
|
Post by Carl on Dec 3, 2014 19:48:14 GMT 10
Hi Carl, sorry,dont know how to remove bearing buddies,maybe you could ask a boat trailer mechanic as that is what they are made for. Your cable operated drums with hand brake will work as they are as mechanical overide brakes. Only you can decide when you tow and stop if that is good enough!I have never known a rego office to check,as long as they look ok they will pass you. Dont forget you can load 300 kg into your van with water,gas,food etc,so your 810kg van becomes much heavier.I always think that your van only weighs its tare weight (810kg)once,and thats on its first trip home with its new owner,until you start adding stuff! Cheers hughdeani Thanks guys, here's a photo of my drawbar and hitch, is this the over-ride system you talk about? I'm a bit confused as to why someone would have electric brakes that are not connected. Maybe a previous owner swapped the brakes over but kept the original over-ride system. 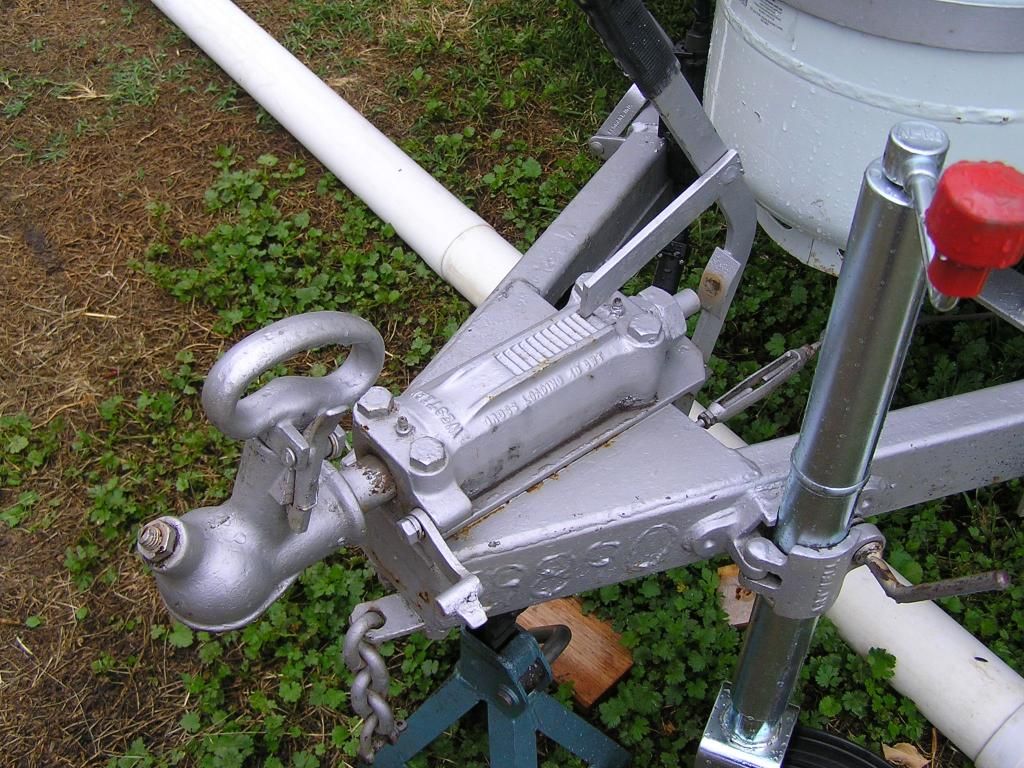
I also Googled bearing buddies and apparently they just tap in and are easily removed by tapping the sides and working them outwards.
Cheers, Carl
|
|
|
|
Post by youngdazza on Dec 3, 2014 22:35:39 GMT 10
It looks like youve got mechanical override brakes, so provided they work I believe that you dont need an electrical brake controller on your vehicle.
Cheers
|
|
|
|
Post by tim on Dec 4, 2014 8:04:38 GMT 10
|
|
Deleted
Deleted Member
Posts: 0
|
Post by Deleted on Dec 4, 2014 8:23:23 GMT 10
Hi guys, I also noticed that the back of the brake hubs each had two wires coming out that looked like they had been cut off. Are they electric brake wires or something else? The Tare on the last 2011 rego label says 810kg is this heavy enough to need electric brakes? I'm going to tow it with my 1962 Chevy Impala, so I don't really want to fit electric brakes if possible.
Hi Carl a photo of those 2 wires coming from the rear of your brakes will take the guess work out of what they are or not. Not sure where you are located but here in QLD the rego office has produced pamphlet on trailer requirements.
Braking systems
Trailers that do not exceed 750 kg GTM with a single axle
No brakes are required.
Note: Where a trailer has two axles where the centres are less than 1 metre apart are regarded as a single
axle. All other trailers that do not exceed 4500 kg ATM
These trailers must be fitted with an efficient brake system that complies with ADR 38/-. Except for over-run
brakes, all brakes must be operable from the driver's seat of the towing vehicle.
For trailers up to 2000 kg GTM, an efficient braking system is considered to have brakes operating on the
wheels of at least one axle. Over-run brakes may only be used on trailers that do not exceed 2 tonnes
GTM.
Every trailer over 2000 kg GTM must have brakes operating on all wheels. The brake system must cause
immediate application of the trailer brakes in the event of the trailer becoming detached from the towing
vehicle. Under these circumstances, the brakes must remain applied for at least 15 minutes.
All flexible hydraulic brake hoses, air or vacuum brake tubing and air and vacuum flexible hoses must
conform to SAA, SAE, BS, JIS, DIN, ISO or ECE Standards and be fitted to the vehicle in a way that will
prevent chafing, kinking or other mechanical damage under normal motion of the parts to which they are
attached.
What they call over-run brakes is what we call over-ride brakes, if your not a 100% sure what sort of brakes you have or what you need then I would recommend you take it to a caravan/trailer repairer and ask them "what,where,when and how?"
Cheers
|
|
Carl
In Training
 
Posts: 44 
|
Post by Carl on Dec 7, 2014 11:43:48 GMT 10
Thanks Lockyer, I'll check the condition of the brakes and see if they are up to the task, then I think I'll just want to stick with the original over-ride system. On the issue of the decals, there's an Ambassador on Ebay similar to mine right now with the later style decal, but it's chassis number is the later series and ends with an 'E' whereas mine is late (E9890) in the early series and starts with the 'E'. Maybe they changed to the later decal when they ran out of numbers in the early series and changed the numbering system? www.ebay.com.au/itm/Caravan-Viscount-Ambassador-/201232479966?pt=AU_Caravans_RVs&hash=item2eda63f6de The chassis number on this one is 1136E. |
|
Carl
In Training
 
Posts: 44 
|
Post by Carl on Dec 13, 2014 12:51:24 GMT 10
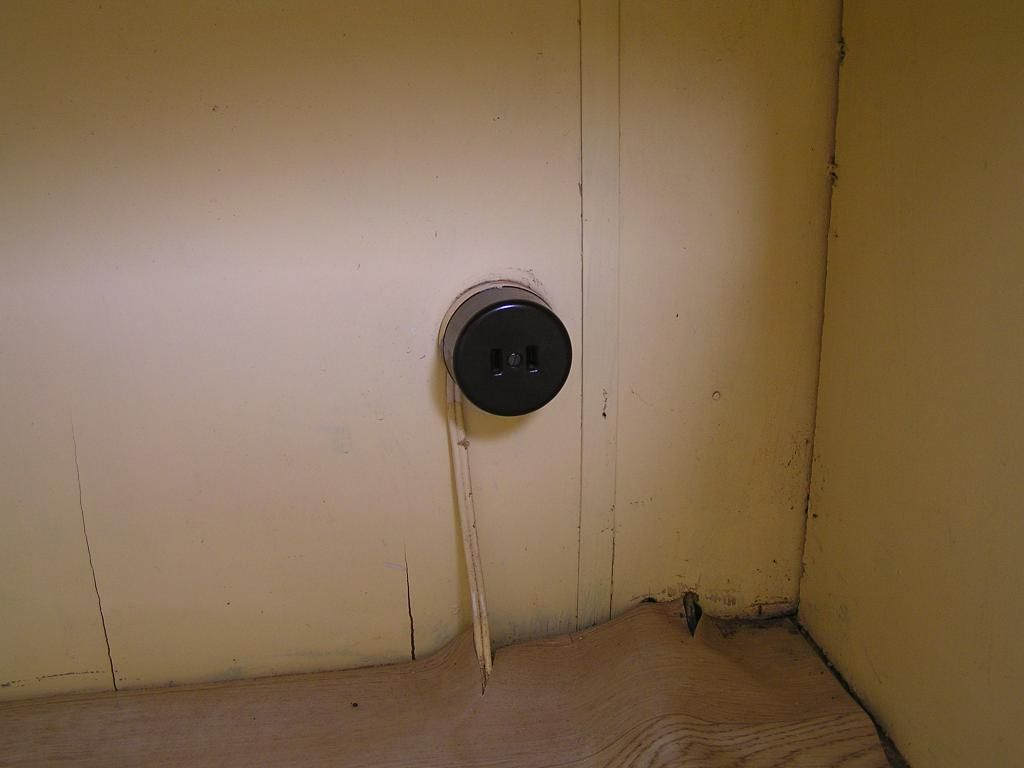
The next thing I need to know is what does this plug do? It's under the right hand side front seat and the wire is the same as the tail lights wiring - two core. The wire goes through the floor, and one wire is earthed to the chassis and the other one is just cut off. I assume it is a 12v outlet, but what is it supposed to be connected to? And how do the 12v lights work in these old vans? Each light has two switches and each light has a 240v and a 12v light bulb, but how does the 12v system get its power? I have the standard large 7 pin plug, is car 12v supposed to be connected to one pin for van lights?
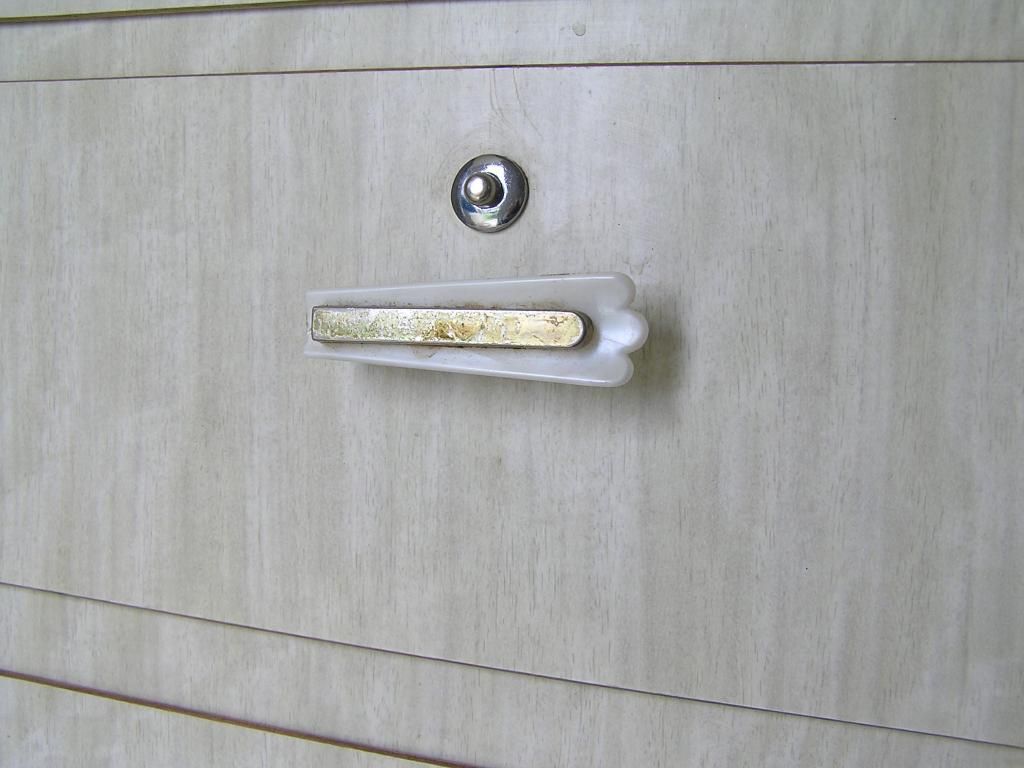
While I'm here, I need 5 viscount cupboard handles like the below if anyone has done a reno and no longer needs them. Most of mine are broken, but this one is still ok.
And finally, does anyone know where I can get some interior wall cladding, new or second hand, because I'd like to replace a section of wall that is water damaged. I think I've stopped the leak, so I'd like to repair the wall. A previous owner obviously painted over it, but it's a bit dodgy.
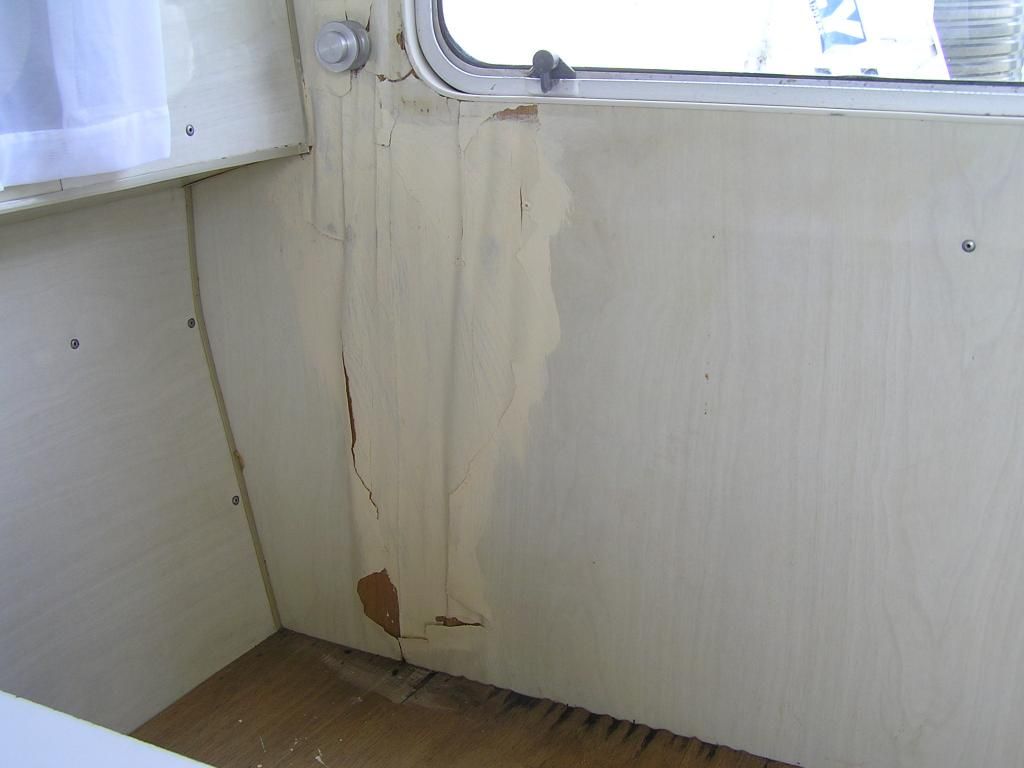
Thanks for helping me, Cheers, Carl - p.s. I live near Canberra
|
|
|
|
Post by Rattles on Dec 13, 2014 13:53:59 GMT 10
The Socket is a 12v outlet and is usually wired to the tugs Battery the same wire as the 12v lights, via Pin 2 on a 7 pin plug or Pin 5 on a 6 pin plug with a Van with over-ride brakes, My old 1965 Ambassador had the same plug and I never used it, they are used on some later caravans to connect the 12v part of a 3 way fridge.
Rattles
|
|
Deleted
Deleted Member
Posts: 0
|
Post by Deleted on Dec 13, 2014 16:46:12 GMT 10
Hi Carl - Rattles beat me to it ! they 12v sockets. I have/had them in my van but they had been re wired to a battery that was on the A frame, I have removed the plugs all together and will look at something a little more modern. Have no idea where to get handles but try ebay/gumtree. The ply wall panels may not be available in that colour or style but you can get them from Gunnersen. www.gunnersens.com.au/caravan-8.htmlYou can find who sell it in your state by going to the "contact us" page Cheers |
|
Carl
In Training
 
Posts: 44 
|
Post by Carl on Dec 13, 2014 18:01:57 GMT 10
Thanks guys, I'm used to restoring old cars, not vans, so parts are not as widely available as they are for old cars, especially American cars like my old Chevy. I don't think I'll ever really need the 12v lighting but I can't stand it if something doesn't work and I know I could fix it if I knew how it was supposed to work. I'll do a continuity check between pin 2 on my 7 pin plug and my 12v lights. If that checks ok, I'll reconnect the 12v outlet under the seat and in the future, I'll probably install a battery system under the seat, maybe with solar charging. I'd like to learn more about solar, and this will give me a chance. Cheers, Carl
ps, I noticed that I have 6 leaf springs in my suspension on one side and 5 leafs on the other. The 6 leafs were under the fridge and kitchen side so I presume this is normal, is this right?
|
|
|
|
Post by peter92 on Dec 14, 2014 9:58:24 GMT 10
Hi Carl, and welcome, its a great little van and will be interested to see what you do to it, so take plenty of pics of what you do as , some times telling people is not enough, pics say a 1,000 words
Regards Peter
|
|
Carl
In Training
 
Posts: 44 
|
Post by Carl on Dec 26, 2014 8:26:17 GMT 10
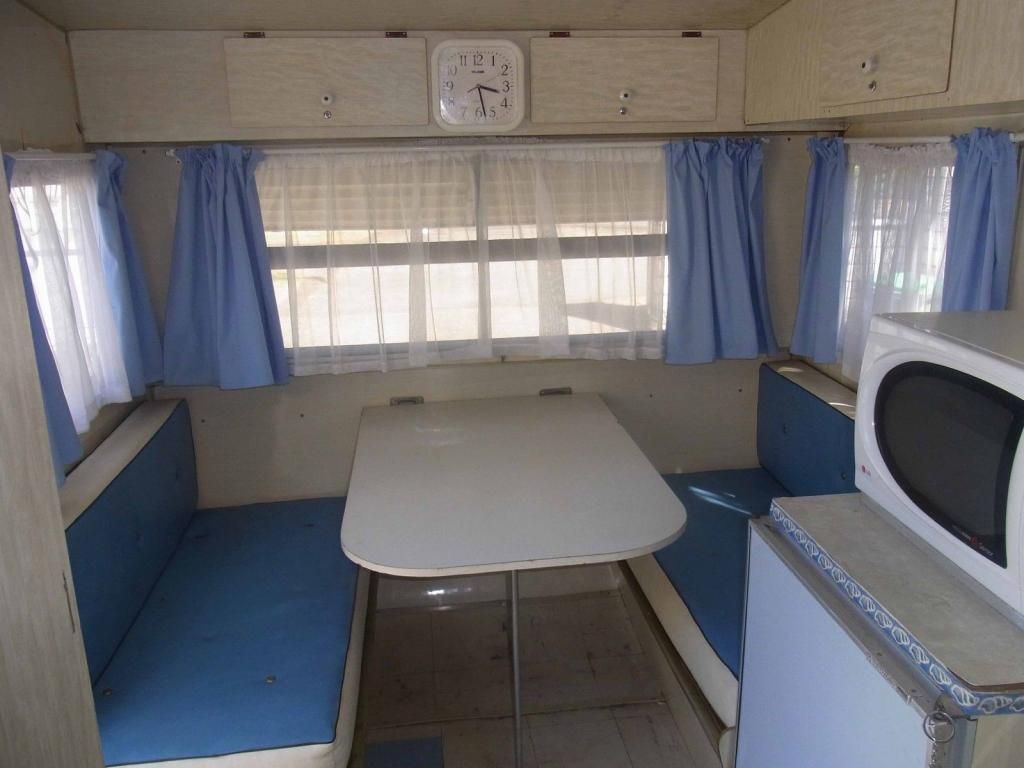
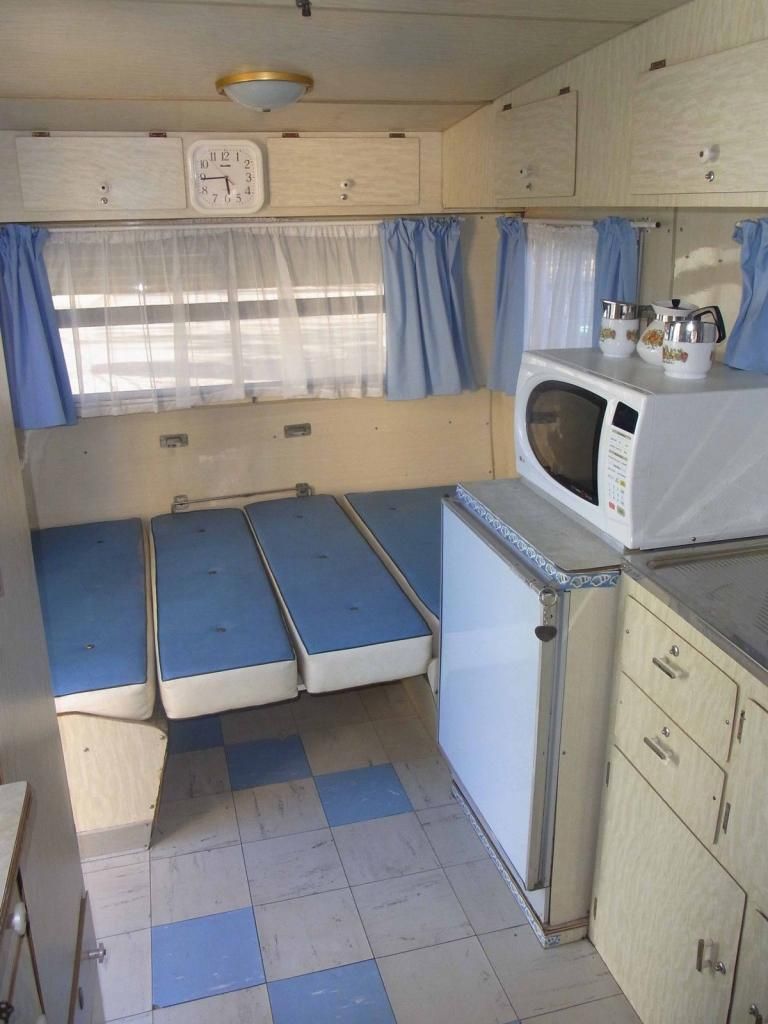
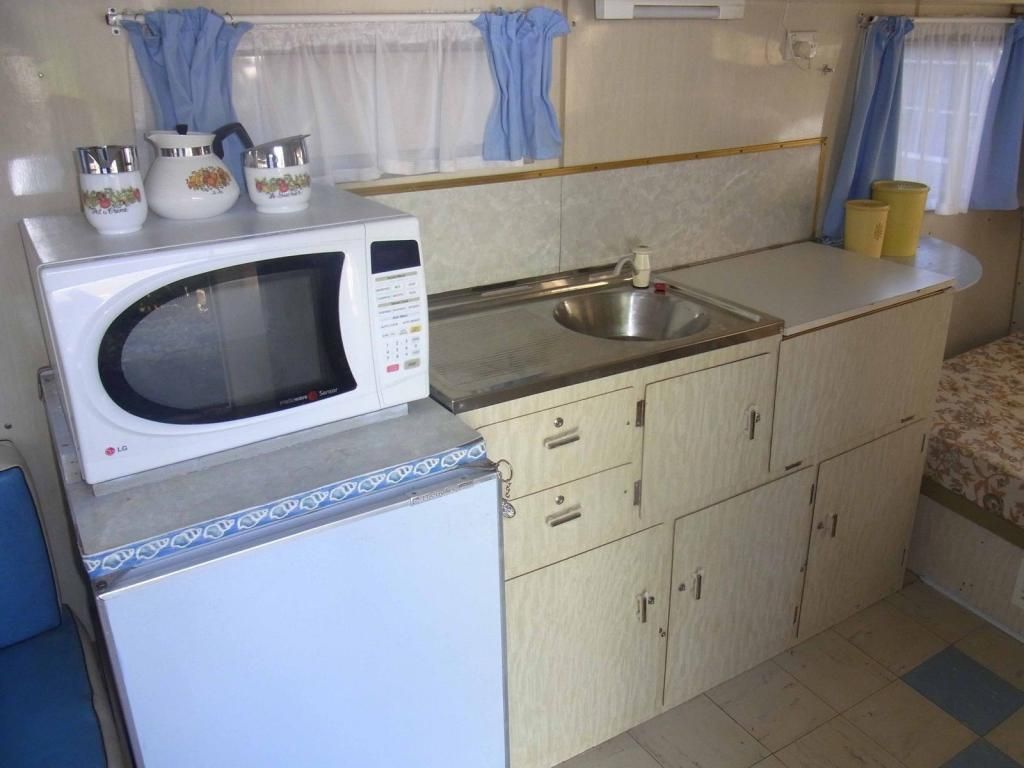
Hi Carl, and welcome, its a great little van and will be interested to see what you do to it, so take plenty of pics of what you do as , some times telling people is not enough, pics say a 1,000 words Regards Peter Hi Peter, I'm going to do it up but leave it as period original as possible. A previous owner changed the sliding stove top to a hinged lift up top and cut the aluminium slider channel off the back wall so they could put a permanent shelf at the end of the bench top. It was plywood painted blue - yuk - but it was quite functional and I decided to put a steel top on it with mini pillars around the edge to keep stuff from falling off. I also put a proper edge around it to hide the underneath framework a bit better. Makes a nice place to put my old Sanyo clock radio.
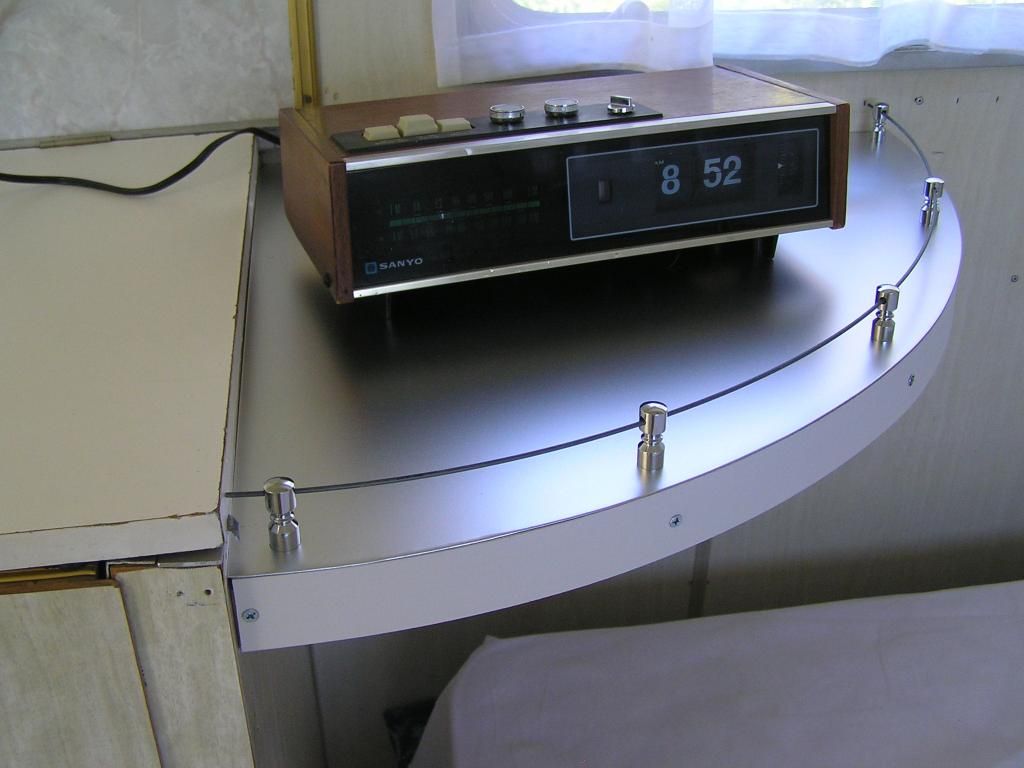
Over on the Vintage Vans site, Al (Franklin1) and I have arrived at the conclusion that this decal is most probably the correct one for my van based on the fact that at least one later chassis numbered Ambassador has it, so I'll order a couple (front and rear) and stick 'em on soon. Cheers, Carl

|
|
|
|
Post by peter92 on Dec 26, 2014 21:43:53 GMT 10
cant wait to see in side shots, will be nice, i bet
Regards Peter
|
|
|
|
Post by camper2van on Dec 26, 2014 23:41:15 GMT 10
Hi Carl Good looking van you have there . Love what you've done to the table extension . With the rear bed , is that a single bed ? Cheers |
|
Carl
In Training
 
Posts: 44 
|
Post by Carl on Dec 27, 2014 20:07:23 GMT 10
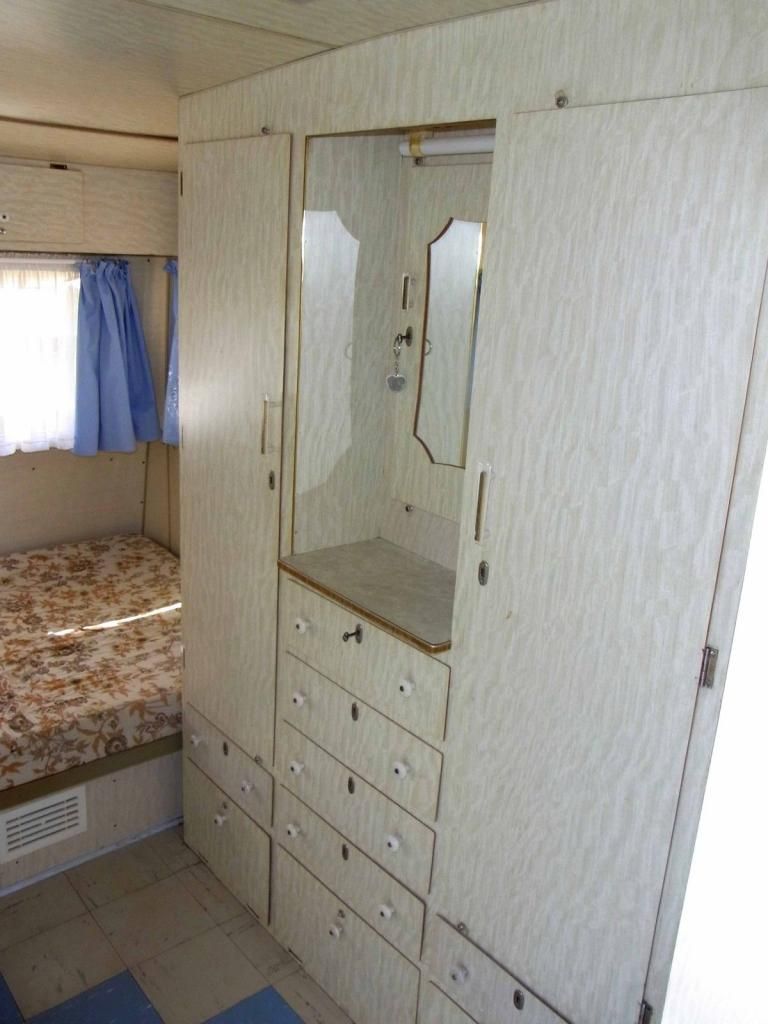
Hi Carl Good looking van you have there . Love what you've done to the table extension . With the rear bed , is that a single bed ? Cheers The rear bed is a double. It's the east-west caravan-sized double which is slightly smaller (1880mm x 1220mm x 190mm) than a regular double bed. I replaced the old foam mattress with a nice new inner spring. Looking at how the base was made, I'm pretty sure it's the original plywood base with one lift-up opening.
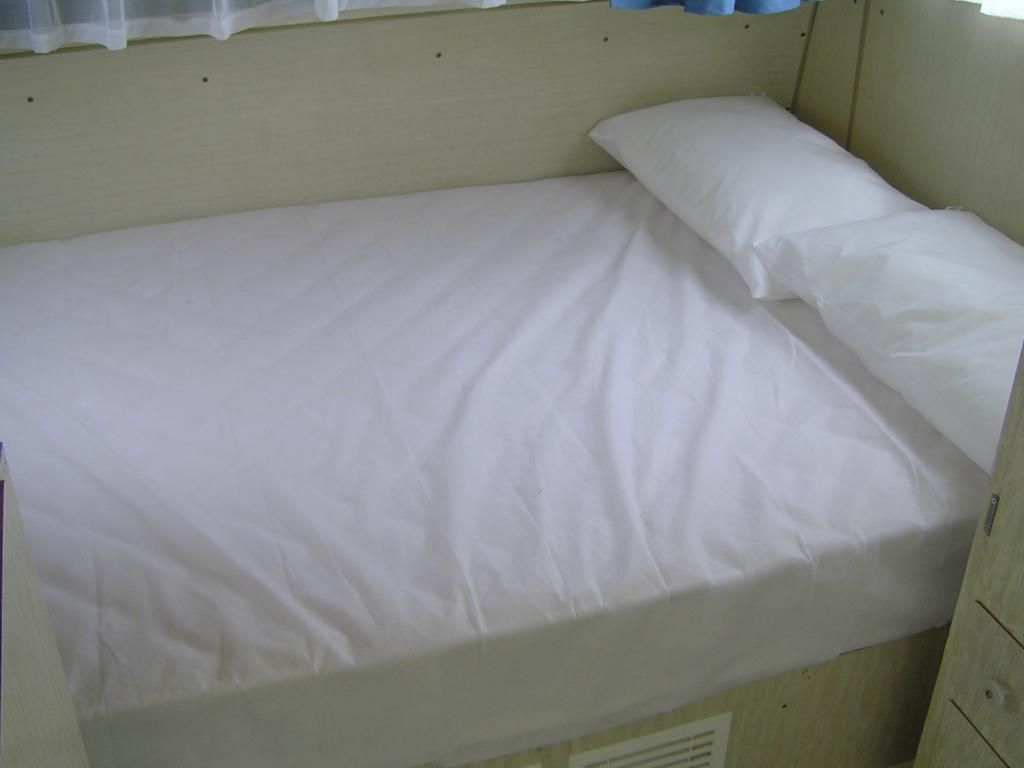
Here's the bed base.
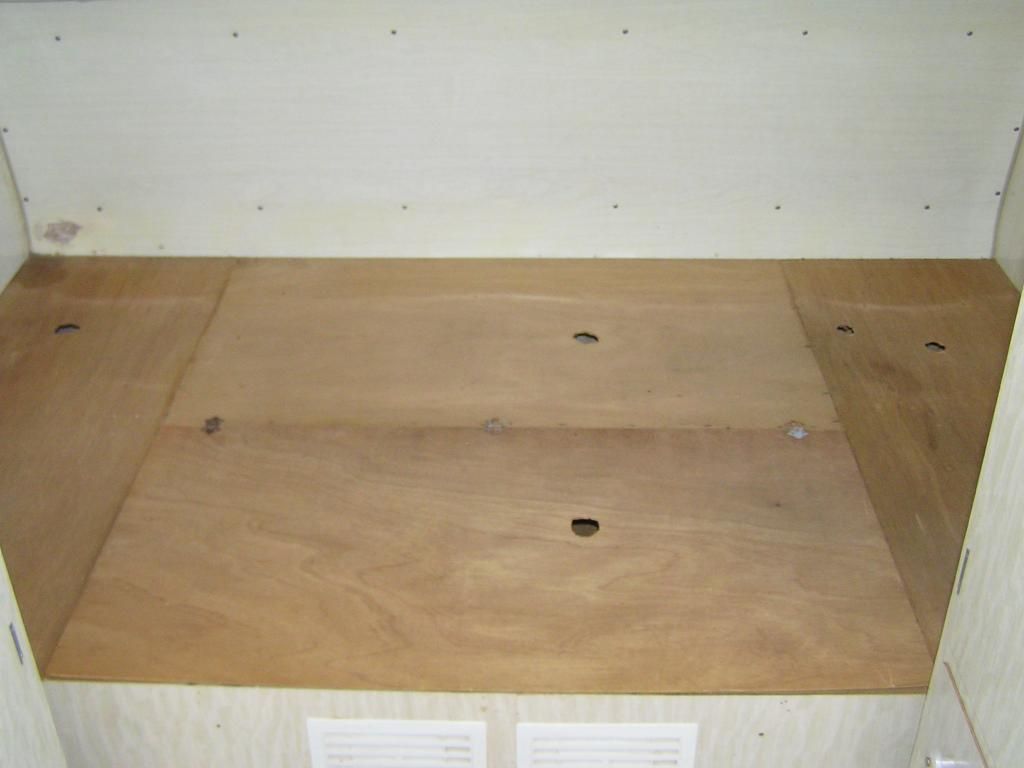
|
|
Carl
In Training
 
Posts: 44 
|
Post by Carl on Dec 28, 2014 19:20:44 GMT 10
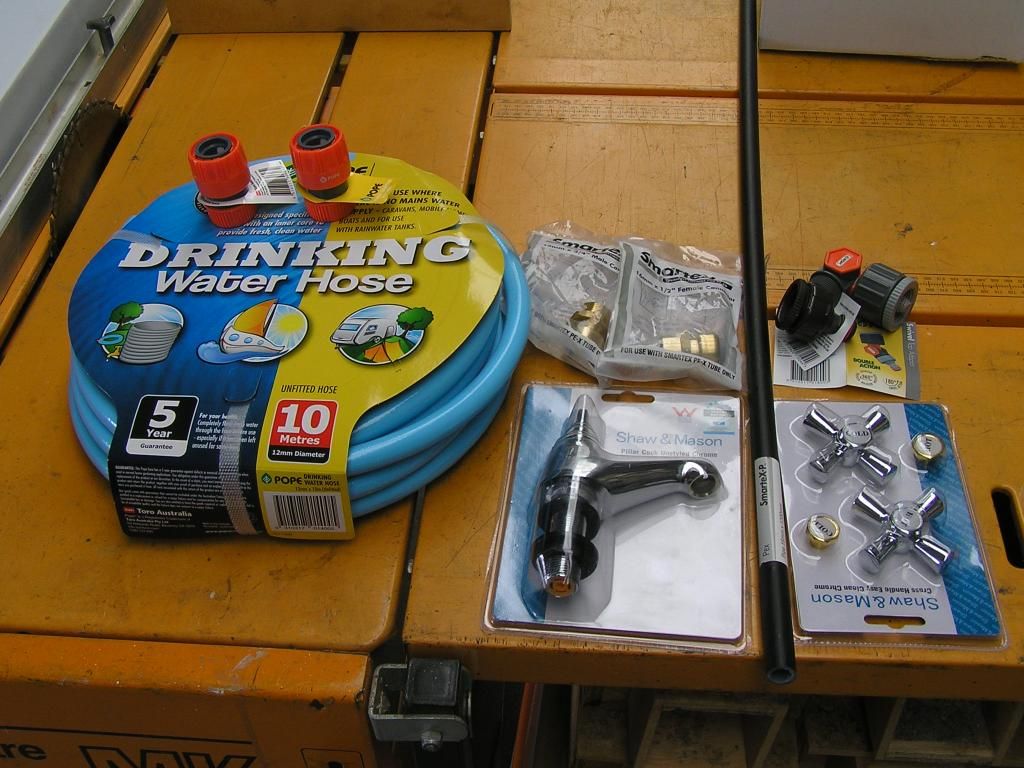
cant wait to see in side shots, will be nice, i bet Regards Peter Hi Peter, I take pictures of most of the things I do on the van. Here's some more work I did because I didn't want to have to pump the on-board water when we expect to only stay at caravan parks. I decided to rig up a town water system and I'm no plumber, but it was really easy and I got all the bits from Bunnings. It works great.
Here's all the bits.
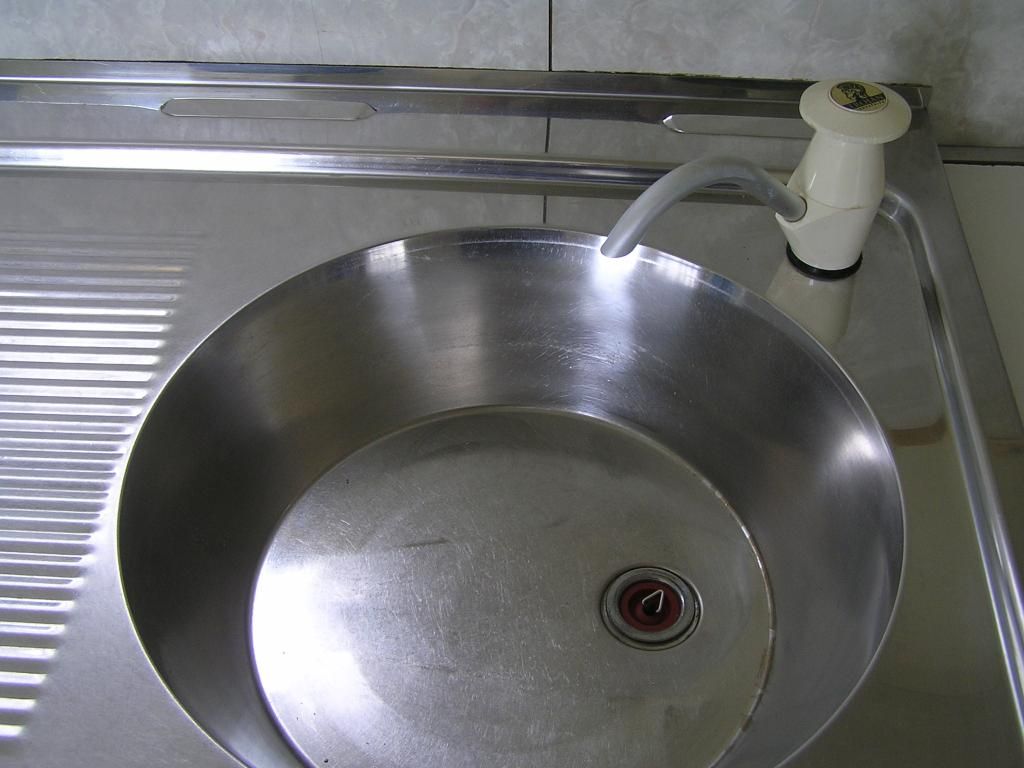
Here's the sink before I took to it with a step drill to cut a 31mm hole. Stainless steel is not easy to drill and you have to use a slow drill speed or it work hardens. The step drill went through it pretty easy.
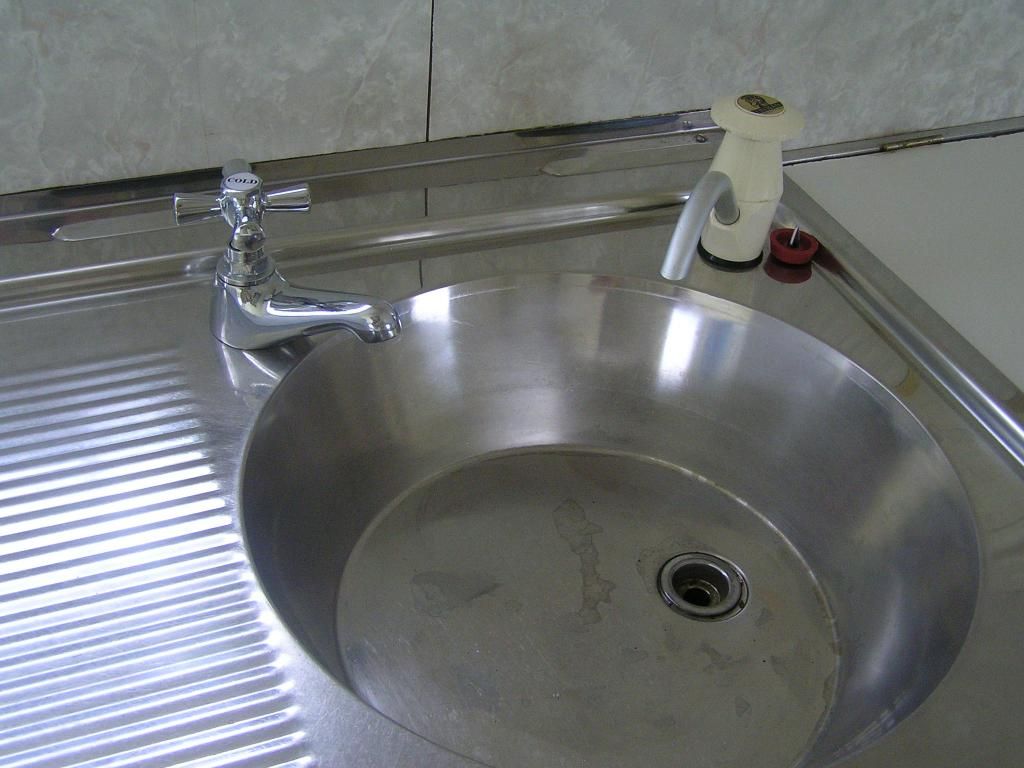
Here it is with the new tap installed. I thought about getting a taller chrome tap, but our kettle fits under it perfect.
Underneath the sink, I used two small blocks of wood to hold the tap in place against the lock nut. The 16mm poly water pipe just pushes into the brass connector, which is done up tight on the tap thread.
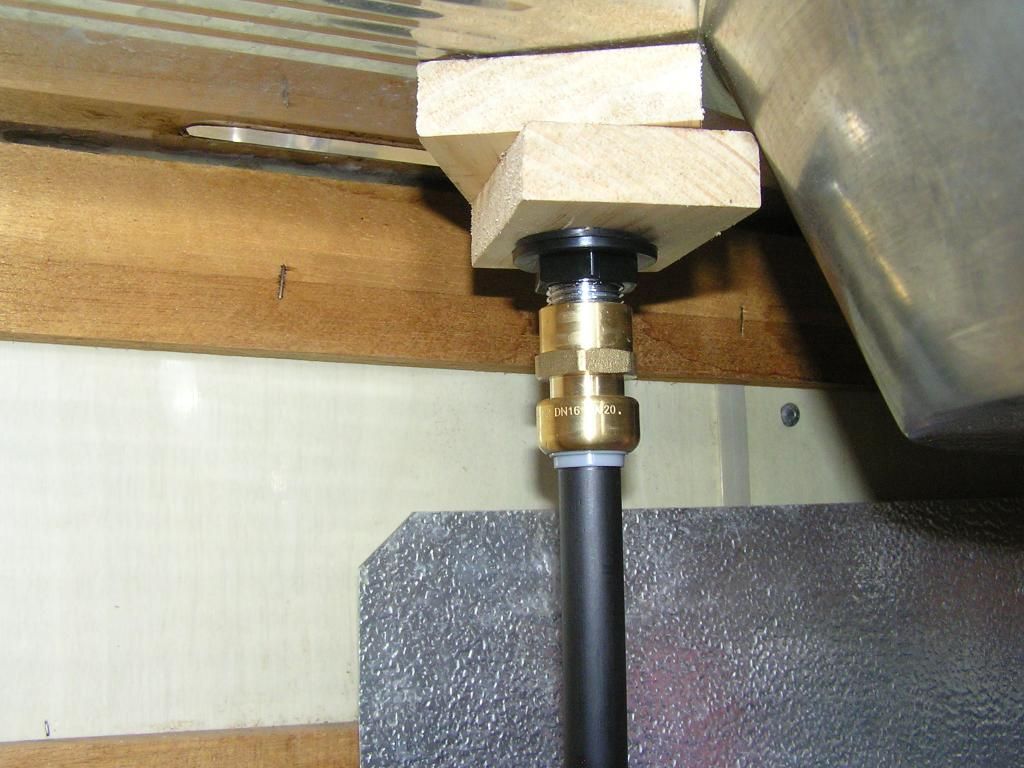
The poly pipe goes down and to the left about 25cm, through two shelves and through a hole in the floor just in front of the wheel, to another push in brass connector with a 3/4 inch thread, which I connected to a 90 degree garden fitting that is mounted into a bracket I made.
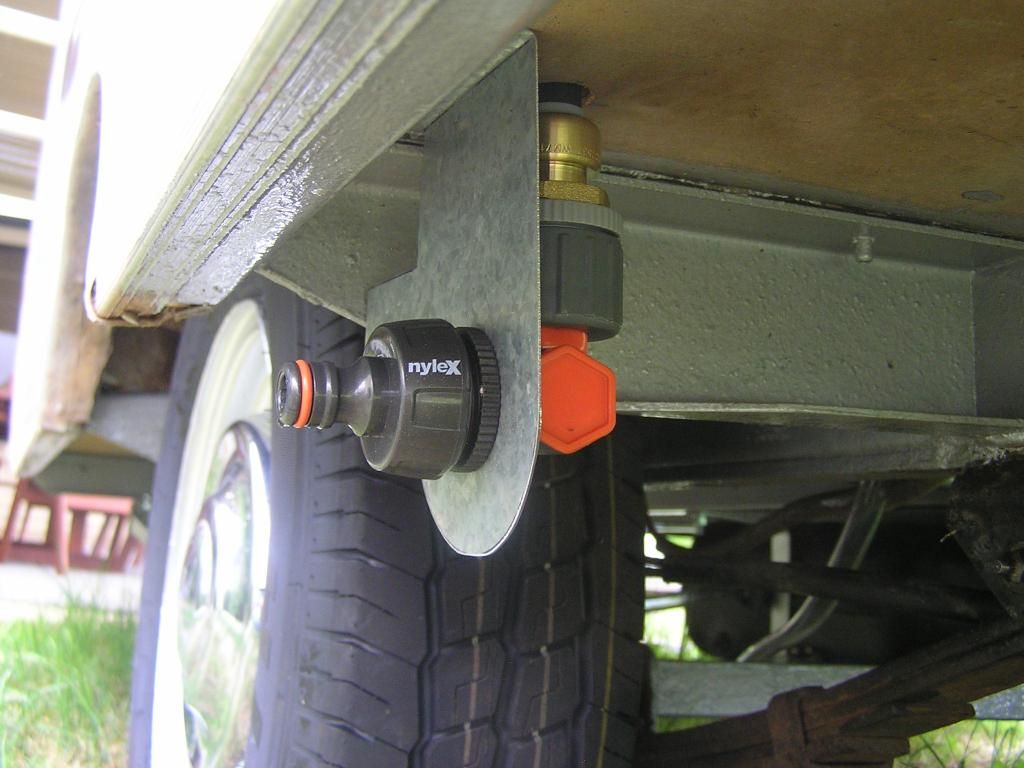
The drinking water hose connects with normal garden hose fittings.
Cheers, Carl
|
|
Deleted
Deleted Member
Posts: 0
|
Post by Deleted on Dec 29, 2014 5:52:01 GMT 10
Very neat work here Carl, looking better all the time.
Cheers
|
|
|
|
Post by peter92 on Dec 29, 2014 14:35:39 GMT 10
coming together quite nicely Carl, like the idea with the tap, keep the pics coming as they might help or give ideas to others
Regards Peter
|
|
Carl
In Training
 
Posts: 44 
|
Post by Carl on Jan 7, 2015 7:46:18 GMT 10
Hi guys, I finally got the old girl registered yesterday and encountered a small problem with the weight rating of the hitch. It still reads in CWT instead of Kg and because it had been painted a few times the rego guy thought it read 10 CWT. When he scratched his head and dived into his books to find out what that meant, he came up with a figure of 500Kg. 'This is not good' he said, 'it should be about 2000kg for a caravan that will weigh about 1200kg when fully loaded' (760kg Tare). He told me I'd need a new 2000kg rated hitch before he would pass it for a Blue Slip (NSW rego). I was all ready to go to a trailer place a couple of suburbs over when I noticed what looked like 40 CWT, not 10 CWT cast into the hitch. I called the guy over and he rubbed the number a bit and conceded that it was indeed 40 CWT, which means it's about 2000Kg and did not need replacing after all. Phew....
Anyway, all the lights worked great, the override brakes worked perfectly, the axel measured in at 1.5 inches which he said, with a wink, is about 40mm, so that'll do. Now I have rego and will hit the road for our first trip in Feb some time. Can't wait !!! |
|


