|
|
Post by awbeattie381 on Mar 12, 2015 12:46:06 GMT 10
Interesting looking combo...looks like it will take all of about 5 mins from 0-100km/h. Seriously though love the army rig. Gotta love that feeling of being packed and ready to head off!! Jealous!
|
|
|
|
Post by snoops on Mar 12, 2015 18:39:04 GMT 10
Arrived at Corowa safe and sound. Uneventful trip sitting on 90 on the freeway. Van was very well behaved and the 101 hardly noticed it was there - apart from the fact the suspension was actually doing something and the ride was very smooth.  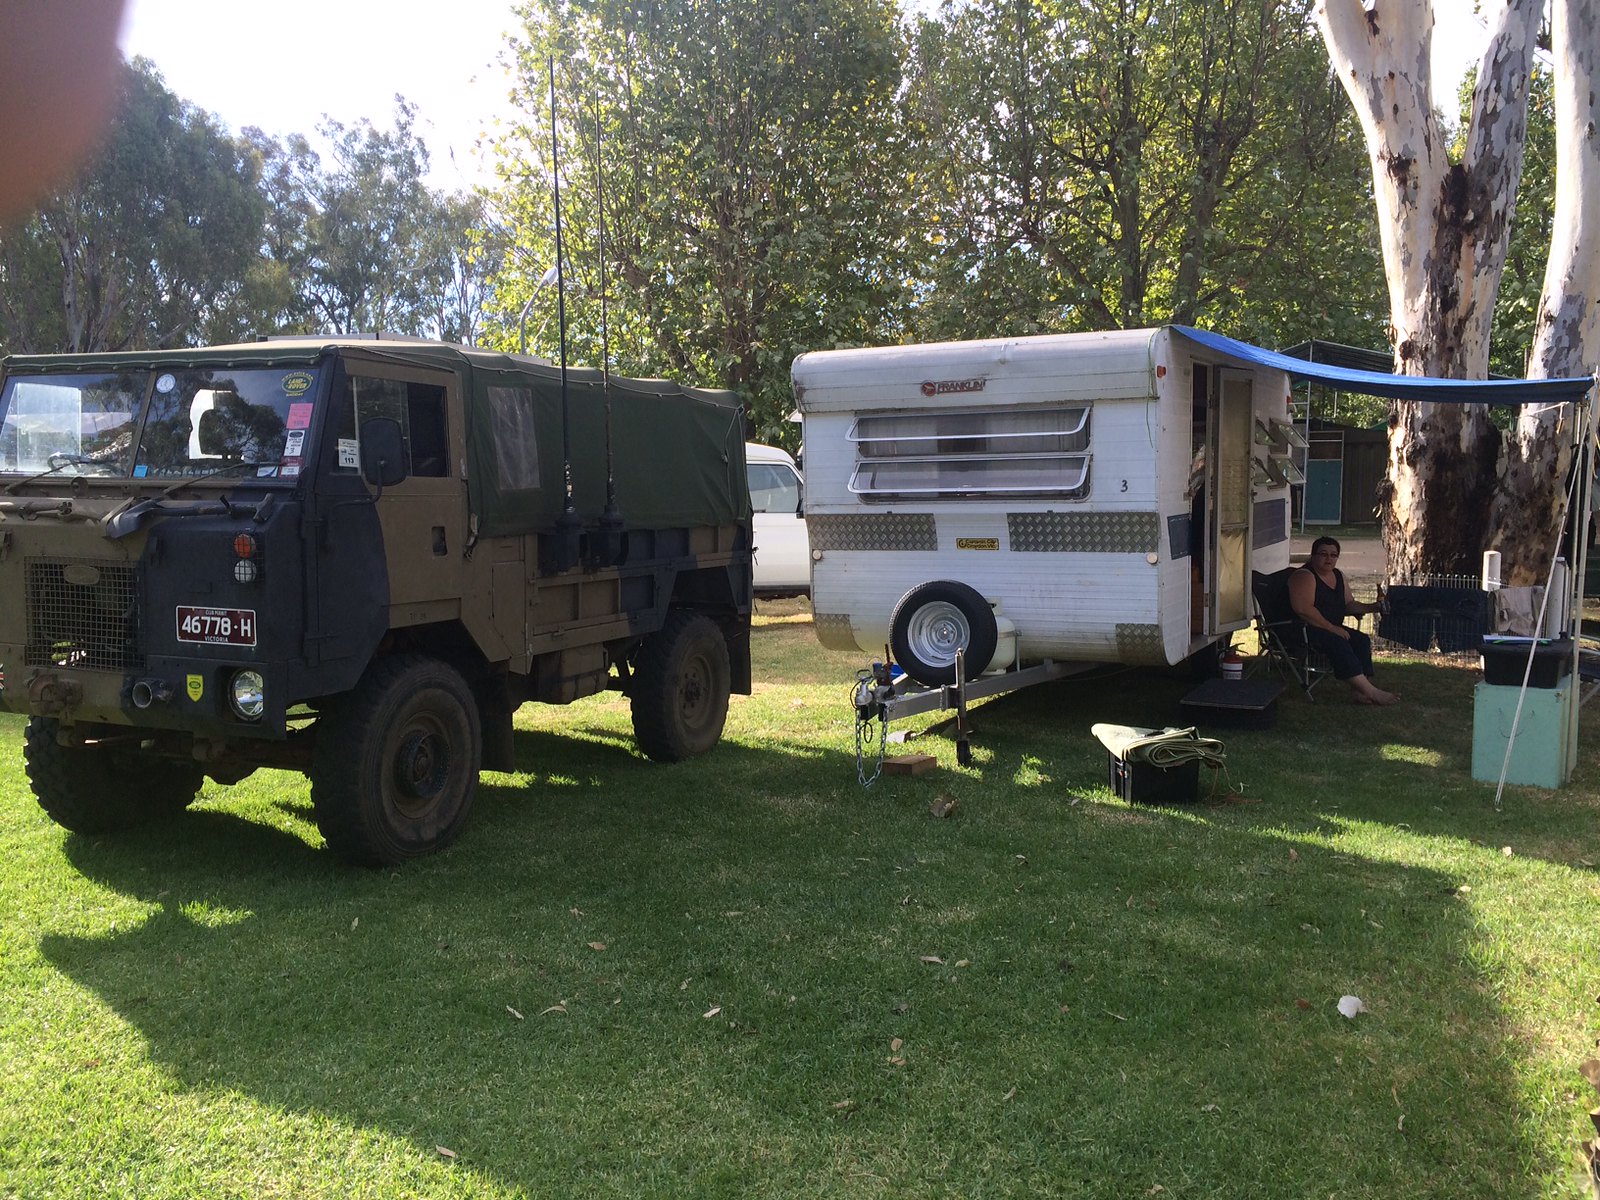 image image by Gavin Gregory, on Flickr 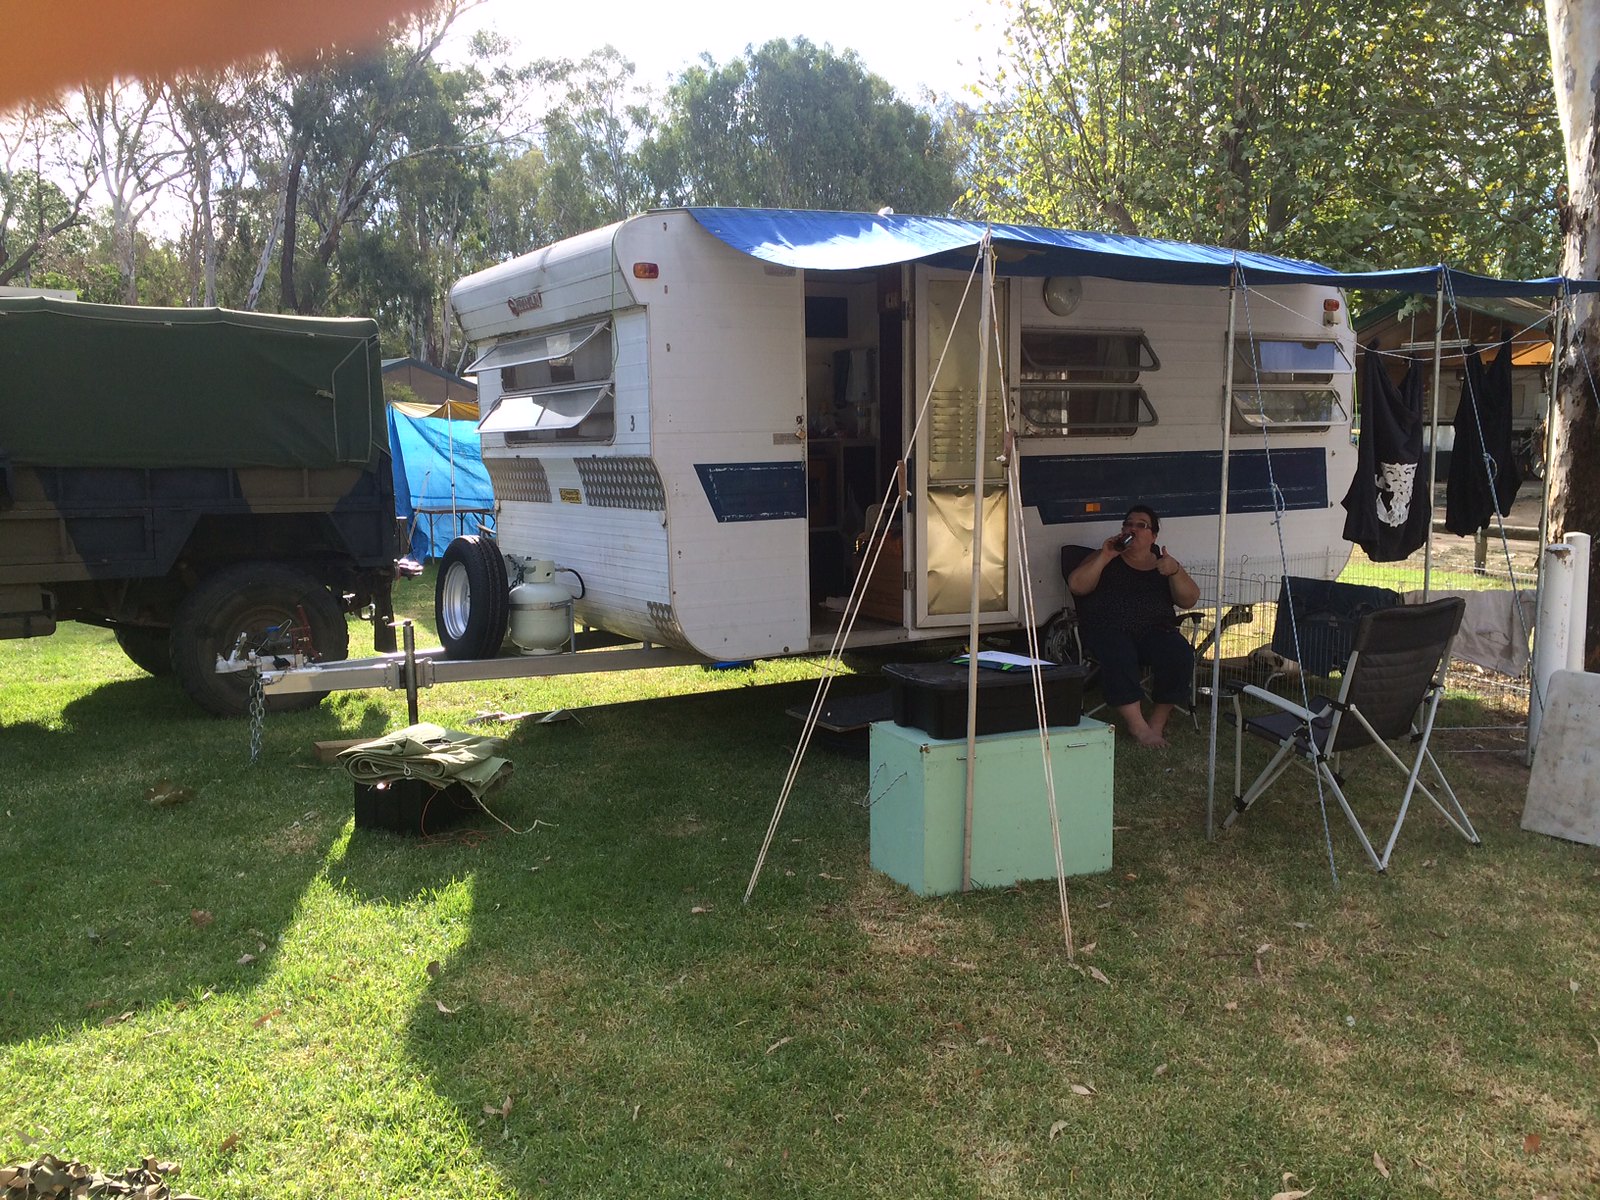 image image by Gavin Gregory, on Flickr |
|
|
|
Post by atefooterz on Mar 12, 2015 21:19:57 GMT 10
Now that is what classic caravans are all about!  enjoy... |
|
|
|
Post by snoops on Mar 15, 2015 20:01:04 GMT 10
So, it's our last night out for the first trip - been great fun. The Van scores a 7 out of 10. All in all, very good, but a few tweaks needed before we head out in a fortnight for nearly 3 weeks on the road in it. First job is to vent the flue on the fridge - waaaaay too much heat ends up in the van because of this. During the hottest part of the day, it is like having the heater on. The fridge also suffers in efficiency as it warms up a bit during this time, but gets very cold again once it gets cooler. I've been reading up on this and good ventilation is the key to keeping the fridge working at its best. A new vent and flue kit is about $90 by the looks of it. Must finish the steps off before its next outing too - a tyre with a board on it just doesn't cut it in SWMBO's opinion....  My cheap arse inverter died, so will have to lash out on a decent one. Some of the cupboards need finishing so we can put more stuff away. Good things - stove and oven are brilliant. We picked up a cool retro saucepan set that matches the van perfectly from a local op shop.  . Bed is great with enough room for 2 pugs. Heaps of room inside the van in general. Everyone loved the old beast  . So, a few tweaks and back on the road for round 2.  |
|
|
|
Post by snoops on Mar 15, 2015 20:16:41 GMT 10
Interesting looking combo...looks like it will take all of about 5 mins from 0-100km/h. Seriously though love the army rig. Gotta love that feeling of being packed and ready to head off!! Jealous! Lol. Very optimistic as it only does 100 with the overdrive engaged, which is not recommended while towing, so about 90 flat stick...  . It's all about the journey, not the destination when you're driving one of these.  |
|
|
|
Post by snoops on Mar 18, 2015 18:57:12 GMT 10
Well, just fixing a few of the 1% ers at the moment. Think I found the leak over the bed. The PO had covered every inch of the rear window in silastic trying to stop it, but a good look over it tonight revealed a gap up on the join between 2 panels on the roof. Hopefully that will keep it dry until the bodywork is done and everything is re sealed properly. Fitted a new filler, new water pump - the little cheapy I had on there made a hell of a racket, but I've got a nice quiet one in there now. The new roof hatch is painted ready to go, but with rain forecast for tomorrow night, that will have to wait another day as I have to reframe the roof opening first - I'll take pics of all that.
|
|
|
|
Post by snoops on Mar 19, 2015 18:46:57 GMT 10
Couple of pics tonight as I finished during daylight hours. New water filler installed. 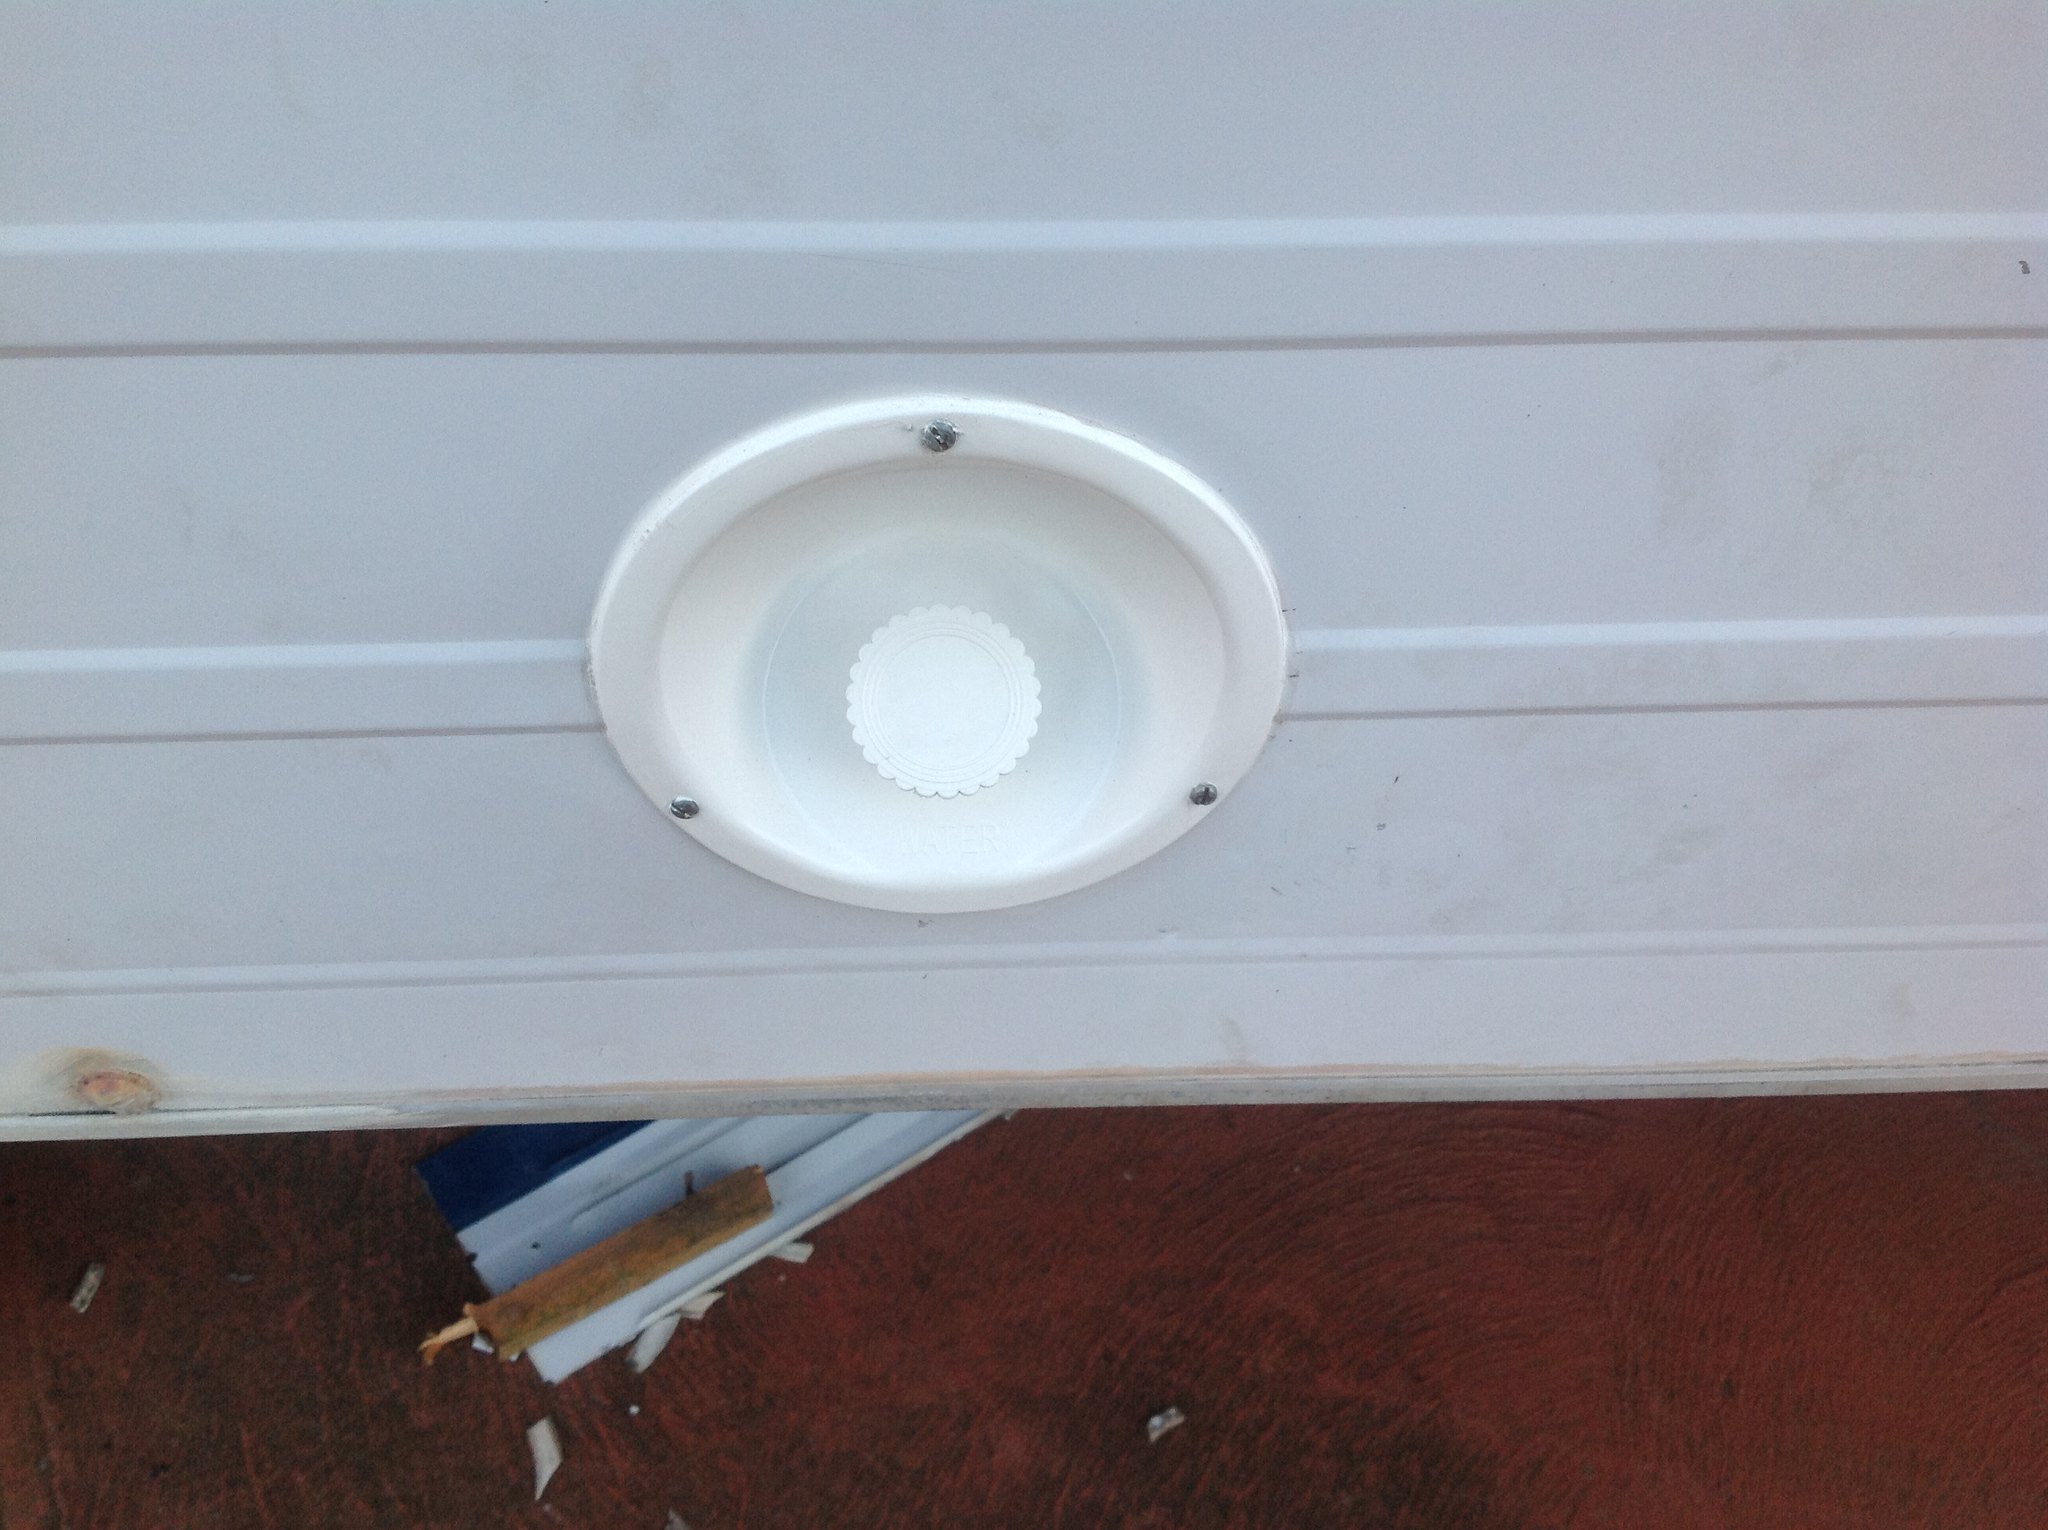 image image by Gavin Gregory, on Flickr Top half of new vent kit installed. Easy enough apart from the relocation of the outlet that runs the fridge from 240 volts - that is now a couple of inches away from the vent - blocks it a bit, but I think I have 3 or 4 times the venting at the top now. Still have to work out where I'm going to stick the bottom one due to the old access door being right where I need to stick it. I may put it in temporarily until after my Easter trip, then find a bit of new cladding so I can fit it properly and make it look half decent. The bottom of the vent is above the top of the fridge where it needs to be, but I'll still have to make a few bits up to direct the air outside and to seal around the fridge properly like modern installations. This should make the fridge work more efficiently, and stop it heating the van up so much. I'll also feel much happier that all the hot air from the flue isn't coming out around all the old dry timber framing around the fridge. 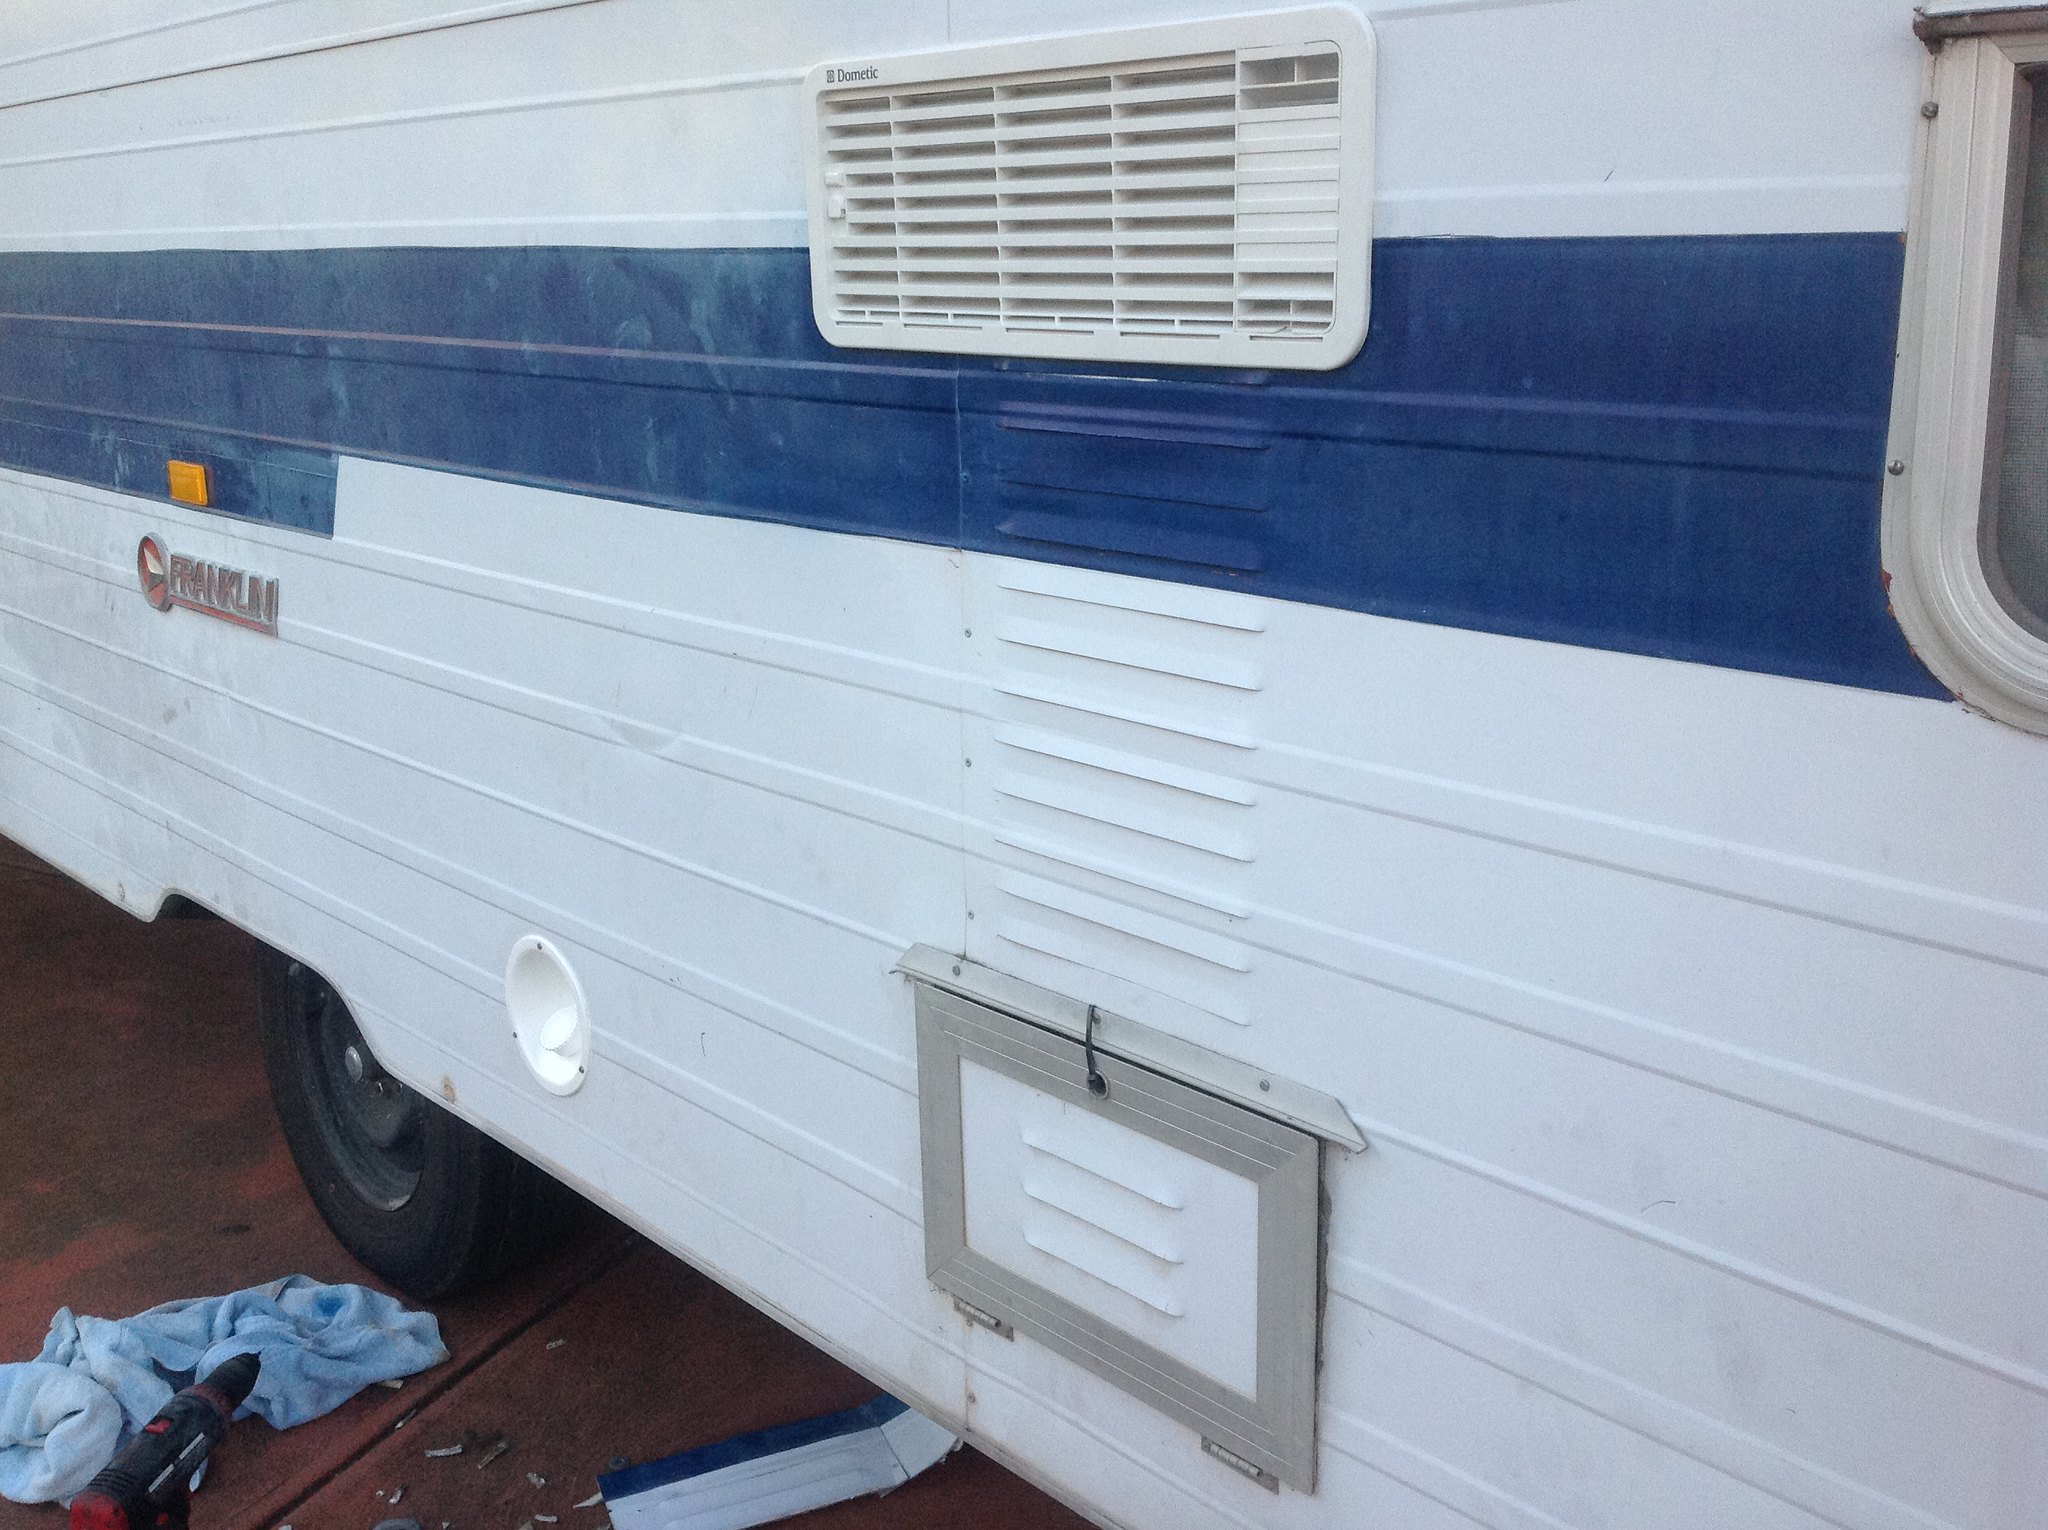 image image by Gavin Gregory, on Flickr |
|
|
|
Post by snoops on Mar 20, 2015 19:25:43 GMT 10
Well, cranked the fridge up on gas last night after fitting the new flue kit. 24 hours later, my sink is now stone cold, as is the beer and the van! WIN! All the hot air now wafts gently outside now.  |
|
|
|
Post by atefooterz on Mar 20, 2015 21:05:55 GMT 10
If i ever hook gas back up to my van i would be interested to see if that Franklin 1975 mod, of having almost twice the fridge height vented, makes a difference or if i need fans etc. Lovely to read your earned success so cheers with a virtual coldie!  |
|
|
|
Post by snoops on Mar 21, 2015 15:31:59 GMT 10
Heaps more done today. Put the lower vent in. I was going to put it in temporarily then look at fitting a new piece of cladding down the bottom later, but it doesn't look too bad like it is. I cut the access door down and sealed it up - there was a fair bit of water damage where it had leaked over the years, but nothing structural. Pulled all the rotted ply out, and all is good there now. 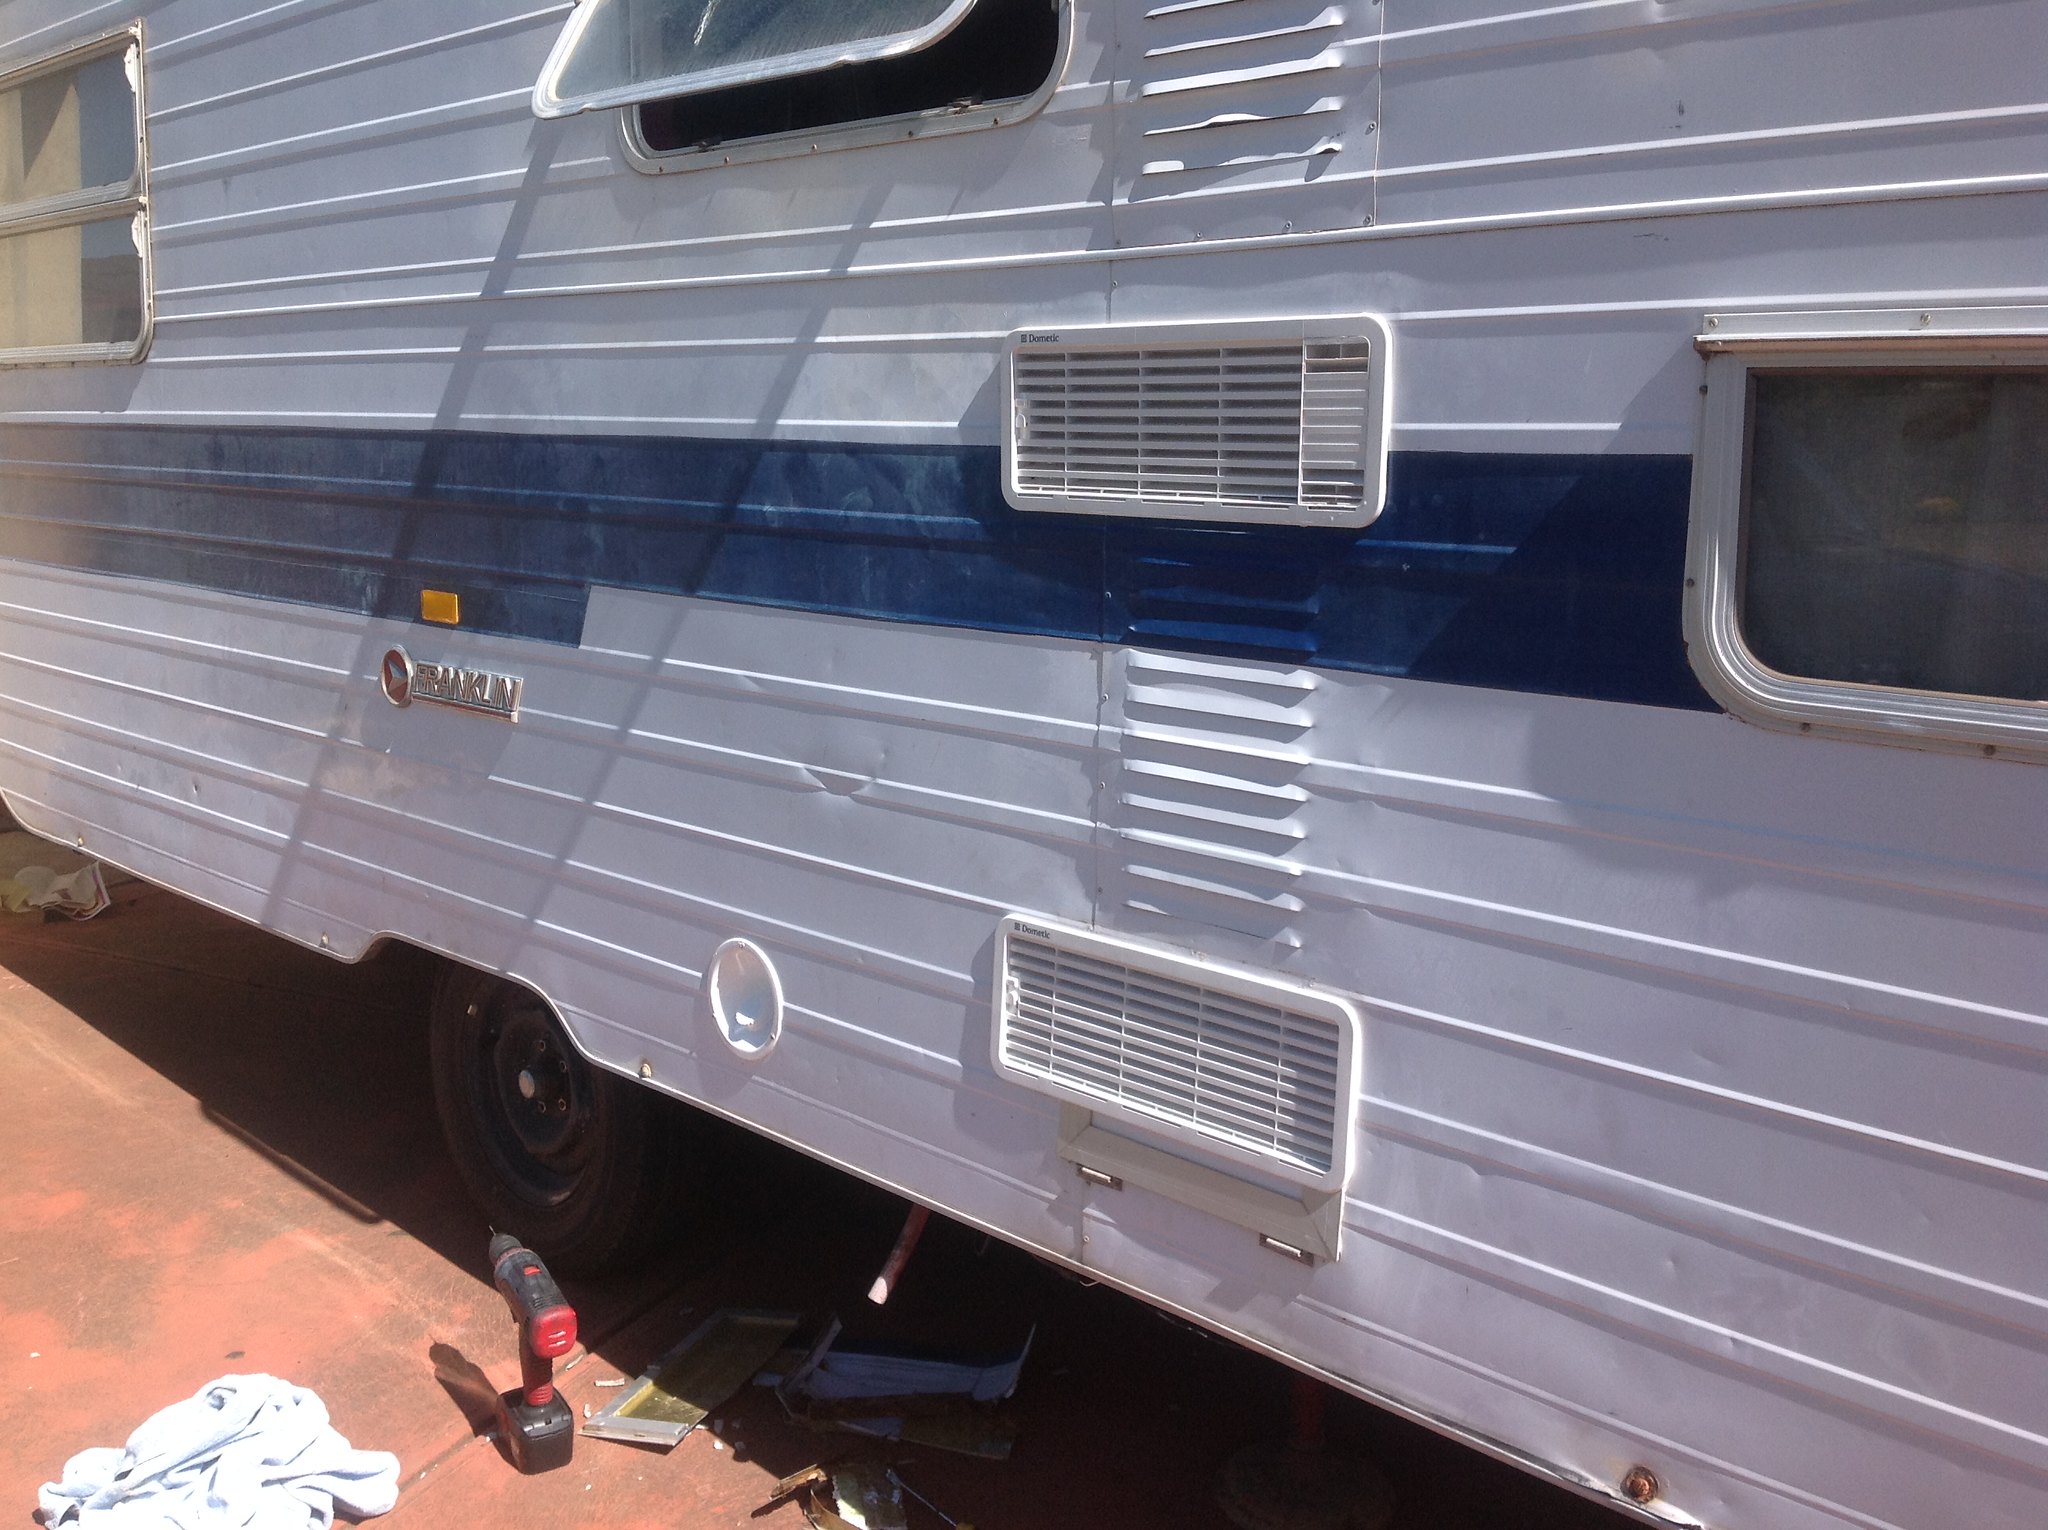 image image by Gavin Gregory, on Flickr Also started on fitting a new roof hatch. Old one was porous and I had a bigger one kicking about from the old van I wrecked. Opening has been increased in size to fit it - despite some water damage to the interior ply, the actual structure was very well sealed and nothing inside has got any damage. New frame is pine, not meranti, but it's only a little heavier. Lots of hard work cleaning the old flashing off - it was stuck fast. New flashing is butyl backed flexible flashing and has stuck well. Should be water tight for many years to come. Pics tomorrow of that once the interior flashing is complete and everything finished. |
|
|
|
Post by snoops on Mar 22, 2015 16:26:56 GMT 10
Roof hatch is finished, it's a bit of a step back - from a 60's van, but it was there and it works.  . Internal flashing is 0.4mm zincalume, and the whole lot is sealed up very well, so I'm not expecting any trouble. Once the sealant has fully cured, I'll give it a hose down to check it. New fly screen is also installed so no mozzies at night.  Hatch area is 900 x 750 now, so quite large. Only downside will be if I leave the hatch open when I'm not around and it rains... Oh well, floors are Lino, so I'll carry a mop...  Photo is a bit deceiving as there is a good 100mm clearance when it is fully open - heaps of airflow. 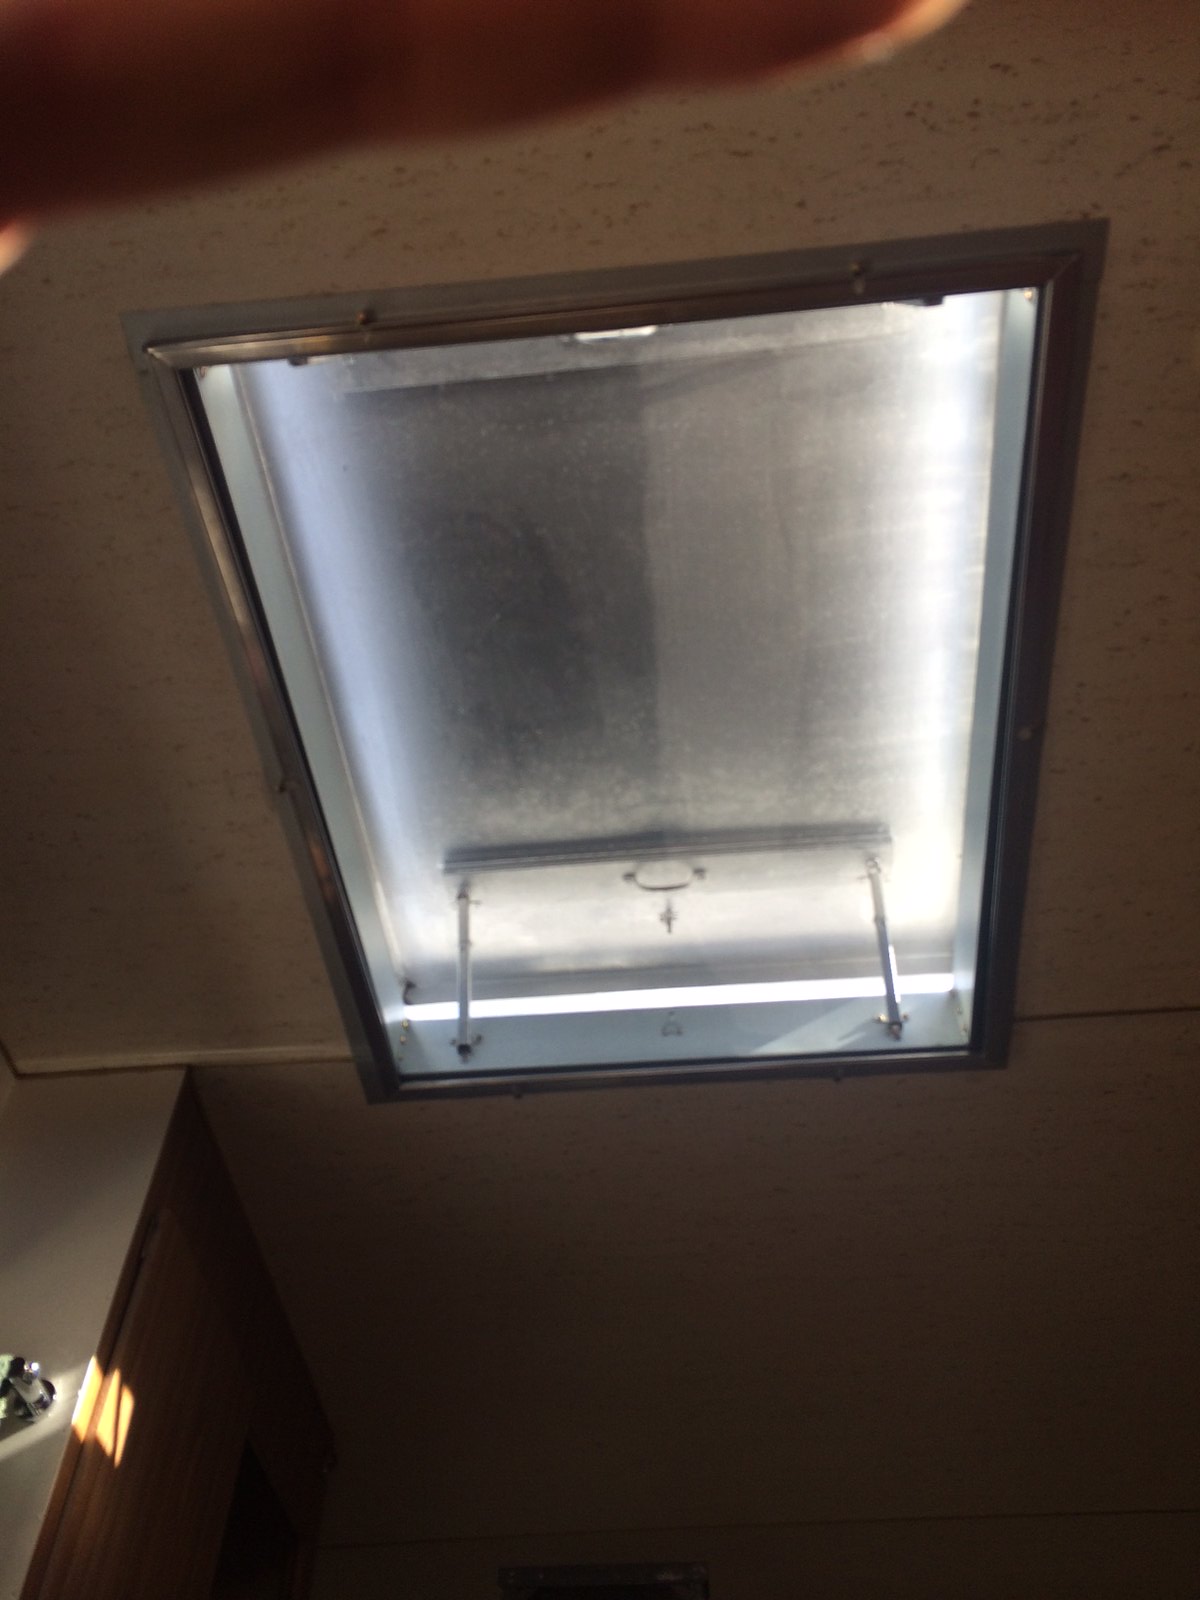 image image by Gavin Gregory, on Flickr |
|
|
|
Post by Mustang on Mar 23, 2015 9:45:16 GMT 10
I know what you mean with large hatches, ours are 800 sq. Guess air con was not even a consideration when these were made.
I note you have a security pin for travelling, good idea, ours just relied on the winding mechanism.
|
|
|
|
Post by snoops on Mar 25, 2015 20:41:04 GMT 10
Yeah, it's got a spring loaded clip each end. Although I think the mech may hold it, I wouldn't want to rely on it, heading out Sunday morning with it for a 3000km trip, so I'll see how it all goes. It certainly will let a lot of air flow.  |
|
|
|
Post by snoops on Mar 28, 2015 20:17:36 GMT 10
So, off in the morning on a 2 week 3,000KM trip. Finished off the last of the must do's left over from the trip the other week. So, draw bar bracing is done, new switchboard and inverter. My cheap arse one died on its first outing, so I coughed up for a decent one. It now runs through a changeover switch and RCD. Works a treat. Run a 50amp supply from the main batteries in the 101 through an Anderson plug to the caravan battery so I can run the fridge while driving now. Just got to throw the missus and pugs in and we're off.  I'll post some pics and details along the way. |
|
|
|
Post by snoops on Apr 10, 2015 21:20:47 GMT 10
Just got back from a 2,500KM trip towing the van with the old 101. Everything went very well, bit there are a couple of war wounds on the van now that need sorting. One of the shiny new stabiliser legs is knackered - the van moved while it was down and twisted it like a pretzel - I thought they would be stronger than that, but no biggy. The bigger issue is the rot on the RH side up the front became an issue as the timber at the bottom of the wall has collapsed a bit and will need repairs before heading out again, not going to be an easy job though, I'll post some detail on how I repair this when I get around to it. Still a couple of niggling leaks to sort, but all in all it was a great trip and the van did us proud. Got a lot of positive comments about restoring an old van - even from the new van brigade.  |
|
|
|
Post by atefooterz on Apr 10, 2015 21:44:58 GMT 10
Will be interested to read how you go snoops, those pesky corners are a bugger. Glad it passed the show & tell test with the white box brigade.
|
|
|
|
Post by snoops on Apr 30, 2015 20:06:37 GMT 10
Well, finally got around to having a play with the rotted corner on the van. Pulled the j moulds off, removed the bolts that bolt through the wall panel, and levered the wall out a bit to take a peak. Well, that was all that was needed - the old timber basically fell out. The glue holding it to both the interior panelling and the aluminium cladding was doing nothing. On the bright side, the glue is holding fast on the foam core - and that is in good condition. Just the corner and the bit where the fridge access panel was were rotted away. Cut the timber off where it goes over the guard and presto, ready for new timber. Ran down to Bunnings and grabbed a decent bit of hardwood to replace it. That should last for a while. It is a bit narrower than the original, and if you look closely now, you can see the cladding bows in a bit at the bottom, but it's barely noticeable. The new timber is secured with urethane so it ain't going anywhere. I ran a bead along the top where it meats the foam core, then a few thick lines on each side to stick to the interior ply and the cladding. New bolts and trim along the bottom edge was screwed in and in a couple of days, it will be stronger than it has been in many years. I'll post pics when it's all tidied up and finished.  |
|
|
|
Post by snoops on Apr 30, 2015 20:16:55 GMT 10
Ok, wanted to post this question separately. I also weighed the front of the van today - so I now know the nose weights. I was aiming for 120kg when I originally started. The van is pretty much exactly as it was from our trip, and while I thought it was a bit heavy - I noticed that the van caused the 101 to buck a bit over rough roads, I was miles out. The nose weight is..... 160KG....  So, I need to loose 40 or 50kg from the front. Some stuff is easy - the batteries are mounted forward of the axle, but there's plenty of room to move them behind. We were storing the fold up table, and some other stuff up the front as well, so I can chuck that on the bed at the back while travelling, but I think I'll still have to find other things to move around. any ideas how to remedy this situation? cheers - Snoops. |
|
Deleted
Deleted Member
Posts: 0
|
Post by Deleted on May 1, 2015 8:54:40 GMT 10
Snoops
Whats your ATM ? The going standard (there is no rule) is 10 - 15% of your ATM. I noticed in your thread that tow hitch you made weighed what?
Could you put the spare wheel from the van in the back of the truck ?
Cheers
|
|
Deleted
Deleted Member
Posts: 0
|
Post by Deleted on May 1, 2015 11:35:18 GMT 10
Hi Snoops,
Great to see you enjoying your Van and another old Franklin back out there on the road - congrats mate - and I love the 101.
Cheers,Des
|
|
|
|
Post by snoops on May 1, 2015 21:29:24 GMT 10
Snoops Whats your ATM ? The going standard (there is no rule) is 10 - 15% of your ATM. I noticed in your thread that tow hitch you made weighed what? Could you put the spare wheel from the van in the back of the truck ? Cheers The van comes in at just over 1,200Kg, so I was aiming at 10% - ie 120Kg. At 160Kg, it's just causing a few too many issues on uneven roads. The short wheelbase of the towing vehicle isn't ideal for this application, so I need to play a bit to get it right I I think. Yeah, I have plenty of room in the back of the 101, just need to reorganise it a bit. Might also ditch the second gas bottle. I used 3/4 of a 9Kg cylinder in 2 weeks running the fridge at all times the vehicle was parked and cooking every night on it - including using the oven for several hours on more than one occasion, so I'm not going to need the second bottle really. I'll ditch them tomorrow and see where I end up.  |
|
|
|
Post by pisces51 on May 1, 2015 21:31:17 GMT 10
G'day snoops, You'll actually have to find MORE than 40 or 50kgs if you want to reduce the ball weight down to 120kgs. When you look at high school geometry - weights and levers stuff - you'll see that a 50kg weight placed halfway between the tow coupling and the wheels, is exerting 25kgs on the ball, and 25kgs on the wheels. A spare wheel weighs approximately 20kgs, and removing it will only lighten the ball weight by about 15kgs due to the position of the spare wheel on your van. The batteries are even further back towards the wheels, so their effect on the ball weight is only about half their actual weight. How much do two batteries weigh? - about 20kgs? Take them out of the van altogether and you'll save about 10kgs off the ball weight. Put them BEHIND the wheels and you might reduce the ball weight by about 15kgs - depends how far behind the wheels you put them. So, removing the spare wheel altogether saves you approx 15kgs Putting the batteries behind the wheels saves you approx 15kgs (depending on the battery weights and where exactly you place them behind the wheels) You'd still need to find another 20-30kgs to remove in the front of the van, to get another 10-15kgs off the ball weight. 20kgs is roughly a fully packed suitcase for an international flight, so that's a fair bit of stuff (how much does your beer in the fridge weigh??  ). Way back when you first started this thread, and towed the van home for the first time, you said you detoured through a weighbridge and the weight came in at 940kgs. Then you had the new extended drawbar fitted, which meant extra metal was added to the overall weight (and more importantly to the ball weight). When you got the van registered recently, what was the new tare weight for the rego process? If we use the original weighbridge figure as an example, the tare of the van was 940kgs. Add the payload allowance of 300kgs for your single axle, and we get an ATM (see here ) of 1240kgs. An acceptable ball weight for that ATM is 124kgs (10%) to 186kgs (15%). If I were you, I'd remove the weight acting on the ball piece by piece. That is, put the spare wheel in the tow vehicle (or even under the rear bed in the van if there's room), and then measure the ball weight. Then move the batteries to the rear half of the van, and measure the ball weight again. I think once you get down to around 140kgs, take the van on a trip and test it out with that ball weight of 140kgs. You might find the van is quite ok with that weight, and you don't need to do anymore shifting around. cheers, Al. ps. See this post and then read the first half a dozen posts or so on the next page, to read about the challenges I faced getting the ball weight correct on my Windsor van. Read down and stop at the post where I modified a step-ladder for the van. |
|
Deleted
Deleted Member
Posts: 0
|
Post by Deleted on May 2, 2015 9:11:50 GMT 10
OK I will tell you a story about a little van that would......
make my wife sea sick !
My Millard Micro is listed across the internet as being approx. 580kgs tare, now when I first picked up our van in the Darling Downs, I thought this will be a nice trip home....Oh I was wrong, I thought I had the Queen Mary behind me and coming down the Toowoomba Range was scary..
In one of my first post in my rebuild I stated the van was going on a diet. I stripped of all the extra's that had been added - at this point I wish I had then gone and got a Tare weight before starting repairs. Fast forward and the rebuild is done and the Tare is now just under 700kgs with a GTM of 600kgs or a ball weight of 100Kgs.(14%)
Before I took it to the weighbridge I had been going on test drives around the local area to see if bearing where getting hot, how the brakes were going etc. I took the wife out twice and within 15 min's she was feeling crook. So I asked my neighbour if the van should make the ute bounce and tug and feel like it is wiggling etc, and should I fit the load levellers and would that help, he responded the LL will have no effect on a van that small, raise the pressure in your back tyres to 45psi. Well I had the tyre pressure at 35psi so lifted it to 40 and there was a difference but not a great difference, so tried 45 and no better so lowered them but to 40psi, I tried the van tyre up at 40 as well - no that didn't do anything either so put them back to 35.
A number of people including people with years of caravan towing experience had told me that the LL will not fix my problem, well if you have read my post when I took the van away for it's first weekend you will know that a lot of people were wrong.
So as Al has pointed out try things but if there is no noticeable difference leave it the way it is and don't be afraid to try things. Try tyre pressures, even try towing it with a different vehicle (if you can change the tow hitch), the van tyres pressures etc etc. You may find removing the weight of the ball could make it worst !
Cheers and good luck
|
|
|
|
Post by snoops on May 9, 2015 7:55:21 GMT 10
|
|
|
|
Post by planner on May 12, 2015 11:18:24 GMT 10
A couple of pics of the lower timber on the front RH side that I replaced recently. I know what a pain that job was. The RHS rear corner of ours was similar, but I was lucky enough to do that from the inside with the ply removed. The section behind the fridge and forward of the door on the LHS had to be replaced as well. This needed to be done from the outside as you did. Have you replaced/repaired step yet? I purchased ours from Dandenong and placed it myself. I can't weld upside down, so I installed it using bolts. The electrolux fridge running on gas should provide weeks of summer use on a 9kg LPG bottle. I used one for years as a camping fridge (sitting on the ground, not in a van) with no problems. The original fridge in our van was knackered, so I replaced it with a 110l waeco upright, running from a 200ah battery installed where your shower will be. With a 120A panel I get about 5-6 days offgrid (one day I might consider another/bigger panel). I've never weighed the towball weight, but I REALLY struggle to lift the jockey wheel, and I like to think I'm reasonable strong. My guess 100-120kg. Planner |
|