john
In Training

Posts: 19
|
Post by john on Feb 24, 2020 12:30:10 GMT 10
Hi Everyone,
I am brand new member having just joined up to-day.
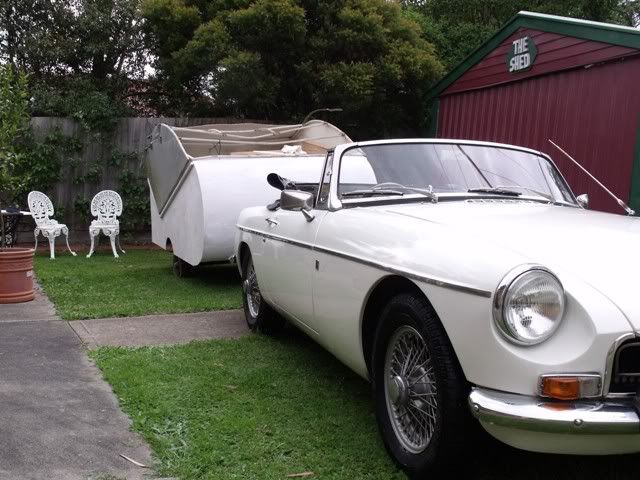
I am looking for any advice on rebuilding a early model Franklin 14 Ft. pop up van roof. I intend taking the roof off, as I feel it would be the easiest in the long run. I have no idea what to expect after tipping the roof upside down, and removing the ceiling, which looks like being in three pieces, which I will keep for templates.
So guys if you can offer and advice, I would sure appreciate it.
Regards,
John
|
|
|
|
Post by pisces51 on Feb 24, 2020 19:50:05 GMT 10
G'day John, and welcome to the forum! 
Poptop vans started to appear in the market around late 1975, early 1976. On the drawbar of your van, there will be a chassis number welded on the TOP of the drawbar arm, around about where the jockey wheel is usually clamped. This chassis number will be a letter followed by some numbers. If the letter is 'W', the van was built in 1975, and if it's 'X' it was 1976, and 'Y' was 1977.
Removing the roof is a job that needs a LOT of careful planning. The spring-loaded scissor lifts (canopy lifters) that raise the roof will need careful attention before loosening, otherwise you run the risk of the whole roof "blowing up in your face" when the tension in the springs is released. You have to devise a method of tying the springs in the half-open position so that you have room to undo the holding screws without allowing the springs to suddenly open up completely, and knock your front teeth out.
Fixing the roof back into position after repair, also requires careful planning. A full roof can weigh in the vicinity of 60kgs, plus the weight of the canvas skirt, so it is not something that can be chucked around easily by one person. You have to spend some time thinking about how you are going to lift the roof off the van, and onto the ground for repair, and then how will you get the roof back onto the van again. Will you fix the canvas skirt back into position first, and then fix the scissor lifters, or will you do it the other way round? What will determine which way you do it??
Good luck with the job. 
cheers, Al.
|
|
john
In Training
Posts: 19
|
Post by john on Feb 25, 2020 8:17:01 GMT 10
Hi Al,
Thank you for your reply, I have fitted a new A frame to the van, and looking at it today it appears like I did not transfer the number over, hopefully I can find it on some old paperwork.
I was unaware that there were springs involved with the scissor lifts, as none are exposed maybe over time they have been removed. I hope to have three or four friends come round and help with the lifting off and on. I was intending to leave the scissor lifts and canvas skirt in place, and make a decision on what attention they may require before refitting the roof.
I am curious to know what is between the flat alloy or galvanised sheet roof and the ceiling, I assume it must be glued or bonded together, as there are no screws.
Regards,
John
|
|
|
|
Post by pisces51 on Feb 25, 2020 11:23:03 GMT 10
G'day John, there must be springs in the lifters, otherwise the roof wouldn't stay up when it was raised, and it would be a hell of a job to lift the roof up in the first place.
Most caravan construction in the old days was staples. There will be screws holding the aluminium edge moulding onto the roof. Everything else is joined using staples.
Glad to hear you've got some friends coming round to help. It's no fun spending the weekend in hospital after the roof collapses on your head.😢
Cheers,
Al.
|
|
john
In Training
Posts: 19
|
Post by john on Feb 25, 2020 15:45:54 GMT 10
Hi Al,
You are a great help, and I guess you have been involved in some roof repairs before.
I have just been down and with the help of a ladder had a look at the scissor lifts, I could see the top and bottom springs fitted and I will take your advice and rope or wire. the arms together.
Many thanks,
John
|
|
|
|
Post by bobt on Feb 29, 2020 22:17:13 GMT 10
Gidday John
Welcome aboard.
Al did a full reno on a poptop he is a great source for information.
|
|
john
In Training
Posts: 19
|
Post by john on Mar 1, 2020 9:33:04 GMT 10
Hi bobt,
Thanks for your reply, I am curious to know what lies between the tin roof and the ceiling and how it was assembled. I guess all will be revealed when we have the roof on the ground.
At the moment I am waiting on a mate of mine, who still works, as to what time it will suit him to give me a hand.
Regards,
John
|
|
|
|
Post by pisces51 on Mar 1, 2020 14:37:46 GMT 10
G'day John, it's mostly air between the roof cladding (which is aluminium), and the plywood ceiling. If you give me a couple of days, I will find some photos of the Millard poptop I restored, and post them here for you.
Cheers,
Al.
|
|
|
|
Post by pisces51 on Mar 4, 2020 20:38:26 GMT 10
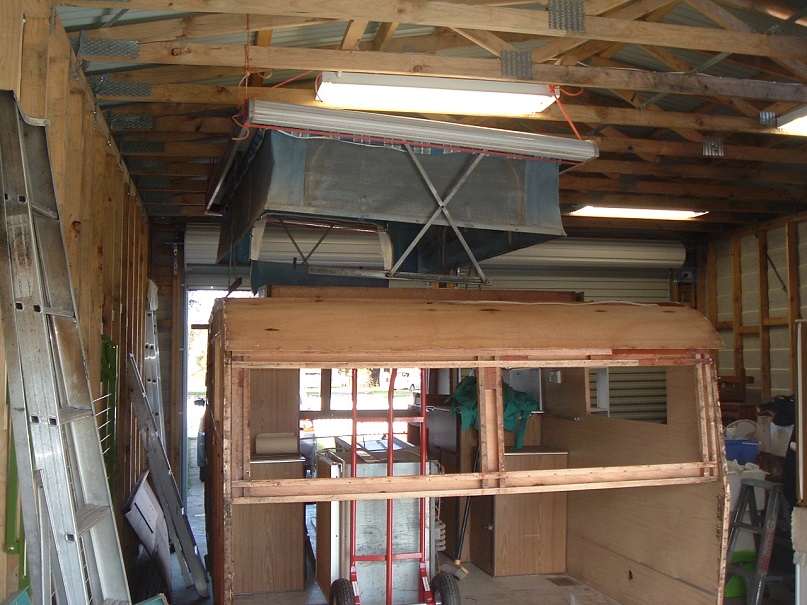
John, here are some photos of the 1976 Millard poptop I restored during the time period 2008 to 2010. This is the van being dismantled, with the poptop roof lifted off the lower caravan body... This is the poptop roof after it was lowered onto some trestles at ground level. The photo shows the aluminium cladding as it was before restoration... This final photo shows the poptop roof after the cladding was stripped off. You can see the layer of silver sarking, which covered a thin sheet of foam for "insulation", and some sparing timber framework which held the foam/sarking above the ceiling plywood...
cheers, Al.
|
|
john
In Training
Posts: 19
|
Post by john on Mar 5, 2020 16:47:33 GMT 10
Hi Al,
You sure did a number on the Millard van, it must have turned out nice when finished. I was intending to tackle the job different to the way you repaired the Millard poptop, I was hoping to tip the poptop upside down on trestles, removing the ceiling and whatever else is there, and rebuilding it that way, if it’s possible.
My roof is flat thin aluminium with square sides, and guessing there would be spars to hold the roof in shape and rigidity. What ever else is a mystery at this stage.
Al, I would like to say you have been a great help in making me aware of what to expect. I will start the job whenever my mate has spare time.
Many thanks,
John
|
|
john
In Training
Posts: 19
|
Post by john on Mar 19, 2020 20:47:47 GMT 10
Hi Al,
We have taken the poptop off the van, and removed the ceiling and timber frame, I am disappointed to find that the roof is only tin plate with a cold galvanising paint coating on the outside. I will reassemble it with stainless steel screws, and staples, paint the timber with oil based undercoat, and touch up the tin roof where previously stapled with coldgal. I have to figure out if I can leave the current insulation in place, and add the the pink bats, or use the pink bats only, time will tell when it starts going back together.
Cheers,
John
|
|
|
|
Post by pisces51 on Mar 20, 2020 19:03:32 GMT 10
G'day John,
Interesting to hear that you believe the roof is steel-based (galvanized iron sheeting??). These poptop roofs started off being clad with aluminium sheeting, and then in 1978 both Franklin and Millard switched to fibreglass moulded poptop roofs.
Have you tested your sheeting with a fridge magnet to confirm it is magnetic (ie. steel-based)?
Cheers,
Al.
|
|
john
In Training
Posts: 19
|
Post by john on Apr 3, 2020 16:29:17 GMT 10
Hi Al,
Yes the roof top after the magnet test is aluminium, what had me fooled was the goldi/yellow coating the inside had, just like some food cans. So far I have made up the wooden frame and liquid nailed it in. Today cut the insulation to size, and liquid nailed it in.
Tomorrow I intend to clean up some aluminium corner strips, that are used to fasten the side of the roof to the vertical members of the wooden frame.
So far Bunnings have done quite well out of the project, it seem to be a daily trip down there for something.
I have taken photos as I have gone, which may help someone else.
Best regards,
John
|
|
john
In Training
Posts: 19
|
Post by john on Apr 13, 2020 20:47:42 GMT 10
Hi Everyone,
The project of rebuilding the poptop roof is proceeding. The four sides of the roof have been stapled to the new timber frame, paying special attention to water proofing the four corners.
Aluminium right angle strips silicane and screwed, to cover both the top edge of the vertical timber, and the stapling on the side of it.
The ceiling lining liquid nailed to the timber and insulation, also screwed down around the edges.
Handles to help raise and lower the poptop, fitted to the ceiling. The interior part of the ceiling vent installed.
Coming up next is turning the poptop over, so the roof can be cleaned and painted.
Hope it's of interest.
John
|
|
john
In Training
Posts: 19
|
Post by john on Apr 26, 2020 7:19:29 GMT 10
Hi fellow members,
The project continues. The poptop has been turned over, it received a heavy wire brushing, painted with two coats of SLS Etch Primer, one coat of undercoat, and then finished up with two coats of Dulux Metalshild epoxy enamel. The scissor lifts cleaned and painted in the same manner as the roof. The canvas skirt pressure cleaned, and the frozen zippers free up. Up next is the outside top of the van.
Regards,
John
|
|
john
In Training
Posts: 19
|
Post by john on May 5, 2020 15:16:39 GMT 10
Hi fellow members,
On with the Poptop project. After wire brushing the whole roof of the van, I started the task of removing many tubes of old silicone sealant, which had been applied by previous owners, in their attempt to cure water leaks. Three days later the roof was ready for painting, and the same process as the painting of the poptop was used.
The directions on the Selleys Roof and Gutter Silicone I applied, was to wait seven days for the paint to cure before use. This was then carried out by masking either side of the all joins, and possible places of future water leaks with tape, before applying the sealant, after which the tape was removed.
|
|
john
In Training
Posts: 19
|
Post by john on May 12, 2020 8:25:28 GMT 10
Hello to all,
There is now light at the end of the tunnel. To-day the canvas skirt has been fitted to the top of the van, with new stainless steel screws and washers, and the newly painted scissor lifts fitted with stainless steel fasteners. I have a couple of days wait, for a few of my friends to be available on the same day, to give me a hand to lift the roof on to the van.
The roof lifting day arrived and went relatively smooth, 100x50mm timbers were placed across the van roof opening. The poptop was then lifted onto the timbers, and centralised with the van roof opening. The compressed scissor lifts were released by controlled manually lifting the roof, with the scissor lifts following to their fullest extent. Measurements were taken, so the top of the scissor lifts could be attached to the new timbers in the poptop. After which the poptop was lowered, so the canvas skirt could be fitted.
Cheers,
John
|
|