|
|
Post by kesprint on Aug 2, 2018 22:01:39 GMT 10
Picked up this little van last week and have already started to tidy her up. 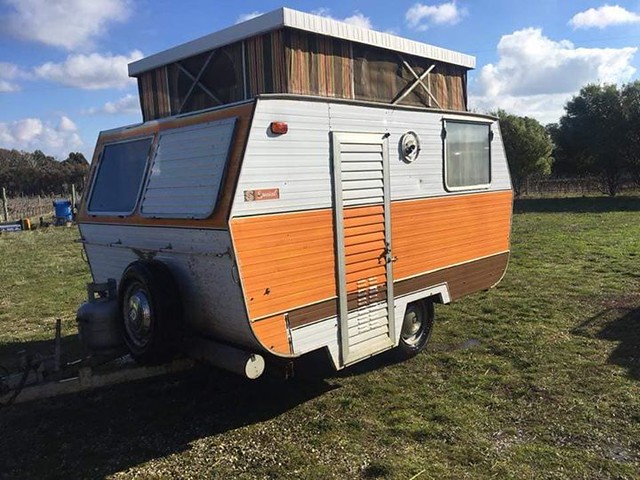 , While I have found a bit of the history of Sandrover (Mordialloc in Melbourne, 1961 - ??) I haven't seen another van the same. It has wind-out windows which dates it 1974+ but that's all I have! I would appreciate any other information. A couple more photos: One from the rear. 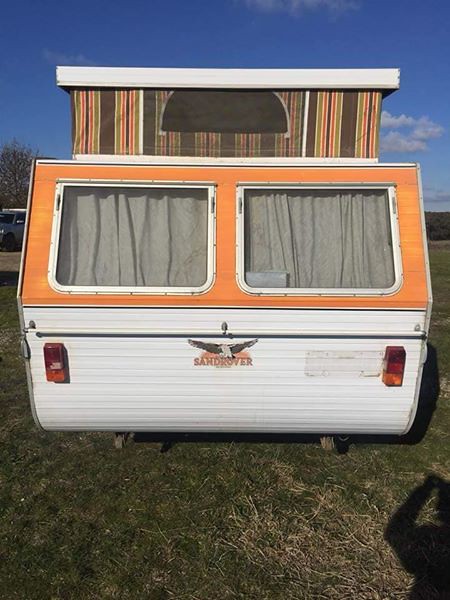 , Interesting wiring! 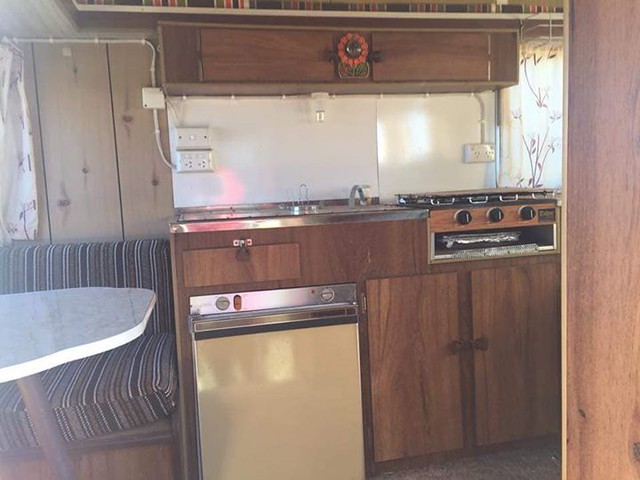 , Rear fold out double bed (Small!) [/a] 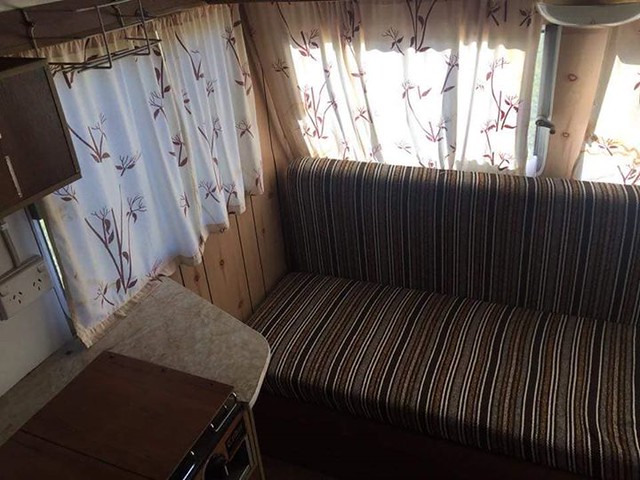 , Brakes have been done and carpet removed. Will keep you updated on progress. Mark. |
|
|
|
Post by hughdeany on Aug 2, 2018 22:33:21 GMT 10
Hi Kesprint,
These vans have always had a question mark above them,as Sandrover were around for quite a while in Mordialloc making small vans,then seemed to disappear for a while and then all of a sudden up popped these vans with Sandrover on them.
One thing that sticks out is the quality of construction was not as good as the originals,which makes me wonder did someone buy the name and start up again,or was it the continuation under different management?
These”new” type were made as full vans and pop tops,the largest of which I have seen was 15 ft.
They still come up occasionally for sale.
Good luck with your resto,
Cheers
hughdeany
|
|
|
|
Post by Mustang on Aug 3, 2018 7:56:11 GMT 10
Hi Kesprint
Welcome to the Classic Forum, thank you for the pics, keep them coming as you update.
|
|
|
|
Post by wibby38 on Aug 8, 2018 13:15:03 GMT 10
Hi Kesprint!!
Quite a rare van you've there, I restored a 1968 10'6"van in 2014-15, as mentioned in earlier reply maybe they Sandrover came under new management, however somebody must know where the factory was situated in Mordiallock.
Cheers
Wibby 38
|
|
|
|
Post by kesprint on Nov 22, 2018 20:53:00 GMT 10
An update on progress: Having removed the original carpet, the first surprise (read disappointment) was finding a particleboard floor! Fortunately most of it is still in good condition as it has been well sealed underneath (by a previous owner). However I have replaced the sections behind the wheels due to water damage (no mudflaps - yet!) 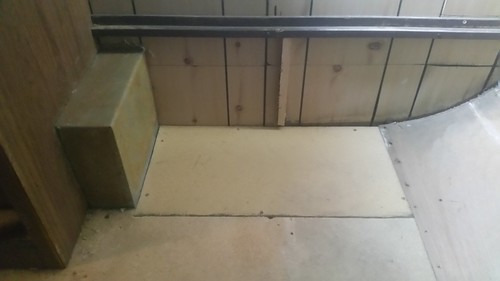 Reno 4 Reno 4 by Mark Barnes, on Flickr When I purchased the van I knew there was water damage in the right front and right rear corners. Removing the J-mould (Aluminium angle) and releasing the cladding revealed the extent of the damage. The frame at the rear was fine, but the front had rotted in the lower curve and below the fridge. I replaced the affected frame at the front with meranti from the seat frame at the rear (Meranti is an endangered species in North East Victoria apparently!) and the affected ply lining. 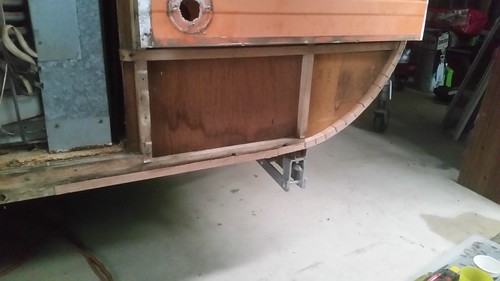 Reno 5 Reno 5 by Mark Barnes, on Flickr The ply at the right rear side had delaminated, as had the ply around the back windows. I am cutting new ply for around the windows, which will be painted to match the cabinets and doors, but wanted to keep the sides original. Fortunately the cladding in the back of the wardrobe was big enough to use for the job. Before and after photos: 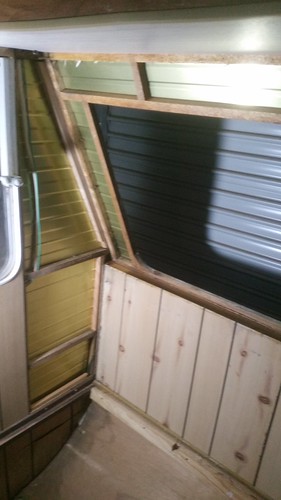 Reno 1 Reno 1 by Mark Barnes, on Flickr 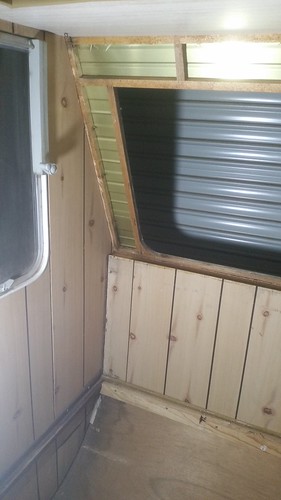 Reno 3 Reno 3 by Mark Barnes, on Flickr Next tasks are to cut,paint and fit the sections around the back windows and to re-fix the cladding. Then paint the cupboards and make the frame for the bed. 'Til the next update ....... |
|
|
|
Post by Mustang on Nov 26, 2018 17:39:53 GMT 10
Doing the correct way there Mark, leaving nothing to chance, good work.
|
|
|
|
Post by kesprint on Apr 23, 2020 22:58:06 GMT 10
Finally found time to post the finished product! Took it on a shakedown run to Port Macquarie last August having completed most of the work. I had fitted formply under the original particleboard floor to strengthen the soft patches, but didn't think to seal around the bottom of the wheel arches. With rain on the first two days travelling, water seeped in on top of the formply and blew up the particleboard! So out with the original floor and replaced with formply - fortunately achievable without removing internal fittings. Also, the ride was very harsh with everything under the bed moving during travel, so have replaced the slipper springs with eye to eye. Some photos:  20200418_144144 20200418_144144 by Mark Barnes, on Flickr  20200418_145952 20200418_145952 by Mark Barnes, on Flickr  20200418_150001 20200418_150001 by Mark Barnes, on Flickr  20200418_140355 20200418_140355 by Mark Barnes, on Flickr Will add a few more photos soon. |
|
|
|
Post by Mustang on Apr 28, 2020 14:39:32 GMT 10
Looking good there Mark, nice colour choices.
Re your harshness, most campfire advice will have your tyre pressures too high, play around with pressure, you will find a difference.
From cold your tyre size should increase about 4PSI.
Cheers
Brent
|
|


