|
|
Post by atefooterz on Dec 1, 2014 11:18:56 GMT 10
Reminice about that effective dark brown gooey stuff that was used as a degreaser back in the day? 
"that effective dark brown gooey stuff that was used as a degreaser" --- As a kid my dad taught me that mixing 50/50 of kerro & phenyl (wheelybin cleaner).
Shaking it up, as it seperates, then either spraying or brushing it on the greesy bits.
Leaving it on for half an hour or so then hosing off got the best results.
This brought up the old vauxhaul motor looking like new.
I used to tell him "why not just pour the oil over the motor to save it the trouble!?!?!?!?". Cheers Ted, wonder why phenyl was used (disinfectant) maybe to slow the kero drying or to smell nicer or it was cheap :)My first EH 149 motor was self oiling as you pointed out haha, smart call but i bet your Dad just mumbled something at that time, |
|
|
|
Post by atefooterz on Jan 3, 2015 12:13:56 GMT 10
|
|
|
|
Post by atefooterz on Jan 25, 2015 12:08:29 GMT 10
|
|
|
|
Post by atefooterz on Jan 25, 2015 12:12:25 GMT 10
|
|
|
|
Post by peter92 on Jan 26, 2015 19:28:37 GMT 10
looks nice Ate
what paint did you use
Regards peter
|
|
|
|
Post by atefooterz on Jan 26, 2015 21:16:02 GMT 10
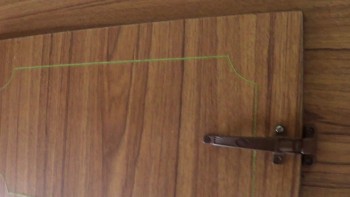
Black stripe is gloss enamel, as is white touchups & the green is gloss acrylic basic green, to get the olive colour is $60ish for 1 litre, i need 200ml max if i did both sides several coats.
|
|
|
|
Post by tedalley on Jan 26, 2015 21:26:28 GMT 10
Ate Hi.
I see you used gloss acrylic olive green. Is that close to the original green as mine was too faded to get a true colour.
Why did you use acrylic over the white enamel?
|
|
|
|
Post by atefooterz on Jan 26, 2015 22:10:25 GMT 10
the green was the closest in colour, just happened to be in acrylic, enamel green was dark like British racing green, The door side of the van has good colour & i have matched it to a colour swatch,sadly minimum quzntiy mix only. The bonus is the acrylic matches the sheen of the original white, plus down the track this non original colour can be relativly easily removed, without damaging the original paint. |
|
|
|
Post by tedalley on Jan 27, 2015 19:49:58 GMT 10
Ok now i need to workout if i want green stripes or some other colour!?!?!?
|
|
|
|
Post by atefooterz on Jan 28, 2015 10:09:35 GMT 10
Ok now i need to workout if i want green stripes or some other colour!?!?!? G`Day Ted, using Dulux colour swatches i discovered mine is now called A247 "base Camp": It used to be called good ol olive green & a stock colour! Grab a swatch or 2 feom Bunnings & see how similar and if it wants to make you go another colour? If i did keep this van i would bite the bullet & keep the original colour as it sets off the green & gold interior plus some remaining laminex is that colour also. |
|
|
|
Post by atefooterz on Feb 5, 2015 9:10:53 GMT 10
|
|
|
|
Post by atefooterz on Feb 10, 2015 21:38:44 GMT 10
|
|
|
|
Post by atefooterz on Feb 11, 2015 14:12:28 GMT 10
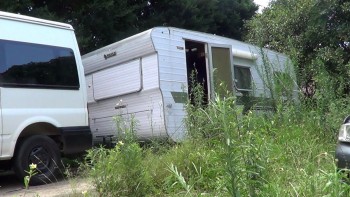
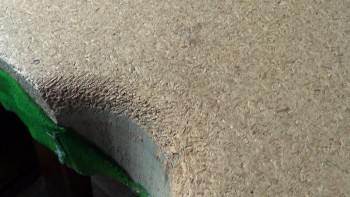
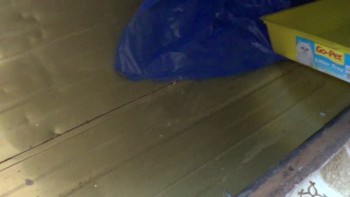
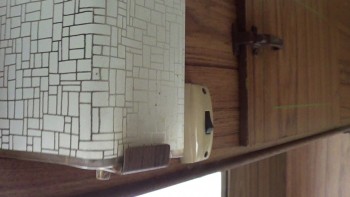
Much better result today, previous owner had wired active & neutral front to back & once switched back solid power & all points and lights working, as a bonus no noticeable earth leakage or issues with the frame anywhere...so far, touch rubber! Cleaned & re sealed the all weather AC inlet & fitted a nice new flap to it, so it looks the biz again.With the crumbling chipboard cupboards i am just bogging then will paint brown, tape to stop issues on good matt varnished areas, this is a caretaker approach rather than re invent & strip out, the damaged areas will now not allow floaty wood chips into the cabin floor. Not flash but retains the integrity of the basic Arrow original interior finish. Rusting gutter mounted vintage tv- wireless antenna mount now de rusted & hammertone black to match the A frame. |
|
|
|
Post by atefooterz on Feb 14, 2015 18:03:59 GMT 10
Almost 2 hours without any woodchips falling off the vintage (classic) chipboard cupboards! #winning!! Pics later of turning a mess into something livable. Ok for a bloke but would not pass the Princess Test haha! I may check out those gold alloy L angle sections, mentioned in another thread would look a treat & minimal weight.
|
|
|
|
Post by snoops on Feb 15, 2015 9:49:46 GMT 10
Your cupboard doors look even worse than mine. I found it wasn't a huge job to cut up some 8mm plywood and make new ones. If you're not fussed about the looks of what you've got, a good sealer on the edges should stop them falling apart for a while.
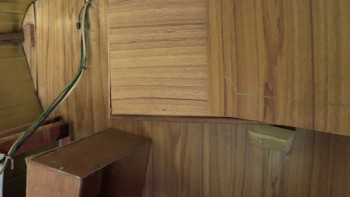
I like the full sized access door for the back of the fridge - I might have to do something like that on mine at some stage - mines just a tiny little door.
|
|
|
|
Post by atefooterz on Feb 15, 2015 9:58:08 GMT 10
I will get some pics when the light is good later, it is all looking quite good plus 99% original Franklin Arrow 1975 that matches the rest of the woodwork as per build. The stupid part is the good doors took less than 1 minute each to re apply a sub latex acrylic to the edges that anyone could have done in the 1980s- 90s or maybe 2000s so the issue never happend, A splash in time saves 8mm non original ply haha!
|
|
Deleted
Deleted Member
Posts: 0
|
Post by Deleted on Feb 15, 2015 15:17:39 GMT 10
Looking Good atefooterz. |
|
|
|
Post by atefooterz on Feb 15, 2015 17:24:45 GMT 10
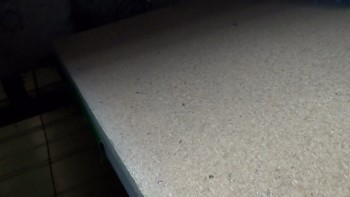
Looking Good atefooterz. Thanks Chuckt, remember Guys,as posted earlier, i have lived in this van almost every day since August last year, so no power tools or shead etc to muck around making new ply doors, the "spanish style Dulux brown looks great to the naked eye as a colour that blends with the ply, even though it is satin or low sheen the camera keeps seeing it as waaay lighter shade than it is haha! All up for less than $20 including paint sample pot & builders bog & sandpaper, most of the work is done by sharp knife because less dust, cheaper than sandpaper but mostly just as it has got passed rubbery in cure, if it cannot survive being shaped then it will just fall out later, ensure that any filler is wet enough to soak & mix togeter the bad crumbly bits in \a slurry= why tape, even if that 1st batch falls out you will find that enough polyester has soaked in to make the 2nd attempt bullet proof..usually! Long term any $ i put into new cupborad doors would not yield much return, maybe just make it sell faster. Most folks seem to want to paint over the veneers etc so if that happened they would still have an "awesome sterile non original result" regardless of new or patched ply. |
|
Deleted
Deleted Member
Posts: 0
|
Post by Deleted on Feb 15, 2015 20:36:21 GMT 10
I lived in mine for a year about 3 years ago then parked it up in the drive since. my lease is up in may so im moving back into it then. hence the mad rush to get as much done as i can before then. |
|
|
|
Post by atefooterz on Feb 20, 2015 0:02:52 GMT 10
Huge day starting with a truckwash bay with gantry & de moth & grasshoppered the Arrow exterior. the white started to appear again from the black diesel dust, even my acrylic paint survived the water blaster high pressure wash #winning . Major dusting & turning work interior mode into clean display mode, luckily i have today to finish that bit, then ready to look for goodies to be snatched on the last day before packup.
|
|
|
|
Post by atefooterz on Feb 26, 2015 20:53:24 GMT 10
A classic thorn among the vintage roses  !! " Corporate Thursday" at the Clipsal 500. I had better save up and buy a classic Mr Whippy Van or maybe a Wards Courier badged one ? It is interesting how the classic car & caravan club folks are merging with interested parties geting into and enjoying each others playthings, huge difference in standard between the pro car folks & the van resto brigade. I can see why some are touchy about the subject of display and presentation, as many caravans would be displayed better than new build, just by habit of the car buffs. Attachments:
|
|
|
|
Post by atefooterz on Mar 7, 2015 22:07:32 GMT 10
A niggly job fixed. A corner was torn so finally got around to sewing a strong reinforced patch under, then try & invisible mend the original onto it. The stress & strain now is taken by the underpiece & extensive webb stitching, getting cotton to match a pain, will do a close up of finished when i get the orangy gold threads down. My sticker collection has grown by heaps! In 1985 i bet the Arrow did not think 15 years later it would be showing off in the Clipsal500 display! What i enjoyed was the car folks really got what an Arrow is, with many saying what i think about upgrading it...well i have a Belmont/ Falcon500, but i like the Premier/ Fairlane grille better & it needs those nifty GTS 3 slots on the fender & a spoiler off a Porche Carrera & presto i do not have an Arrow ( Belmont /Falcon500) anymore. Impressive was that many folks who walked/looked in, after doing the rounds of all the Vintage Vans, were saying "Ahh now this is an oldie!" or "Wow Original!". Most agreed, especially the younger ones that Classics should have a theme like the Vintage ones do with the Betty Boop, Rock N Roll cafe etc. Most agreed upon were Sandman, Brocky, Ted Mulray- get outa my van",Bonus ponts for a white & carnation red Mark Holden. For already painted or timber damaged beyond repair the matt black fluro postered & black light Led Zepplin got high marks! I am sure down the track our South Aussie mates will produce some stunners along these lines as they they get the vibe rather than price pointing those white box mod cons into an oldie. A few punters got top marks as correctly guessing the van would have only had a ceramic jug & pop up toaster as extras, in original set up as a caravan park beastie. |
|
|
|
Post by atefooterz on Apr 10, 2015 12:17:40 GMT 10
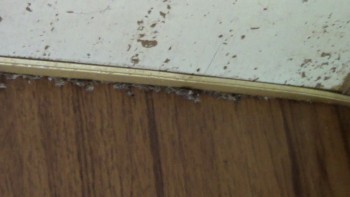
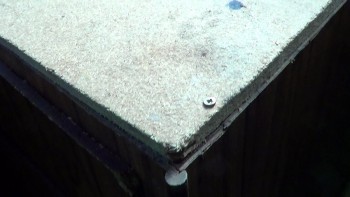
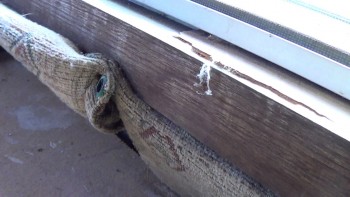
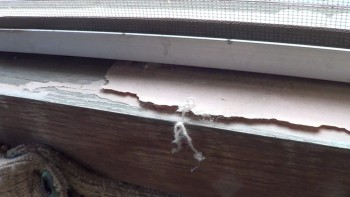
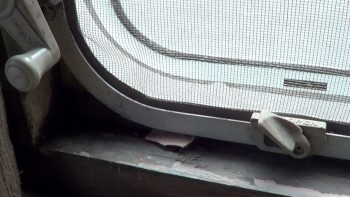
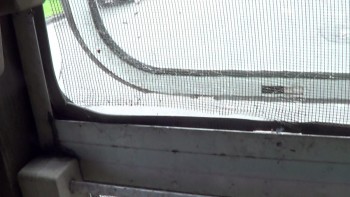
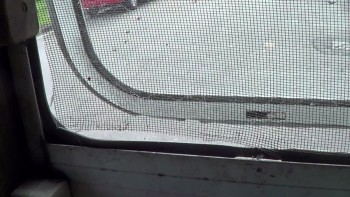
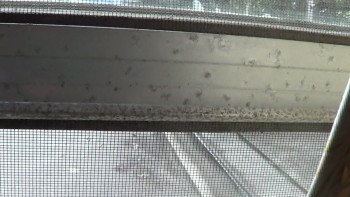
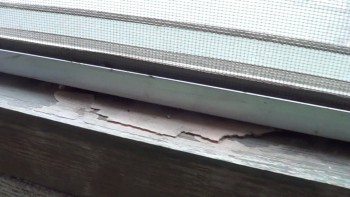
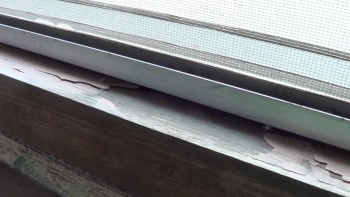
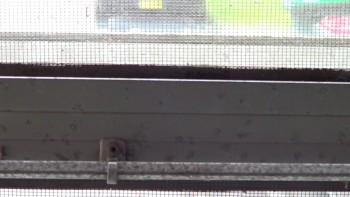
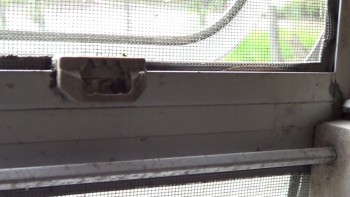
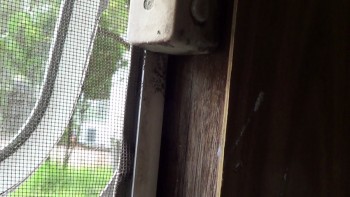
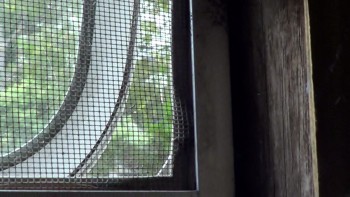
At long last i have finaly had a dry van then get rain while level to see where rear window leaks are comming from, if i ripped them out & did the full re seal it may have stopped the issue, but with no understanding! It appears that the main issue is the dodgey countersun screws along the top allowing capillary corkscrew water along their coarse thred, the flat chanel they hold down also unsealed in a few areas, waiting for some more rain, hopefully in at least 2-3 hours time so temporary sealant has set. No biggie if not, as the white diluted gunge would show leaks pathways, not bored on a rainy day haha!
EDIT: I am only doing it this way as there is a huge amount of previous owner sillycone everywhere (to be removed and done properly later), so what i am doing will not permanently affect the alloy nor painted area, just looks a bit meh while i do detective work.
|
|
|
|
Post by tasmillard on Apr 10, 2015 12:46:04 GMT 10
Good work there! I have done all windows on mine using marine grade sikaflex 291. This stuff is used for boat hatches and the like, so more than enough to keep out rain. Its a biggish job to do all windows, but I am so glad I did as its one less water leak area to worry about. I used fine grade industrial steel wool (not the kitchen variety) and sugar soap, finally cleaning the area with mineral turps. This was for both window frame and cladding area where they mate.
|
|
|
|
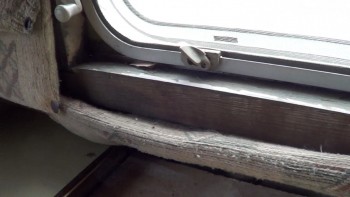
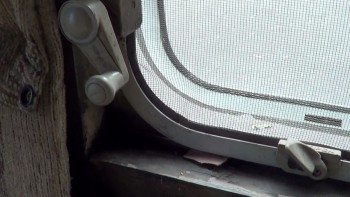
Post by atefooterz on Apr 10, 2015 13:00:11 GMT 10
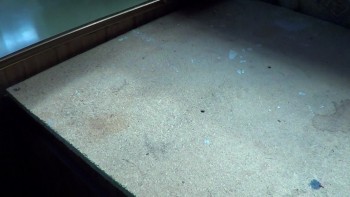
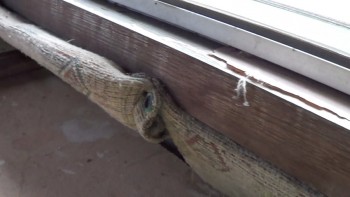
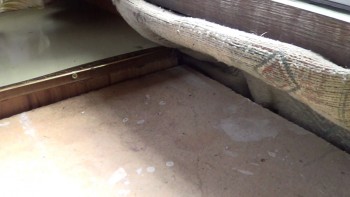
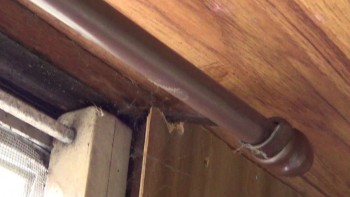
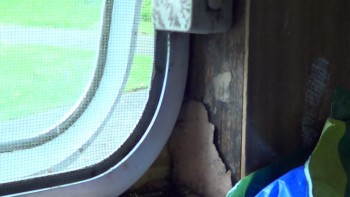
I am looking along the lines that the original mastic surround is still working and the leaks are from above that, looking at the various threads & pics of how these windows sit, plus the issues Peter72 had plus seeing his first hand, i need to understand the where why of it all. Unlike a boat there is no issue of sinking plus the inside was fitted with easily removable cushions screwed over where ply usually hides the area and retains moisture. I have just removed the cushions & have a laminex piece that allows water to fall down to the timber-alloy bilge area that has drains, without my bed getting wet, so no issue of rotting that big floor timber, the corner timbers already damaged but now mostly dry from drains. If i did the sika route then down the track it is a very hard, long or if paying someone extra expensive issue, plus an extra 200g of weight that may or may not be required. |
|


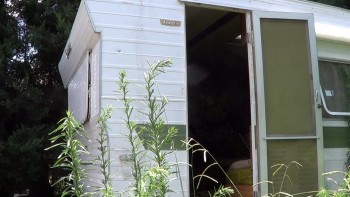


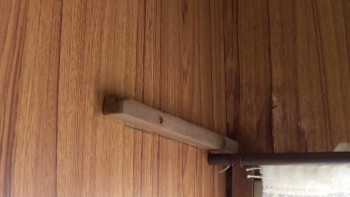


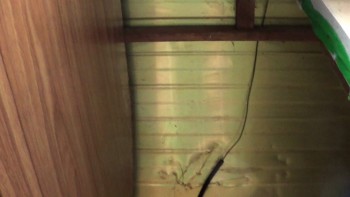

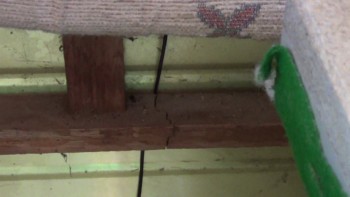
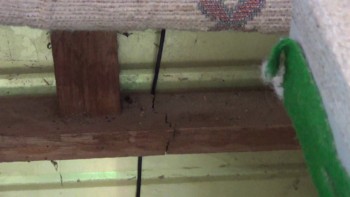
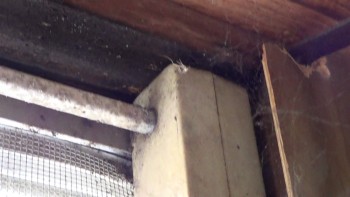

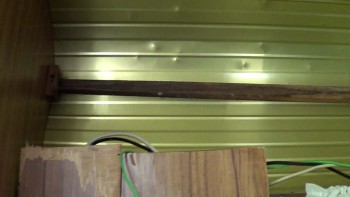
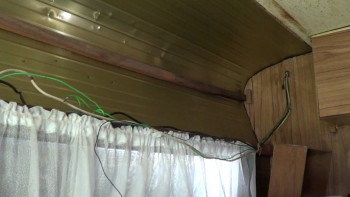
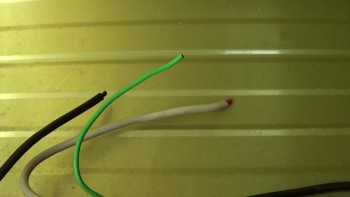
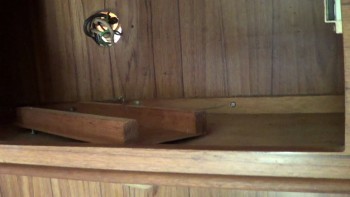
 Ripped a few bits off & discovered why the kerb side has no power as the leads were cut when kitchen ripped out by previous owner. Ripped off fridge outer grate to see if any breakers or switch & just discovered spidey webs & gultch haha. Multimeter & some new twin & earth feeds it seems for tomorrows adventure.
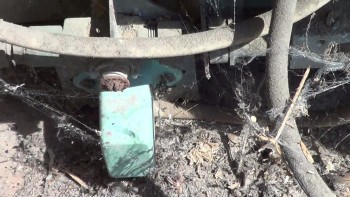


 !! " Corporate Thursday" at the Clipsal 500. I had better save up and buy a classic Mr Whippy Van or maybe a Wards Courier badged one ? It is interesting how the classic car & caravan club folks are merging with interested parties geting into and enjoying each others playthings, huge difference in standard between the pro car folks & the van resto brigade. I can see why some are touchy about the subject of display and presentation, as many caravans would be displayed better than new build, just by habit of the car buffs.


