|
|
Post by kiwijim on Jan 16, 2013 15:11:06 GMT 10
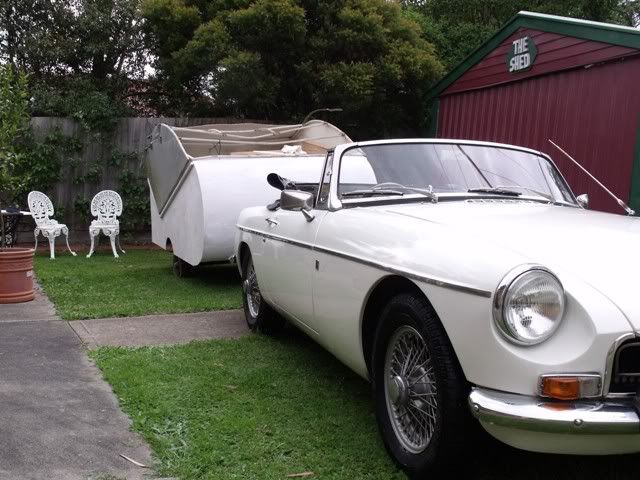
Howdy Al, These power ratings are sure all over the place, I've just checked the Transformer I used on the LED lights, The Multi Meter tells me that the output in volts is 12.22v instead of 12v, and the Amps read 2.55a not 0.7 that it states on the label. That probably explains why the LE D's are going like grease lighting. ;D ;D ;D Now, the other question I would like some Bright Spark to answer is....... will the transformer I have at present, producing 2.55a be too much for a string of only half a dozen LED's  I keep comparing a 12v globe being lite by a 24v battery cheers kiwijim  |
|
|
|
Post by ForumMod on Jan 16, 2013 16:03:57 GMT 10
No, not from my understanding of electricity. An appliance or light will only draw the amount of current it needs to operate. Any excess current in the circuit is just waiting for your finger, errr...I mean other appliances/lights to plug into it.  Edit: I meant to add that the transformer voltage is constant at 12V or thereabouts, which matches the voltage of the LED strip circuit, no matter how many or how few LED globes are in the strip. I've seen some LED lights on ebay where they reckon they'll operate anywhere between 10 and 30 Volts. cheers, Al. |
|
Deleted
Deleted Member
Posts: 0
|
Post by Deleted on Jan 20, 2013 12:57:38 GMT 10
Hello All,
Small transformers are rated for continuous use, and it is very difficult to measure the output as you are measuring 'open circuit' information, which can be quite different from 'on load' rating.
Eg. An open circuit voltage of 12.5 - 13.5 would probably equal 12.0 - 12.2 on load.
Measuring current by just using a multimeter gives a large false reading as you are only using the meter as the load - I tend to rely on the 'listed' rating as it is possible to draw more current from the transformer, but it will run hotter than normal and won't last as long due to the extra heat breaking down the insulation.
As Al said, the transformer will not supply too much current.
Regards,
Chris
|
|
|
|
Post by kiwijim on Jan 24, 2013 1:53:38 GMT 10
Howdy Chris, Well someone said the other day that using a low wattage transformer would only do damage to it........... correctThe 0.7a transformer I used the other day to run the string of L.E.D.'s is now "KAPUT" dead as a doe doe. I thought it might have been the LED's but, on taking the lot out to the shed and ran the string of led on a 12v 8w transformer, they were all O.K. "Oh Well" off to the Salvo's shop in a day or three and find some more transformers. UPDATE on the Coromal........... I've finally finished relining the interior above the stove and front wall,...... 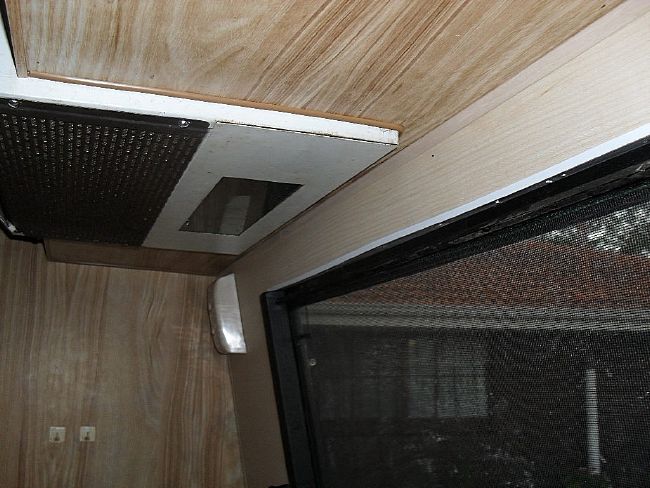  Also finished the new double bed................ 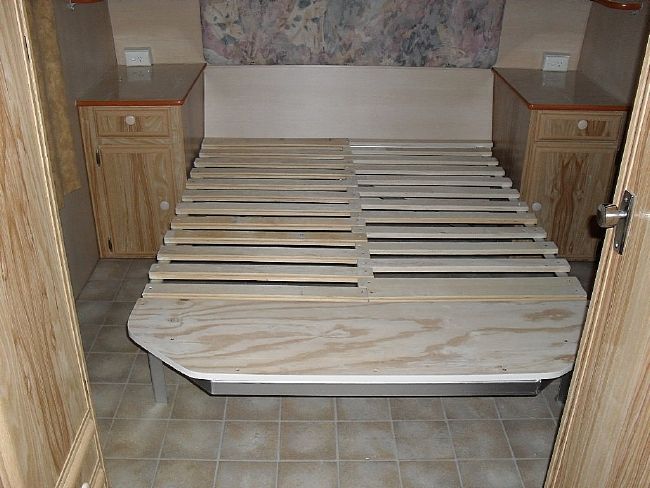 I went to the markets the other Sunday, was talking to a Bloke who was demonstrating the new range of replacement LED globes, A person walked past and knocked a globe off the stand which crashed to the ground and shattered the reflector, the person kept walking without looking back, the stall owner did his nut saying, there goes $18.00. I offered Him a couple of bucks for the wreckage, took it home and after removing all the broken glass reflector, I fitted the led's into a Halogen casing I had in the shed........ Similar globe that I grabbed for $2.00........ 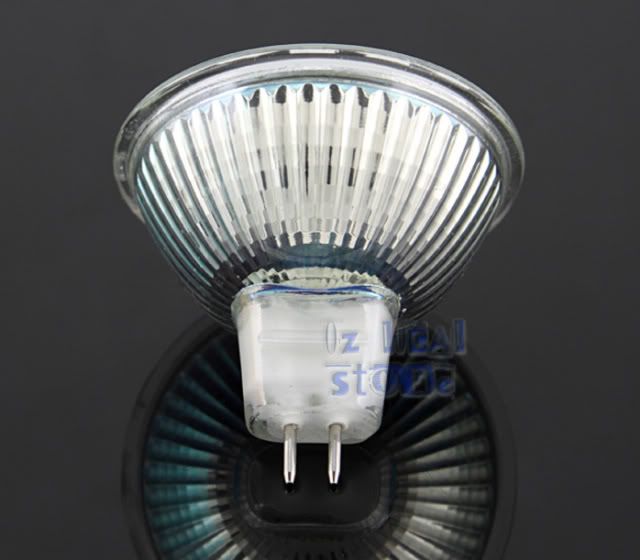 the 12 led's fitted into the old 12v halogen down light......... 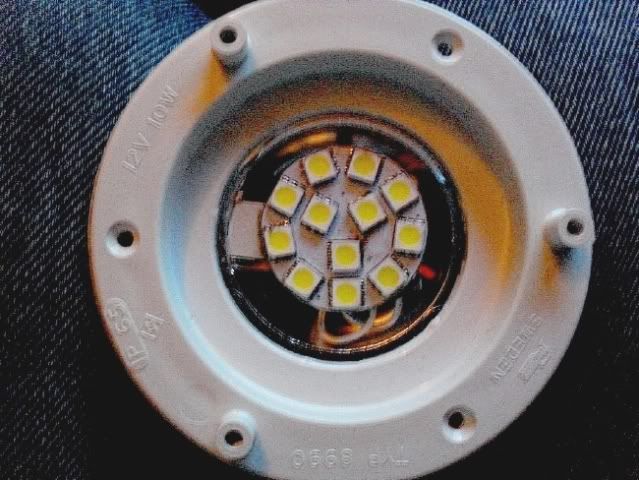 I stuck the case back together and switched on, Brilliant......... 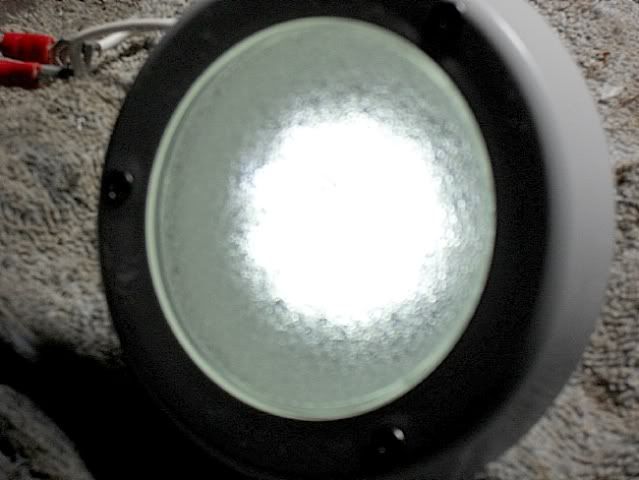 The next job in the van will be cutting a hole in a cupboard to fit a Micro-Wave, cheers kiwijim |
|
|
|
Post by ForumMod on Jan 24, 2013 10:58:24 GMT 10
G'day kiwijim, Well that's certainly got the van looking a lot better! Interesting conversion of the light fitting too! You sound like you're the same as me...someone who likes to tinker with stuff to create something useful out of bits of junk. ;D cheers, Al. |
|
|
|
Post by kiwijim on Jan 24, 2013 15:41:42 GMT 10
Yep, You're right Al, The Missis reckons I'm a tinker from way back, just can't throw anything away with-out trying to fix it or adapt it to do something else. We had a local junk collection here this week, "Man" was there some goodies on the verge, ;D ;D ;D  I scored an upright air con, one of those pedestal types,........ t  The bottom container that holds the water was jammed shut, not for long,........ 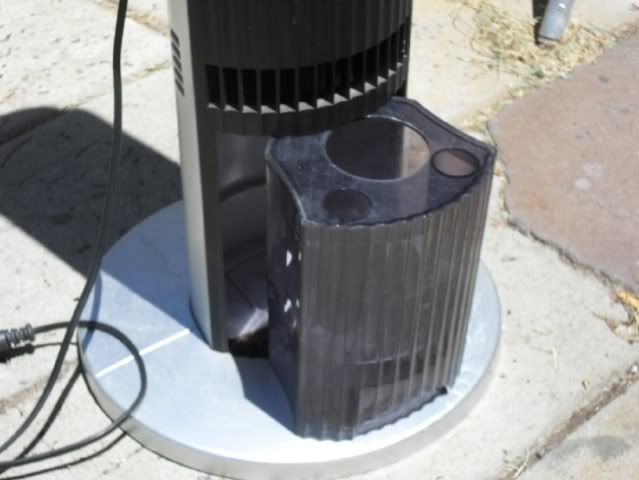 Had it working in 5 clicks flat, lovely and cool in the shed now ;D ;D ;D kiwijim ;D |
|
|
|
Post by kiwijim on Jan 26, 2013 15:15:17 GMT 10
We were in Kmart the other day and bought a very expensive Micro wave oven ( $45.00 ) for the Coromal. When I got home the temp was only in the mid 30's so, into the coromal and ripped out the end door of the storage shelves, chopped half the door off and installed the Micro wave...... 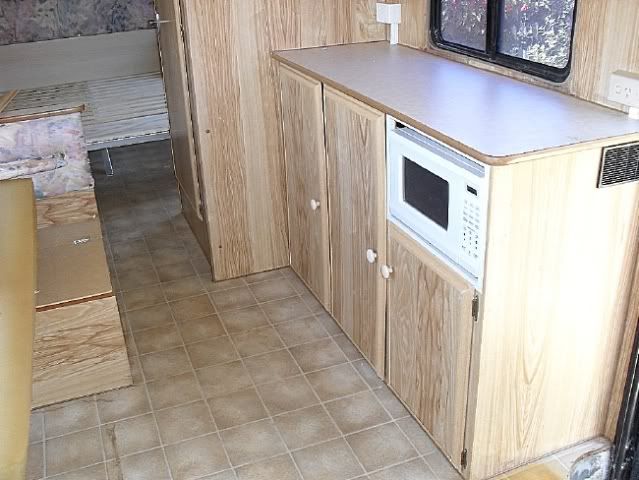 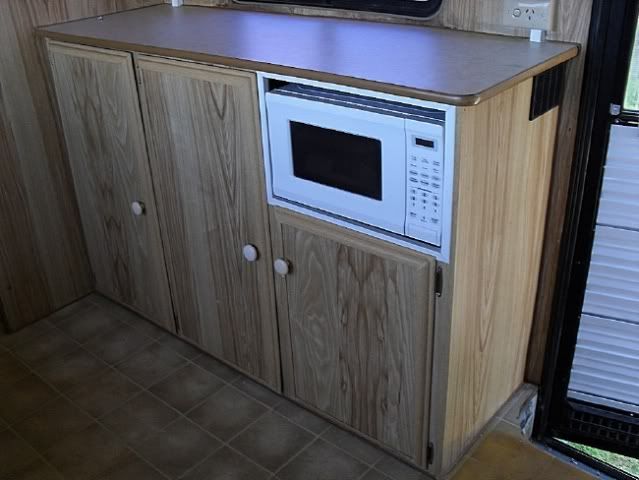 Just to stop the oven from bouncing around while traveling, I attached a steel strap over the oven and stuck felt pads on the inside of the strap, this should stop the oven from slipping out off the shelf............ 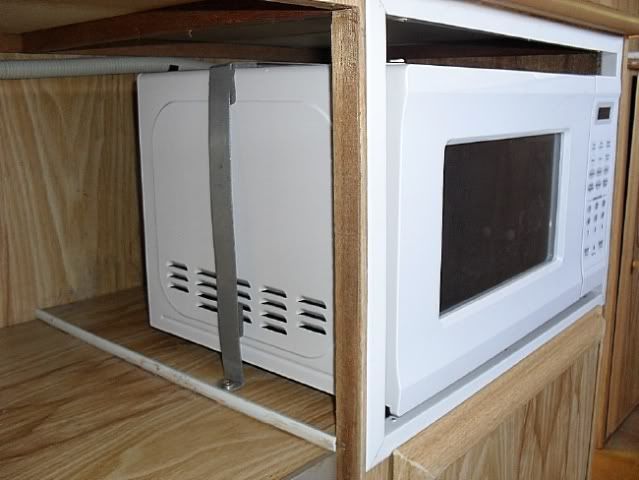 I then found a small air vent in the shed which I fitted into the wall at the rear of the oven....... 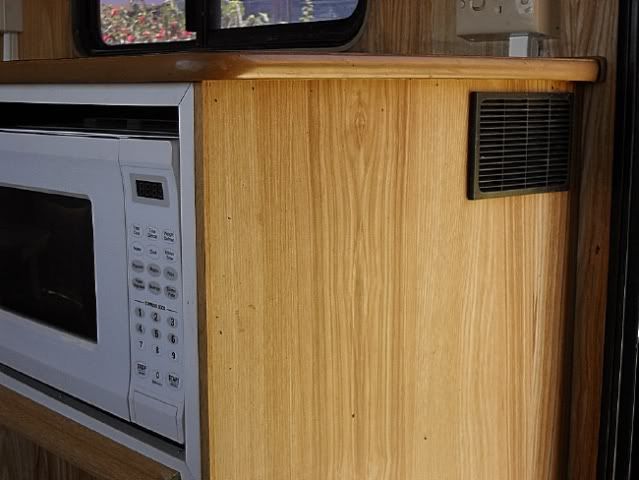 Next job, laying some new Vinyl in the front half of the van, after that I can re-install the 3 way Fridge, ... getting there !!! kiwijim ;D |
|
|
|
Post by jeff on Jan 26, 2013 16:40:58 GMT 10
Very neat job kiwijim, given me an idea  cheers |
|
Deleted
Deleted Member
Posts: 0
|
Post by Deleted on Jan 29, 2013 21:53:09 GMT 10
Jim,
Your an ideas man.
Love the work on the van, still trying to pop in for a look
Teflon
|
|
|
|
Post by kiwijim on Feb 5, 2013 19:43:02 GMT 10
Lucky I'm not holding a " COLD ONE " for ya Teflon,with this hot weather, the fridge is looking pretty empty at the moment. ;D ;D ;D Latest up-date,We went to the Markets again last weekend, found a roll of floor Vinyl going for $ 60.00, 5 min later the Missis was pushing it out the gate on her trolley to the tune of $ 50.00. Then later, the fun started, I decided rather than cut the Vinyl to the shape of the floor in the Coromal, I thought why not loosen all the screws holding the furniture to the floor, then raise it all by using a screw driver and push half of a cloths peg under the frame from the inside, well, a good couple of hours later I had all the furniture pegged to a height of 5mm. Next the measurements started, remembering I had to allow an extra 15mm on all outside measurements, here's the result...... 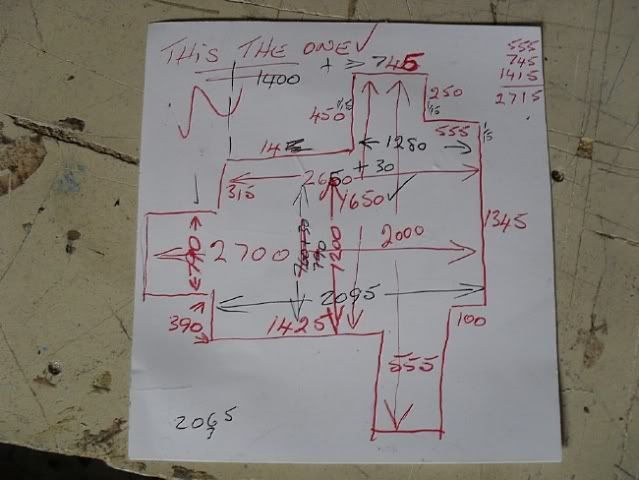 A couple of hours later all was done, the new Vinyl went under the furniture pretty easily and looked a lot better than cutting to size........ 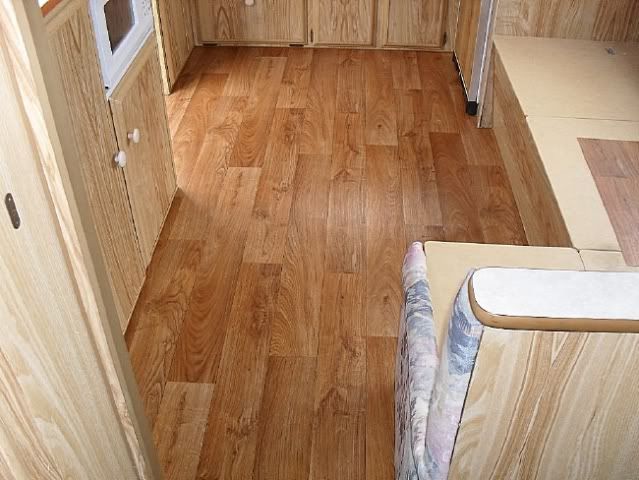 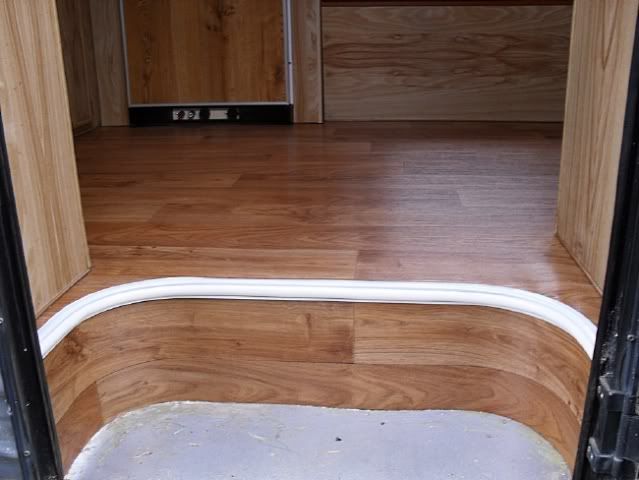 Next I re-fitted the three-way fridge ........... 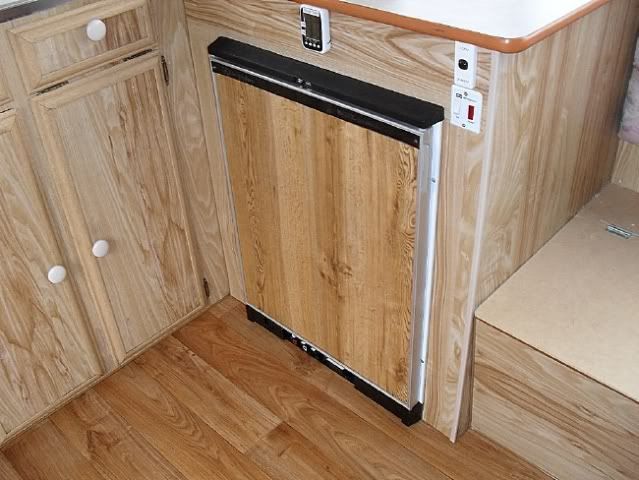 The next job, will be finishing off the step, I will have to hunt down some 12mm rubber for this. The fun will continue........ kiwijim ;D |
|
|
|
Post by ForumMod on Feb 5, 2013 21:50:52 GMT 10
Wow, mighty fine effort there, kiwijim! It must have been a real fiddly job to get the pegs under the furniture, and then try and get the vinyl underneath. You're a braver man than I am.  Love the plan on paper! ;D Seems pretty easy to read. No chance of cutting anything to the wrong measurement. Yep, all pretty straightforward. Gotta hand it to ya for getting it right! ;D ;D I reckon if you took this van back to the person you bought it from, they'd be gobsmacked at how good it looks now. cheers, Al. |
|
|
|
Post by kiwijim on Apr 3, 2013 3:19:46 GMT 10
Well The weather has finally given me a break, The Humidity has headed back up North and the Temp is slowly coming down to something livable again. So, back into the Coromal. In the last Month I have been giving it a bit of stick, All the wheels and bearings have been off for inspection, clean and repacking, I only had to replace one inner Bearing as it was grinding, then repainted all wheels inner and outside and refitted all, at the same time the lower side of the Coromal also got a freshen-up...... 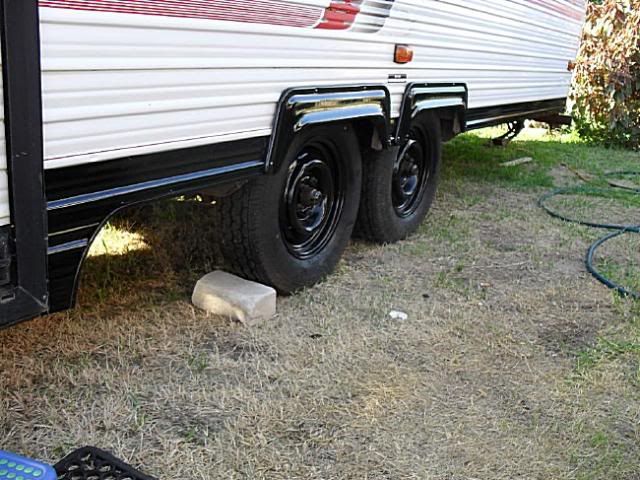 The L.E.D. lights I ordered from China arrived so fitted them all in place of the 12v globes....... 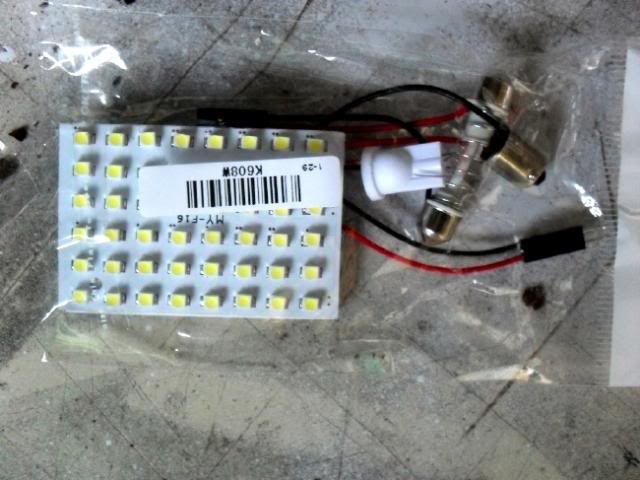  This is a picture of the L.E.D's first in day-time then at night..... 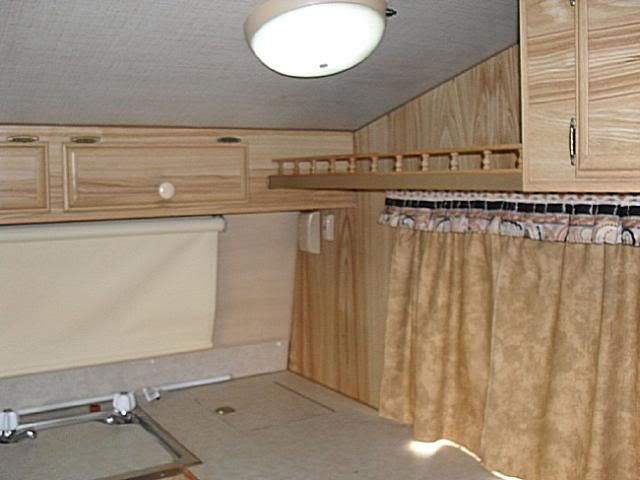 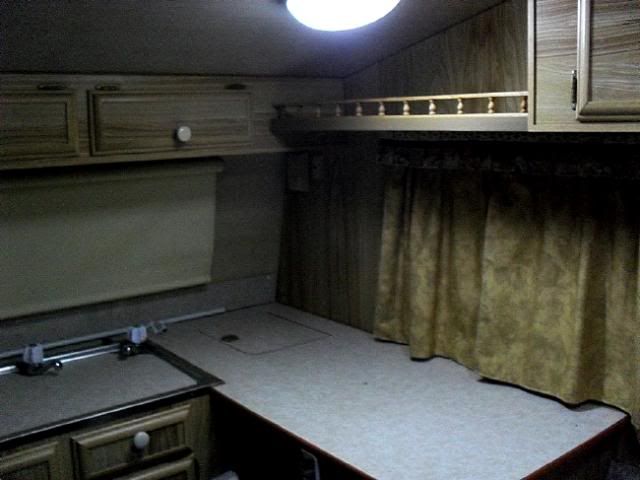 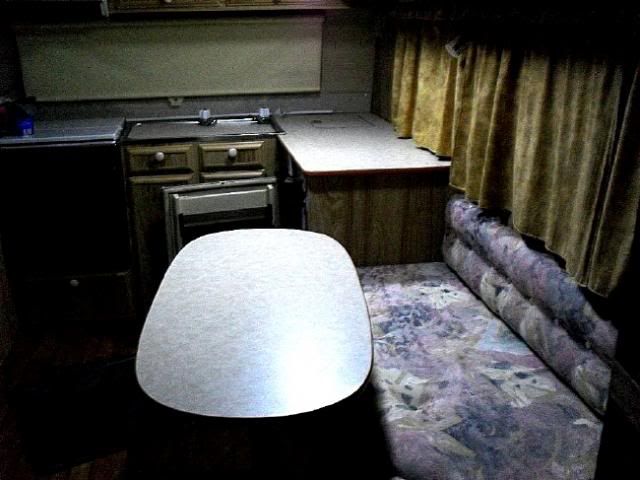 I'm more than happy with the light these L.E.D's produce. I have also fitted an internal 12v Deep Cycle Battery to run the L.E.D.s while camping in the bush...... 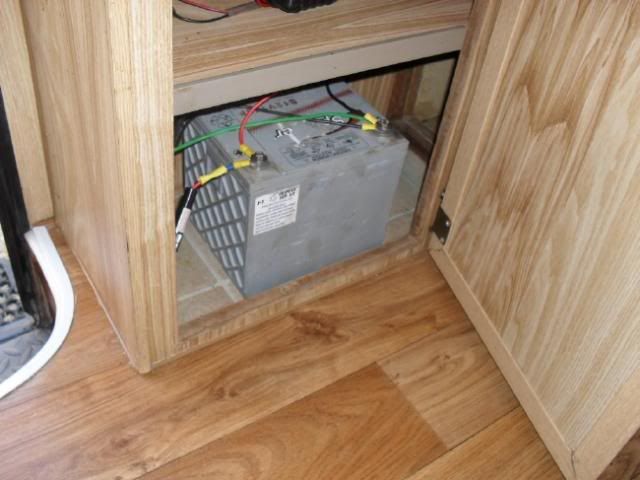 Then fitted a external power connection which is connected direct to the Battery and in-turn has the folding Solar panel connected to it..... 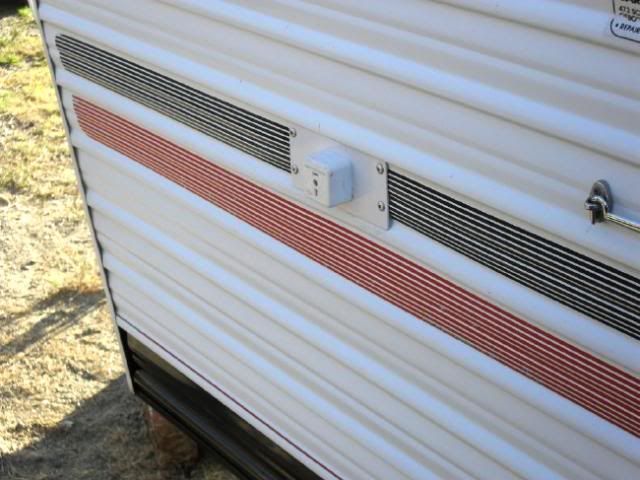 I've finally finished the new upholstery, after going through 3 sewing machines and borrowing one from the Daughter...... 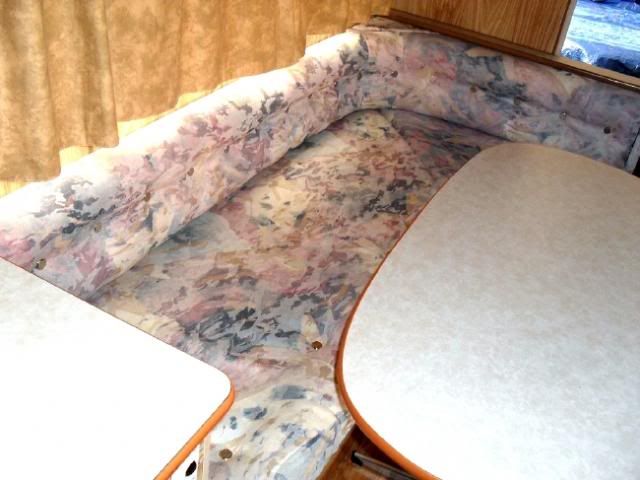 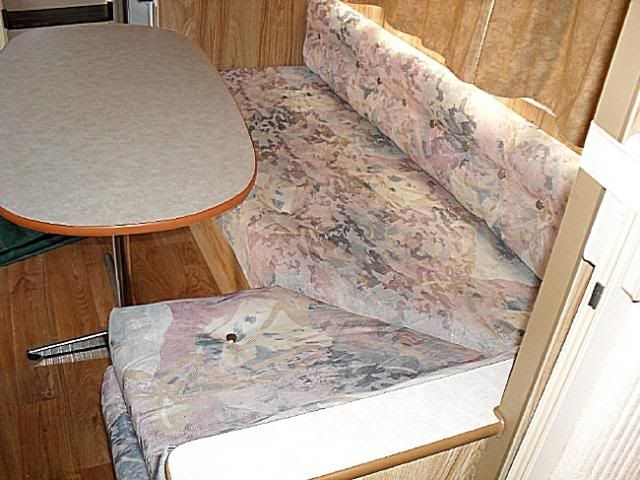 Even got carried away and bought some lace curtain material, then whipped up some new window dressing........ 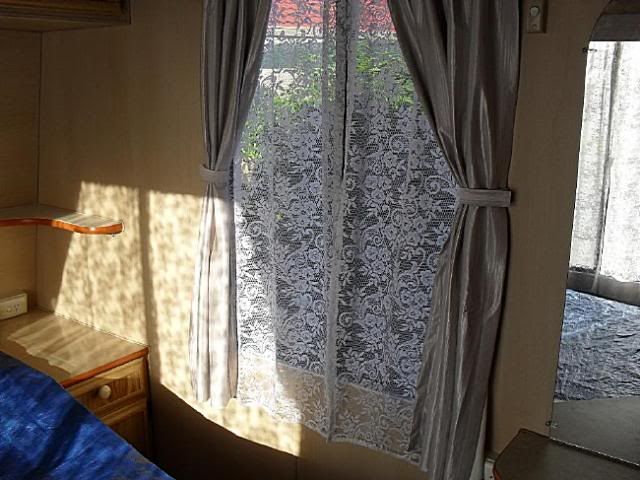 "NUP" sorry fella's, not taking any orders. ;D ;D ;D More to come. kiwijim |
|
|
|
Post by bobt on Apr 3, 2013 17:19:41 GMT 10
Very impressive young fella.
You will not know ya self with the LED's, they give great light and go easy on the battery so it is gain gain all round. I note you mentioned 'solar panel' so is this the new 'green' kiwi?
Like them curtains wish I was there when you were sewing them up. I am sure you did it under some close supervision. You should have got on to that fellow in NSW with the real sewing machine to do the upholstery. Looks good.
Glad to see it is all coming together nicely.
Ya never know ya might just get to see them wild flowers yet.. ;D
|
|
|
|
Post by kiwijim on Apr 3, 2013 18:05:31 GMT 10
Howdy Bobt, "Yep" happy with the L.E.D's alright but, it payed me to order an extra set because one was a non-goer, not really worried as the six I bought only cost a total of $13.00, posted free from China.  Yes, you are looking at the new slim green Kiwi Machine, we won't be doing any cooking inside, except boiling the kettle in the morning, the rest of the cooking will be done outside on one of those "El cheapo" cartridge cookers from Kmart. Another rather warm day in the West today so, up early again and fitted a second water tank under the coromal, don't say the filler hose is too low because I yet have to fit it properly ........ 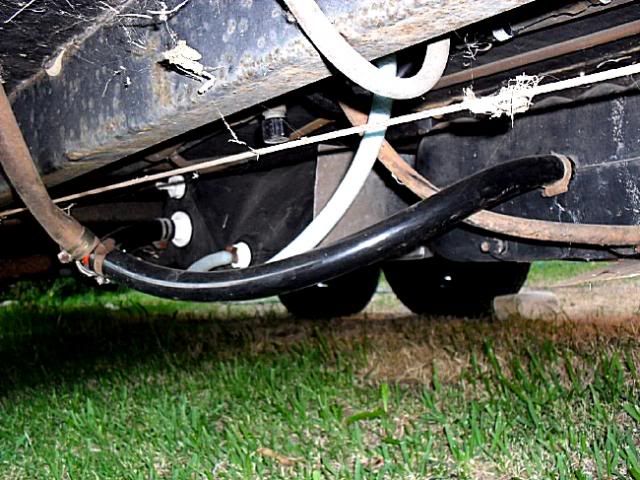 WE will now have a total of 145 Lt of water on board, good for a half a dozen showers. I scored a new Mattress of Gumtree recently, ( $ 250 ) exactly the right size for the D/bed........ 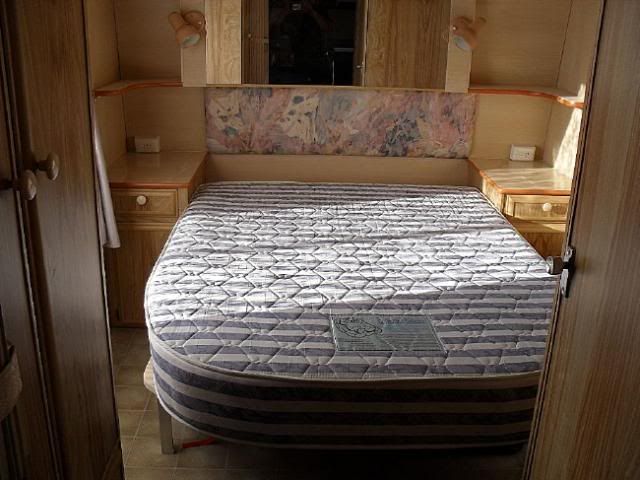 I've also fitted the T.V. hinge bracket to the wall in the arch way, It's held against the wall with an Ocky strap and rests on a section of angle frame with felt pads at the bottom and on the rear wall........... 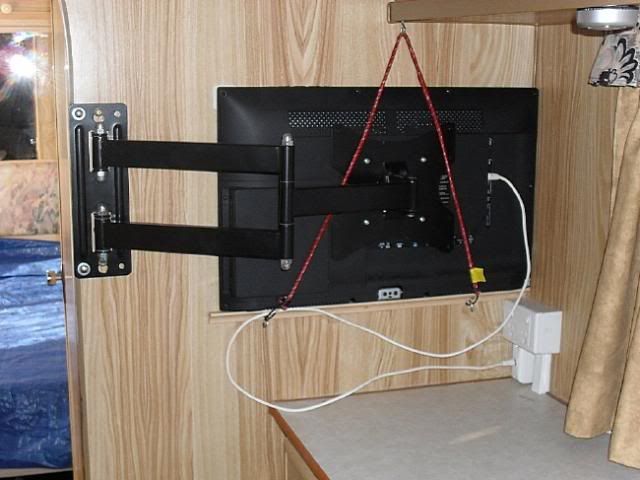 swung around for viewing from the lounge........ 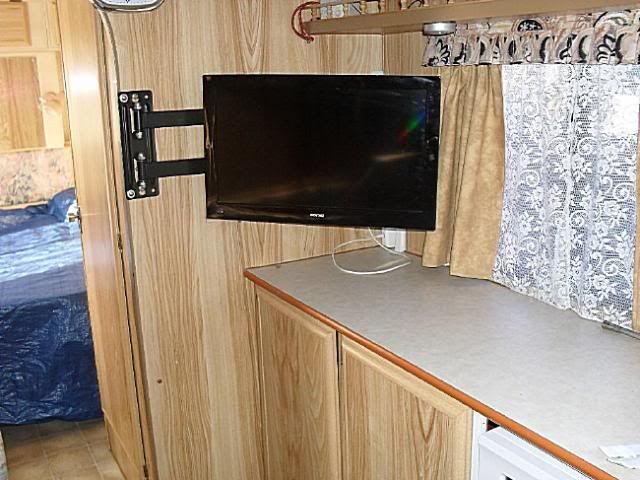 Then swung further for viewing from the D/bed........... 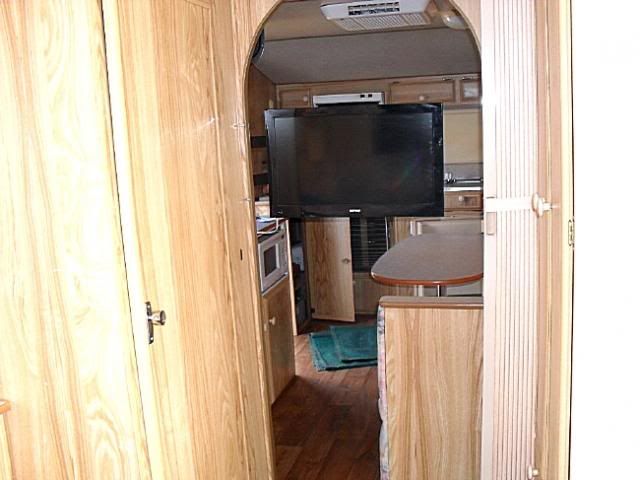 The next job which I am definitely NOT looking forward to, is stripping all the old cracked and damaged Decals off the both sides of the van, I've spent a good few hours already of this job and after all that time and a bottle of turps, a bottle of Tar remover and the heat gun, This is all I have achieved so far....... 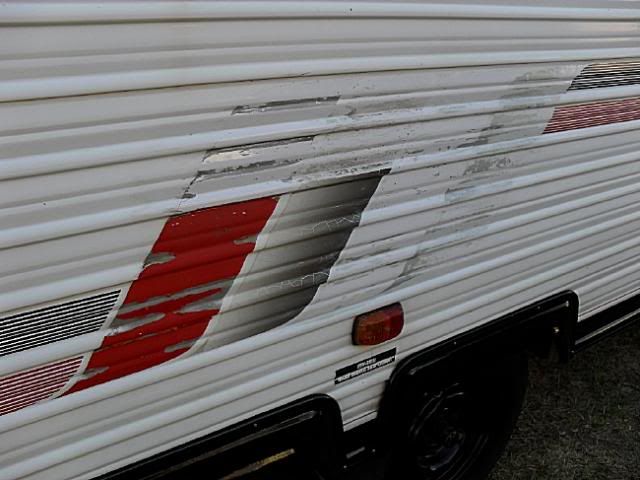 Lucky we don't plan to take off on the Wild Flower tour until Mid August, I may get the van finished by then, that's 14 months since we bought it. " Strike Me " kiwijim ;D |
|
|
|
Post by ForumMod on Apr 3, 2013 21:54:11 GMT 10
By jingo, by crikey kiwijim...I thought you'd given up on the van due to the summer heat! But you've certainly been slaving away, and the van has come up a treat! Where did you get that 12V power inlet from? That looks like it'd be pretty useful for solar power connections. I had a big enough job trying to remove the original Millard stickers on the poptop, so I'd hate to be trying to remove all the decals like you're trying to do. Great effort on the van! ;D cheers, Al. |
|
|
|
Post by kiwijim on Apr 4, 2013 1:07:41 GMT 10
G'day Al, Yes, I did give away working on the Coromal for a few weeks, I don't know if it's just me, or if the Summer temp here in the West is getting hotter each year, this year I have really felt it and the Humidity has been knocking us Ole Fellas around something shocking as well.  That external 12v power connection is available from Camec, ( Check their catalog in the electrical section, item No 32 ) and probably any other good caravan store, I can't say what they cost because it must have fallen into my bin back in my working life. ;D ;D ;D It will probably take all the time I have left to remove those Decals, off the side of the van, I was thinking of even giving paint stripper a go, but that may effect the aluminum. I'll just keep at it with the turps and plenty of elbow grease, it ain't going to beat the Kiwi.  kiwijim |
|
Deleted
Deleted Member
Posts: 0
|
Post by Deleted on Apr 4, 2013 21:16:25 GMT 10
Hello gentlemen, The "12 volt" connection is an old style 32 volt (ac) plug used commonly in workshops etc. over 25 years ago - but as with most 'functional' items, it has found many new and innovative uses. Kiwijim, Try soaking the decals in kerosine (dries out much slower than turps) every 20minutes or so for a couple of hours - then get out the hair dryer (or heat gun) and warm the decals until they become soft ........ they will peel off reasonably well. The rest of the van is looking great !!!!!!! PS I still prefer my FREE led lights  LED lighting 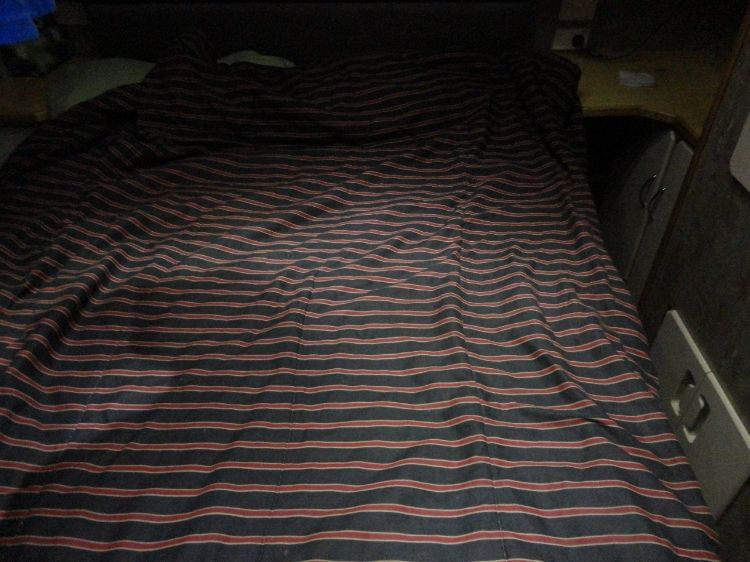 240v lighting 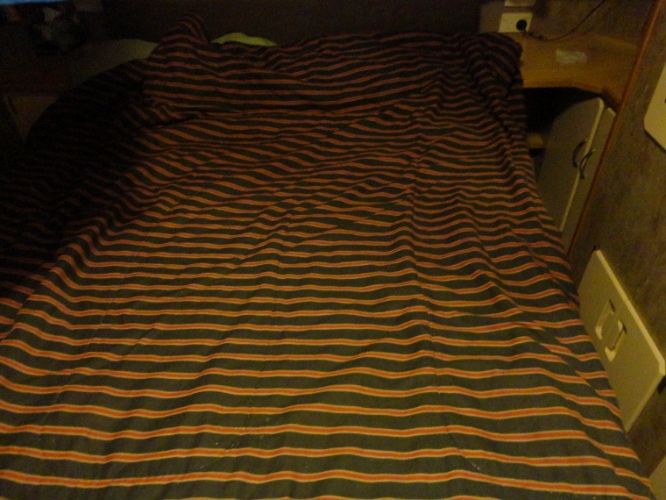 Chris |
|
|
|
Post by drylander on Apr 4, 2013 23:53:13 GMT 10
love the tv bracket Jim but how solid is it attached...my cupboards are only thin ply so I guess you added reinforcing
to the inner wall?
Pete
|
|
|
|
Post by kiwijim on Apr 5, 2013 6:32:17 GMT 10
Thanks for the info about trying Kero Chris,The plastic stickers are pealing off pretty easily, it's the flamin glue they used that is the problem, heat seems to only make it go harder and even using a chisel makes very little impression on the stuff, Anyway I'll give the Kero a go, any new ideas are always welcome. Free L.E.D.'s in your van !! now you can't get any better than that, lookin really neat as well. Pete, The wall where I attached the T.V. bracket is solid timber behind the wall lining, I used 4 x 7mm Coach Bolts which go right through the wall and are nutted on the rear. The frame of the arch way is two pieces of Miranti with a thickness of 25mm x 50mm from top to bottom. there is no way the T.V. will ever move or fall off the wall ( hopefully )  cheers kiwijim |
|
|
|
Post by ForumMod on Apr 5, 2013 10:36:26 GMT 10
G'day kiwijim,
I ended up using unleaded petrol to help remove the glue left behind after the Millard sticker was removed. I used a hot air gun to shrivel the sticker up, and like you say, there was a layer of glue left behind. I made a small pad out of an old singlet and dampened that using the mower fuel can. Then I dabbed the pad on a small section of glue (about 100mm x 100mm) and waited for 30 seconds for it to soften the glue. I then used a timber scraper (which won't mark the aluminium) to "chisel" the gummy glue away from the surface. Took a few hours to do just the Millard sticker, so I'd be marking off a few DAYS if I was doing the side of a van.
ps. I tried every chemical I had in the house and the shed when I first started trying to remove the sticker. Metho and acetone (in nail polish remover) will both take the white acrylic paint off the aluminium, so I quickly crossed them off after trying them on a very small section. Kero didn't work for me; neither did eucalyptus oil, tea tree oil, nor various household cleaners. Unleaded petrol was the only one that softened the glue, but nothing actually removed the glue of its own accord.
Thinking about it just now, I don't think I tried WD40, and it's supposed to have a million different uses apart from protecting metal.
cheers,
Al.
|
|
|
|
Post by annieoakley on Apr 6, 2013 10:38:17 GMT 10
I once worked with vinyl signage. I haven't removed it from a caravan but often from painted surfaces. We used eucalyptus oil. Dab it on and leave for an hour or two to soak in then scrape off. This is safe for the painted surface underneath. My experience has been mostly with inside walls not in direct sunlight. If the glue was very dry from sunlight I would extend the dabbing process over a couple of days to moisten thoroughly before scraping.
|
|
|
|
Post by kiwijim on Apr 6, 2013 16:34:01 GMT 10
Well I went out into the Scorching Hot W.A. Sunshine today, A can of petrol in one hand and a cloth in the other, Two hours later I gave it away, The flamin Petrol evaporated off the van as fast as I could apply it and the glue is still there, although a little thinner. I've a good mind to use some paint stripper and repaint the van when finished. I'll give that W.D. 40 and also the eucalyptus oil and for that matter I'll try anything that is recommended. It's not going to beat me, that's for sure. kiwijim |
|
|
|
Post by bobt on Apr 7, 2013 16:54:03 GMT 10
scorching hot sun!! Think I would have skipped that effort and found something else to do. You could always leave the stickers the way they are and go with the "Rat Rod" Look. Tis all the trend these days I am sure I heard em say it had rained in Perth. Musta been some news show replay from another decade. bobt |
|
|
|
Post by kiwijim on Apr 7, 2013 19:24:15 GMT 10
"Yep" If the memory is right, I think we did have one wet day her in the West. Now was that a couple of weeks back ? or longer Anyway, "Old Hewy" must have looked down and said.... "Right" one damp day, just to give you guys a bit of hope and now you've had it, then grabbed the heater and gave us the full 2400watts ever since. Back under the air con again, maybe next week could see some more action.  |
|
|
|
Post by kiwijim on May 14, 2013 17:08:25 GMT 10
Well here we are again, Another month gone bye and a wee bit more done to the Coromal. It's taken me over a month to remove the old Decals from the sides of the van, I used a couple of bottles of Tar & Bug remover, the heat gun and a bottle of Turps, but in the end it's come up alright. Here's a shot just after I started on the removal job....... And here it is today after a whole months rubbing, soaking, and rubbing some more, "Never Ever Again"........ 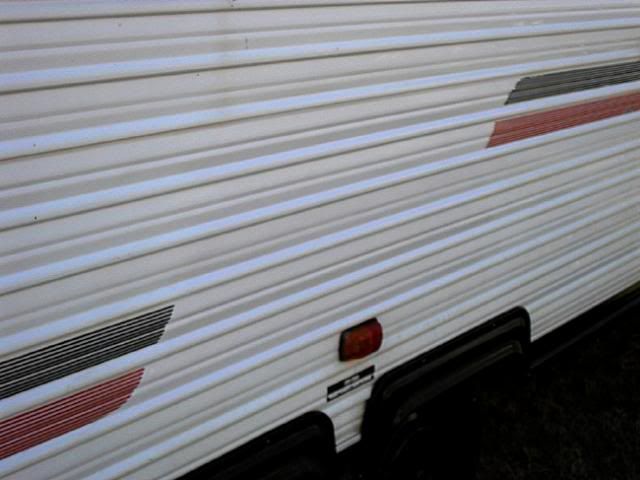 As yet I haven't decided weather to repaint the removed Decals back on the side, or just leave it as it now is, to tell the truth, the pinkies are screaming for a rest. cheers kiwijim |
|