Deleted
Deleted Member
Posts: 0
|
Post by Deleted on Jun 5, 2012 13:13:00 GMT 10
Hi folks, I have got to say that I just love this site, the information is fantastic, especially the blow-by-blow renos. I just wanted to share my little project with everyone too – not that I’ve actually started yet, and I have a feeling that ‘little’ isn’t going to be the most accurate description! Anyway, I decided a while ago that I would like to buy a van as a project, and after annoying everyone within 500km that ‘may’ have an old fella lying around somewhere I was lucky enough to find this: (apologies if the photos appear dark, the only time we could get to have a look was near mid-night, before it rained and the roads became slop). 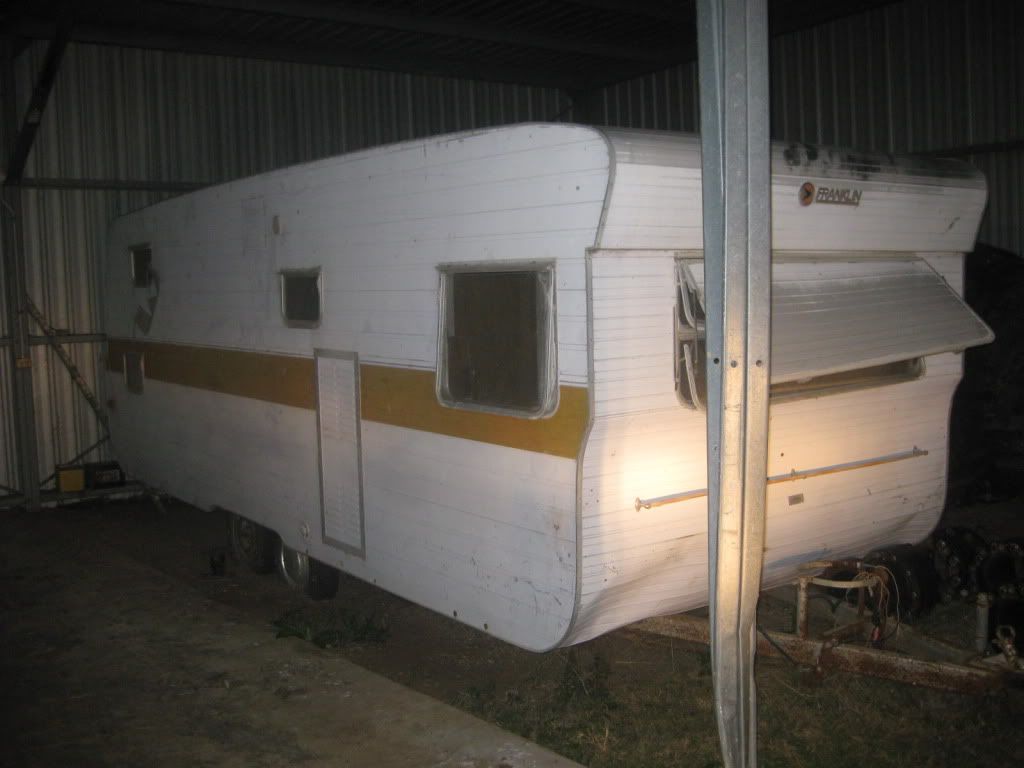 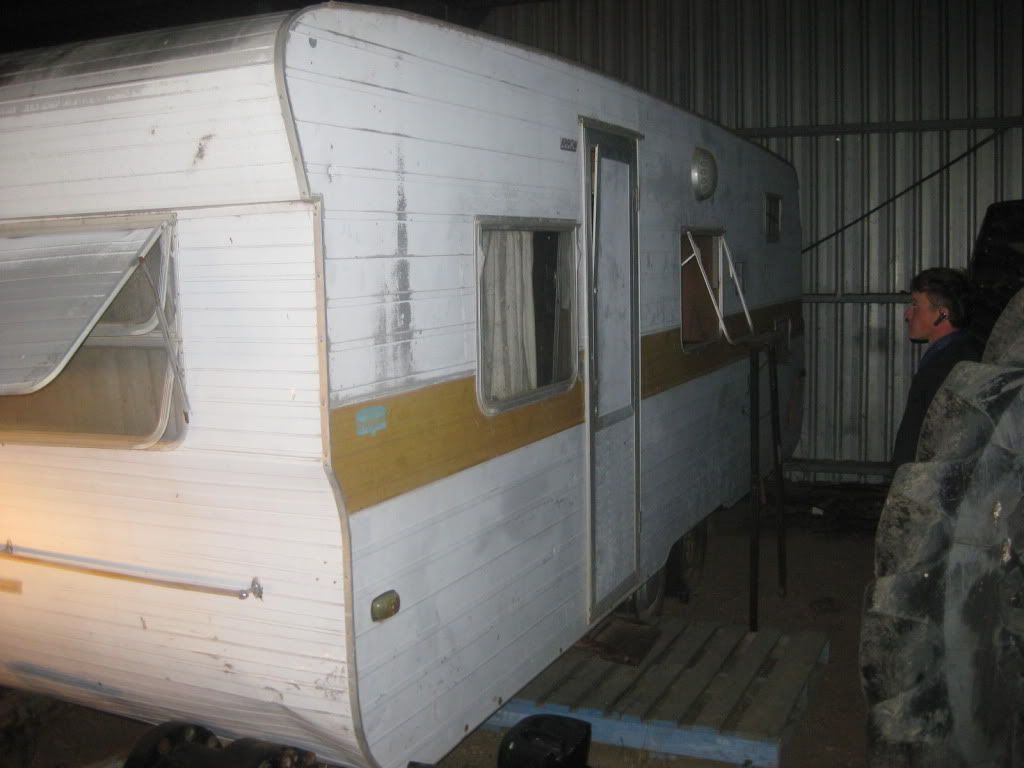 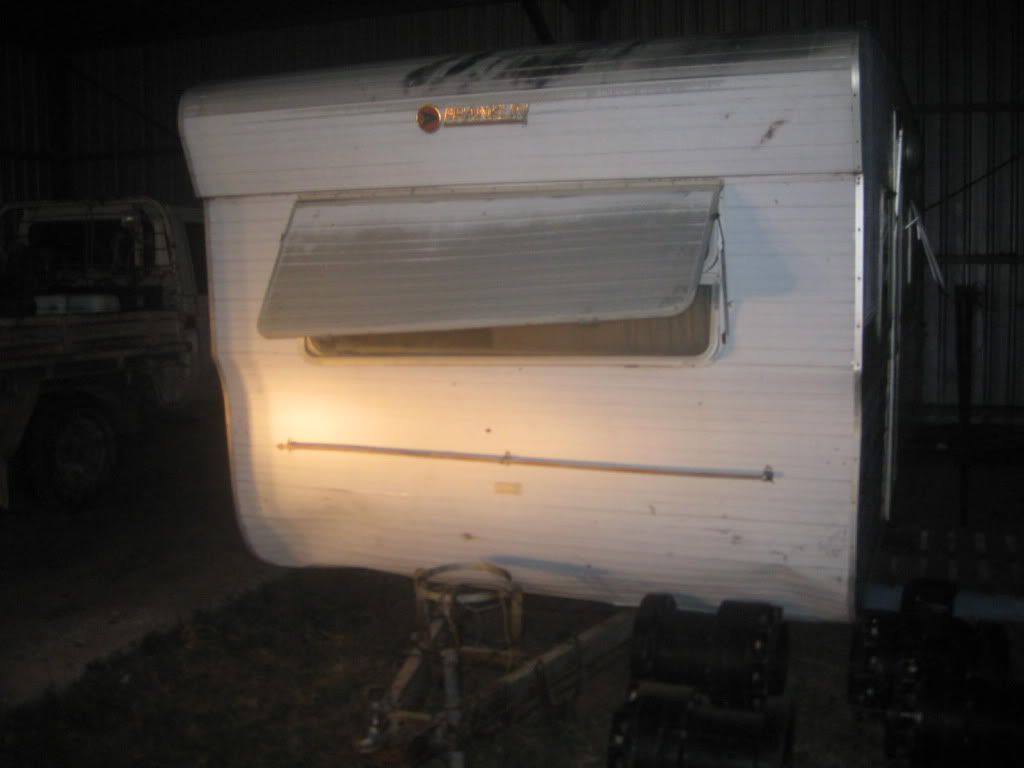 ...in a shed on a property at a grand price of free (it is taking up valuable shed space apparently). I won’t be able to get to it for another week or two, but I plan to move it to another property out there and take up their valuable shed space while I attempt to do my reno. I took these photos when I first met him… now christened Frank (because I’m super creative). Here is the interior: The swollows have made themselves at home! 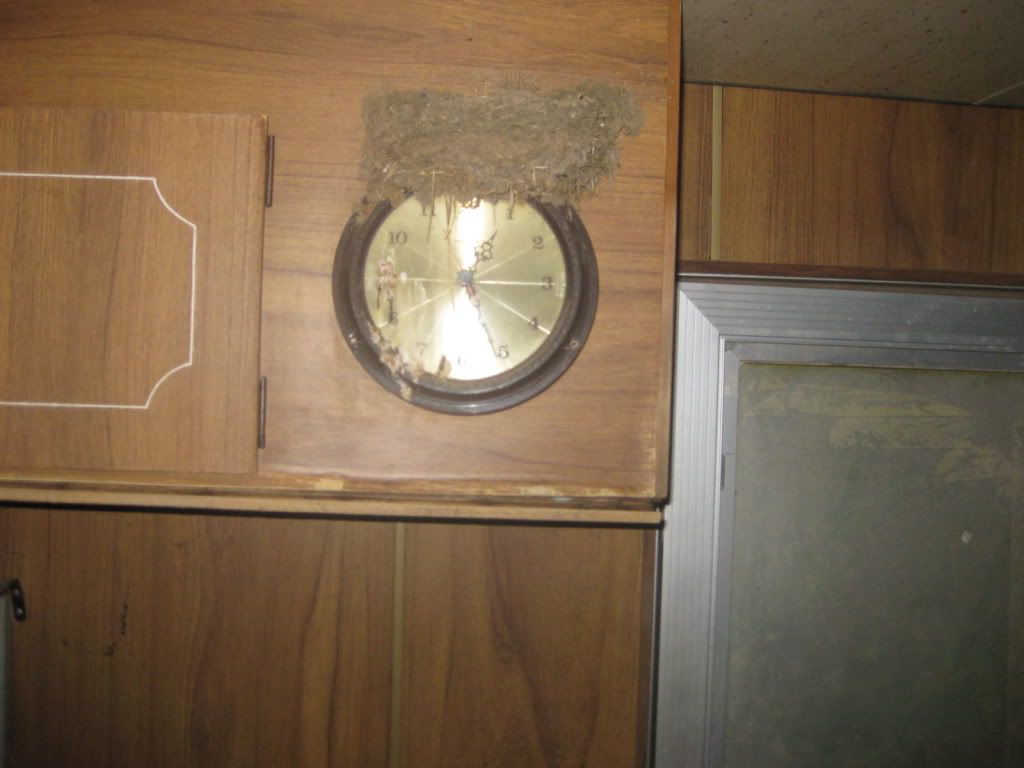 The first hatch:  Looking back towards the 'main' bedroom: 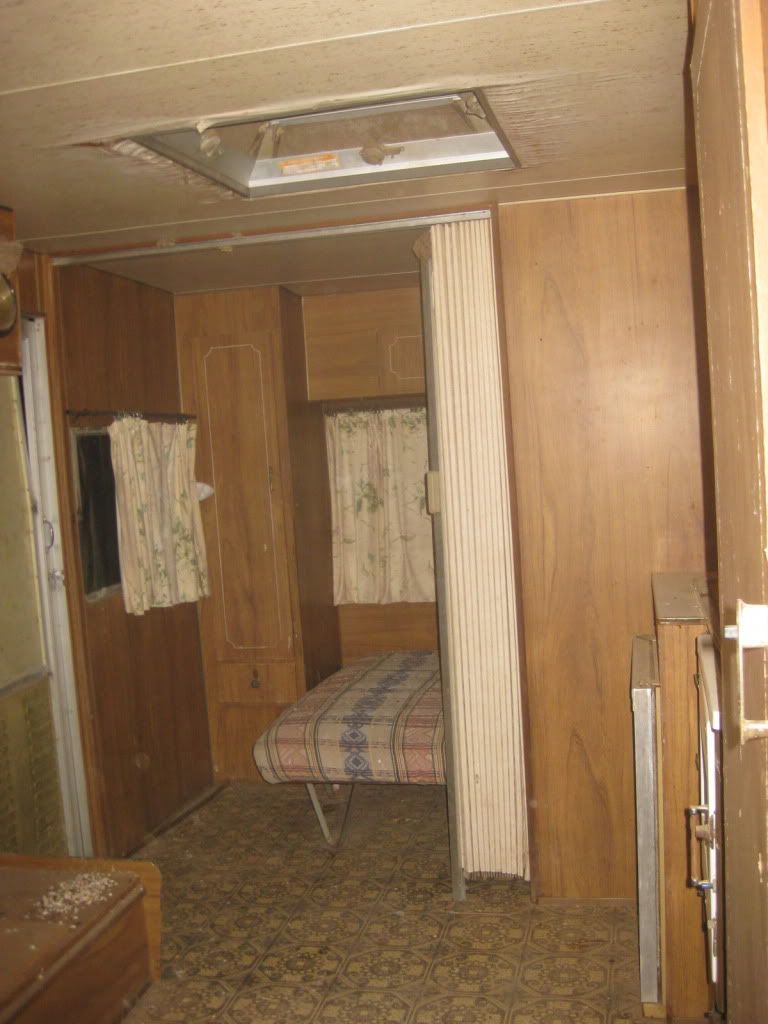 Looking into the 'bunk' room: 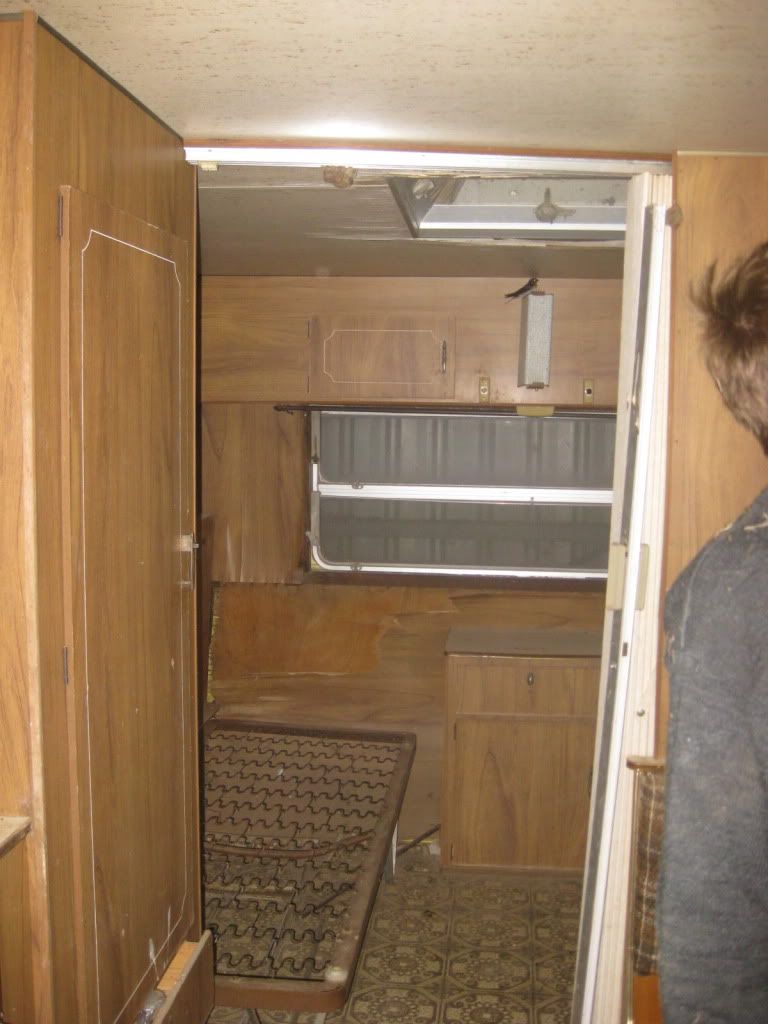 The kitchen: 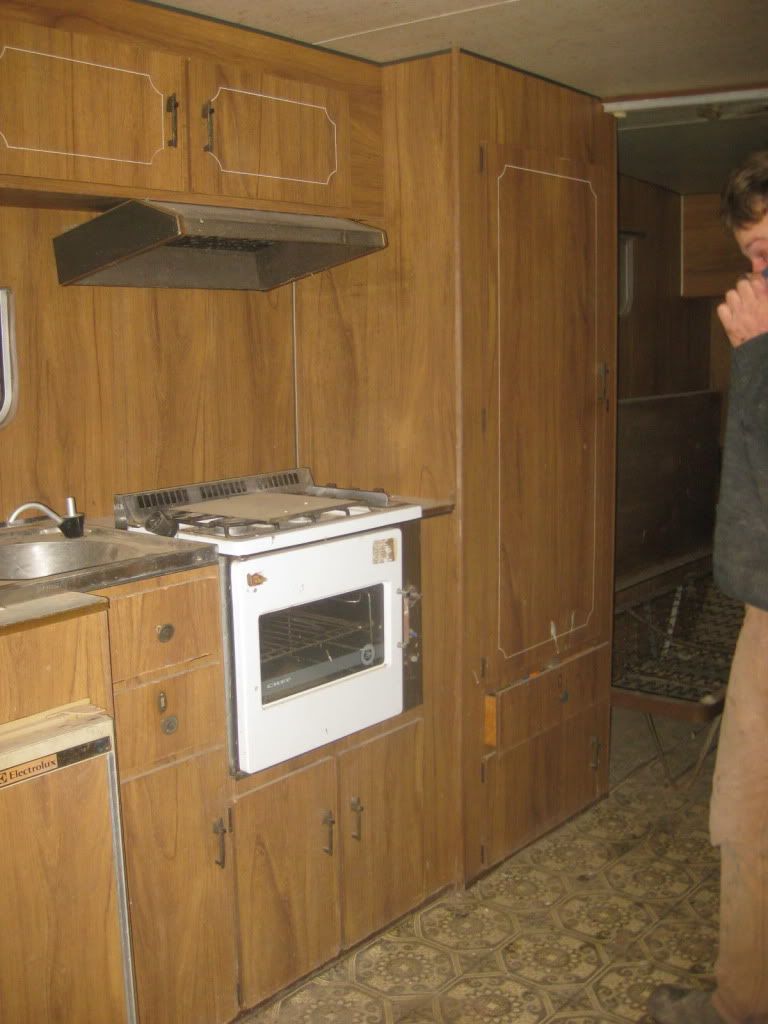 The lounge (you can see the swollow sitting on top of the light bracket): 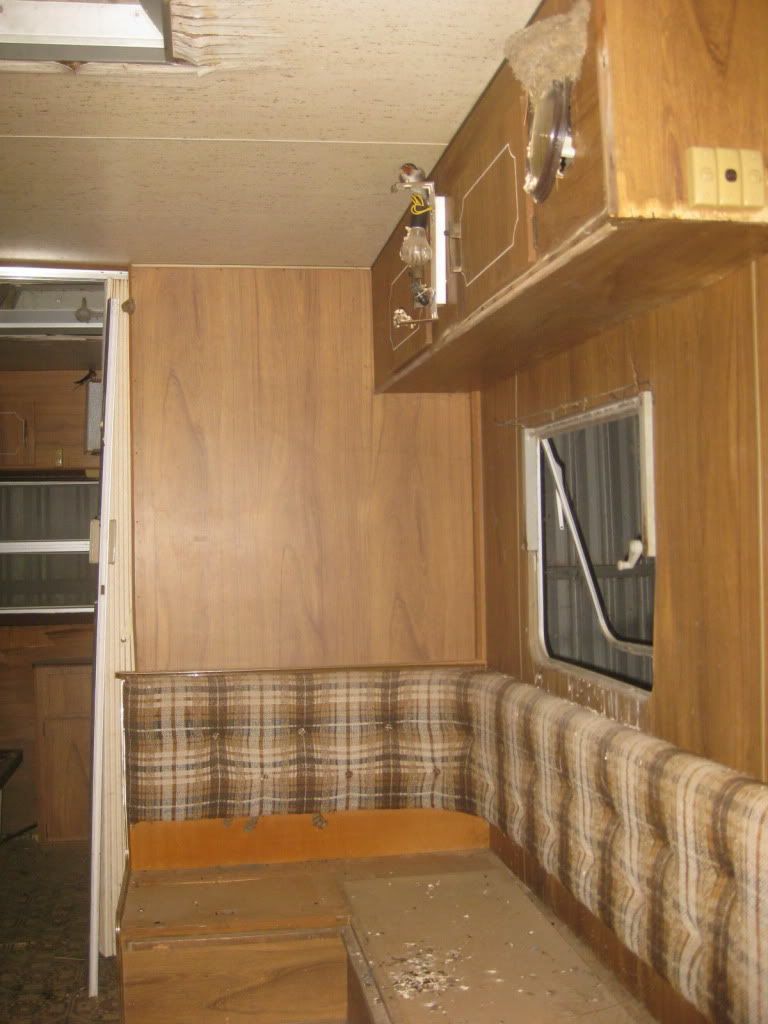 I’m not 100% sure where exactly to start, but I figure once I start having a decent look around I’ll figure out what needs attention and what I can salvage. It seems a shame to waste anything when really it doesn't appear to be in to bad a shape! The roof around the hatches definitely needs attention judging by the water damage, so that’s probably a good a place as any to start. I’ll leave anything to do with steel up to the other half, being a boiler-maker and half handy. I, on the other hand, may be taking on more than I can chew, but after helping by partner and sister with their house renos I officially have the bug and am very keen to turn Frank into a comfy home away from home! I have to say I got very excited when I stumbled upon this site. Thank goodness for Google! I’ll continue to add more photos as it all progresses. Cheers! |
|
|
|
Post by olfarts on Jun 5, 2012 13:31:40 GMT 10
Well done Arrow and welcome aboard ;D ;D ;D Cant complain about the price on that find can you    Looking forward to photos and a blow by by blow description of the renno !! Dave |
|
|
|
Post by millard1399 on Jun 5, 2012 17:39:57 GMT 10
G'day arrow, Looks like you only need a couple of screws and a bit of glue and she'll be good as new!   When you get a chance, have a look on the nearside (doorside) arm of the drawbar and find the welded chassis number there. It'll be somewhere next to the jockey wheel clamp and usually on the top of the arm. Let us know what that complete number is (it should be a letter followed by numbers). Is that an RVMAA badge I can see squeezed between the door and the side window?... 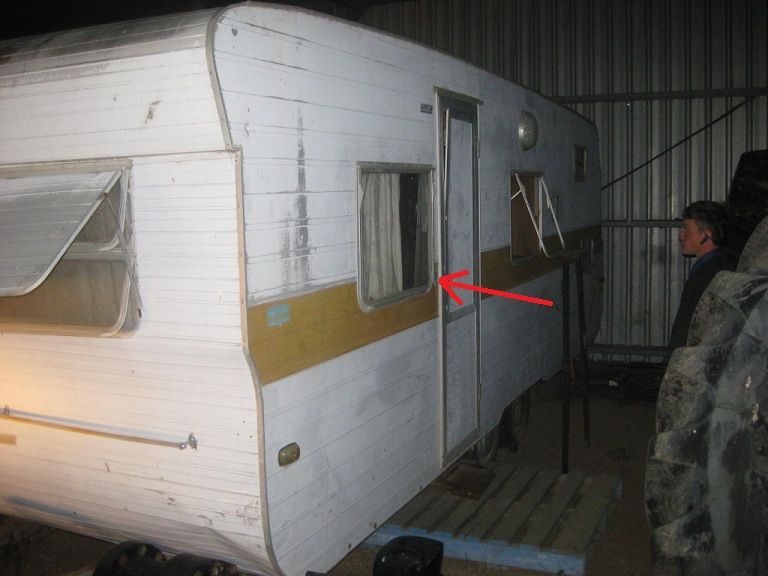 These badges started to be fitted in mid-1976, so if there's one rivetted to your van, it means it was completed in the later part of 1976. I think the Arrow model was discontinued in '77 or '78, but I'm not 100% sure about that. cheers, Al. |
|
|
|
Post by planner on Jun 7, 2012 16:25:15 GMT 10
Arrow
Congrats on the acquisition, I would love a 20ft, but 15ft is all that will fit in the shed at home (and I don't need another trailer in the back yard beside the boat, horse float and tandem trailer).
When next in your van can you pleeeease take a pic of the top of the stove. Our van was bought without a stove and I have recently bought a good secondhand version, albeit an orange one.
I know the chef stoves do not sit against the wall of the van, but is the "gap" covered in full, covered partially eg. vent or left uncovered for all manner of things to fall into.
Thanks
Planner
|
|
Deleted
Deleted Member
Posts: 0
|
Post by Deleted on Jun 8, 2012 9:17:06 GMT 10
Thanks Dave! I have an ETD for October so I had better get to it!
Al, I'm heading down to G-town on Sunday arvo and plan to spend a bit of time cleaning up and re-painting the chassis and checking all the running gear, so while I'm there I'll grab you the chassis number and see if there's a RVMAA badge.
Planner, I surely can take you some photos, I won't be back to a computer until Tuesday so I'll post them up then. I'm just hoping that it all still works, I gather its been a fair few years since the old fella has been used, and even then I doubt anyone would've tried using the stove or fridge!
Cheers
Arrow (Bec)
|
|
Deleted
Deleted Member
Posts: 0
|
Post by Deleted on Jun 12, 2012 9:01:57 GMT 10
Al, looks like we have an RVMAA Badge:  And here's the chassis number :-)  Planner here's the photos of the stove for you:    I started cleaning up the chassis late yesterday afternoon and it's coming up quite well, from what I can tell there is only minor surface rust. However, after closer inspection of the rear of the van we discovered that the back wall is barely attached (which would explain why that section of the floor was missing!), lucky I like a challenge! :-) |
|
|
|
Post by planner on Jun 12, 2012 10:55:30 GMT 10
Planner here's the photos of the stove for you: Thanks Arrow the pics told me all I need to know, this weekend the stove might get fitted. (SWMBO was going to paint it, but I think now she has come to accept the orange color). Picked it up for $100 from someone that was using it in an annexe, Has done very little work or been kept very well. Planner |
|
|
|
Post by millard1399 on Jun 12, 2012 17:53:21 GMT 10
G'day arrow, Thanks for posting the extra photos of the RVMAA badge, and the chassis number. They both help me to be more confident that the "X" series of chassis numbers relate to 1977. I don't know how many Franklin vans were built during that year, but if yours is the 7,231st chassis built, then they were obviously still pumping them out at a time when the industry was going downhill at a rapid rate. Your chassis number and the serial number on the RVMAA badge both suggest your van was built towards the end of the year. I'm still waiting for somebody to come on the forum with an RVMAA badge that's got the serial number of 000001. Imagine finding the van that got the first RVMAA badge!   cheers, Al. ps. I've changed the very first heading of this thread to include the year and the chassis number.   |
|
Deleted
Deleted Member
Posts: 0
|
Post by Deleted on Jun 26, 2012 10:55:43 GMT 10
Thanks Al,
Just a few quick questions. I've pulled all the windows out of the van and bought them home to do some repairs.
I've managed to find virtually everything I'll need to fix the bits that aren't working and I've cleaned them all up and am ready to rumble, but does anyone have an opinion on replacing the broken glass with perspex? I thought it would be a pretty safe (and cheap) option, but I'm reconsidering after seeing the panels cut and it doesn't look like the finish is there.
Also does anyone have any tips on removing the dust seal? My goodness after spending countless hours cleaning the frames up I'm officially stuck on these seals. They won't budge - even after lifting the crimps on either end, they are just so brittle.
And another question while I'm going... the sealant around the windows was pretty well shot, and basically flaked off in great chunks on the majority of the windows. Does this mean I should be looking for more water damage around the frames? I'm a little hesitant to go ripping wall panels off at this stage unless someone thinks it is necessary. After I pulled the back wall off and discovered the extent of the damage I'm not super keen on repeating the process!
Thanks in advance :-)
|
|
|
|
Post by planner on Jun 26, 2012 15:09:45 GMT 10
Also does anyone have any tips on removing the dust seal? My goodness after spending countless hours cleaning the frames up I'm officially stuck on these seals. They won't budge - even after lifting the crimps on either end, they are just so brittle. Arrow Ive just completed replacing the dust seals on all windows, and I don't think there is an easy way. (alarm bells were sounded when the local caravan repairer suggested that if I have trouble not to bother coming back to him  ) I found it slightly easier if I sprayed them with WD40 and let them soften for a day or 4. Some of them still needed to be broken into short sections and pushed out using a small screwdriver, by this I mean pushing along the track/groove. I have a leather stitching needle which was invaluable for this process. Pity you're so far away, otherwise I would come and help ;D ;D I only found rot in the framing around 1 window (right, rear) which I am currently replacing. For my van it was an easy task as I had stripped the ply off that wall already. I believe you could replace window framing without separating ply/insulation/cladding as there is no other framing in the walls of the arrows ie. the window frame is not connected to either the floor or the roof with timber. I will upload some pics shortly of wall construction. P.s.get yourself a can of silicone spray when replacing the dust seals. It turns a cr&p job into a relatively painless job, also helps if you can recruit a second pair of hands (kids come in handy for something) Good Luck Planner |
|
|
|
Post by Caprinut on Jun 26, 2012 21:48:36 GMT 10
Peter here, I replaced the glass in all my windows with poli-carbonate tinted inserts that are available on the CravansPlus site. These are used on new built caravans and fit into the frames which have remained constant in dimension all these years. At the same time I replaced all the plastic bits and pieces and winder hinges as they are cheap enough and will last for the next 30+ years. A bit of carefull drilling to remove old bits and new rivets and its as good as a new window. The new rubber seal for the poli is available slightly thicker so it compensates for the thinner window replacement. As a bonus an original window weighed 11kgs and now 1,5kg so a substantial saving when all the windows are added up Attachments:
|
|
Deleted
Deleted Member
Posts: 0
|
Post by Deleted on Jun 26, 2012 22:00:48 GMT 10
hi Arrow,
we have just replaced our windows with perspex and are really happy with the result, and as planner says its a case of patience with the rubber seals, it is worth it in the end. Alex dipped the new rubbers in soapy water and wet the grove which made it a much easier job getting the new seals in.
regards
Jean
|
|
Deleted
Deleted Member
Posts: 0
|
Post by Deleted on Jun 27, 2012 10:11:58 GMT 10
G'day Arrow
My two bobs on the dust seals, make sure when you have the old one out (just break it up I found as the easiest way) that you spend a little time to get the channel SPOTLESS, anything left in there will give you problems putting the new back in.
As has been suggested, a little lubricant such as WD40 or olive oil will help, as will having someone feeding the seal in while another pulls it along the channel.
Hope this helps
|
|
Deleted
Deleted Member
Posts: 0
|
Post by Deleted on Jun 27, 2012 11:05:51 GMT 10
Thanks for the tips everyone! I persevered last night, barked 4 knuckles, nearly blinded myself but managed remove the dust seal on ONE whole window! Pathetic I know lol but I’ll get there :-)
Peter – WOW! That is one very flash van you have there! Your windows do look fantastic… unfortunately after looking at the CaravanPlus website I discovered they’re slightly out of my budget… thanks for the suggestion though!
Jean, thanks for the advice :-) I think I may just put the Perspex in and see what the finished product looks like before I go spending money on an alternative, I think I was just disappointed with what the glazier had done - I gave him one of the uncleaned crappy windows to get the size right, and he fit it all back together in the filthy frame and it looked scratched and dodgy (he didn’t even put the seal in straight!). I’ll give it a whirl and hopefully I can get a better finish.
Planner,
I ended up using olive oil as I had no WD40 and it helped a lot (I have the remainder of the windows soaking today while I’m at work). Unfortunately the difficulty came in breaking the strip so I could take it out in portions (the whole thing at once definitely wasn’t going to work!), I mangled the crimps and the whole show was far from pretty. I flogged some more appropriate tools from work today so hopefully I’ll have some better luck tonight.
I didn’t realise the windows were floating. That’s very handy to know… and makes me wonder what is holding the whole thing together?!
I’m going to have to come up with something creative to get the rear wall back on, I’ll take a photo or two on the weekend so you know what I’m on about.
I wasn’t sure if the old ply would come off easily or take the whole foam with it. Judging by your photos it can be done! That gives me hope :-)
PS. As I sat there cursing at the seals last night I seriously considered going for a drive to Vic to take you up on your offer!
Cheers :-)
|
|
|
|
Post by planner on Jun 27, 2012 14:34:09 GMT 10
I mangled the crimps and the whole show was far from pretty. I flogged some more appropriate tools from work today so hopefully I’ll have some better luck tonight. I mangled a couple of crimps as well, these I ground flat so the channel now ends 5-10mm short of the frame edge. As stated before the leather needle (thats what I'm told it is) was fantastic for breaking the seal into pieces and cleaning out the channel. I didn’t realise the windows were floating. That’s very handy to know… and makes me wonder what is holding the whole thing together?! Glue and many many many staples. PS. As I sat there cursing at the seals last night I seriously considered going for a drive to Vic to take you up on your offer! Will be up in your general direction this weekend (well closer than I am currently), going up on the Culgoa River for a few days, but caravan windows will not be anywhere near the top of my list of priorities. Planner |
|
Deleted
Deleted Member
Posts: 0
|
Post by Deleted on Jul 2, 2012 11:01:04 GMT 10
Hi Planner, I hope you had a great weekend camping, better than mine at least...
I didn’t have an overly productive weekend but I started pulling the ply off the walls in the back of the van, another very steady job! Good news is the timber around the windows looks to be in good nic (apart from the back wall, but that’s another story). HOWEVER… the timber at the bottom of the wall is completely rotten. It looks like water has come in around the windows and pooled at the bottom of the walls. I have a horrible feeling that the problem is going to run the full length of the van as the windows in the kitchen and front room appear to have the same issue. Unfortunately the floor is worse for wear where it meets the wall too. Plan of attack now? Strip the entire interior and figure out where to go from there… during the week I’ll continue to bash away at the windows (I'm slowly getting the hang of it - no injurys lately :-) ) and maybe by the time I’m finished them the van will have progressed a bit!
Planner just wondering if the glue used to hold your arrow together green? Or has my Franklin got a horrible disease?
Sorry no photos again… dead battery…
|
|
|
|
Post by planner on Jul 3, 2012 10:02:59 GMT 10
Hi Planner, I hope you had a great weekend camping, better than mine at least... I did have a good weekend, slept for 11 hrs last night (went to bed before the kids). Planner just wondering if the glue used to hold your arrow together green? Or has my Franklin got a horrible disease? I will have a good look at the glue tonight. The insulation has a green tinge to it, which I assumed was mould, maybe it was glue. The timber at the bottom of the walls was rotten on one side only, for a length of about 500mm. This I have removed and will replace. I haven't looked further forward in the walls, but the other windows showed little sign of water entry. What I don't know, cant hurt me hey.  The floor in ours also appears OK, no soft spots that I've found. |
|
Deleted
Deleted Member
Posts: 0
|
Post by Deleted on Jul 9, 2012 9:05:17 GMT 10
Thats not a bad theory at all Planner! I wish I wasn't so curious some times! After removing the interior the damage was a lot worse than I had thought, particularly behind the kitchen. This is after my efforts on the weekend... 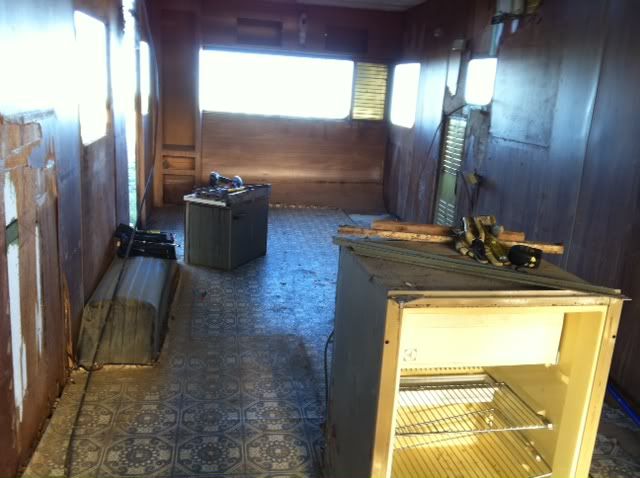 The roof ply was so easy to detach - the un-water damaged ply came off in lovely big sections... the water damaged stuff is not so fun to get off (I've left most of that for next weekend). I spent a fair bit of time taking the cupboards out carefully so I could use as templates, most of the timber in the kitchen is no good to reuse, the same goes for the frame of the booth. The plan for next weekend - Remove the remaining ply on the walls, lift the floor and replace the damaged timber in the frame, if I'm unlucky there will be time to get the grinder out and work on the chassis again - mind you once I get the floor up it'll be a much easier job! Until then it's back to the windows! I'd like to see some more photos of how you're travelling Planner! Question: Has anyone replaced their hatches with anything else? I've pulled them out and can try to revamp them, but I'm wondering if it is a major sin to put say a skylight or something in instead? Cheers |
|
|
|
Post by planner on Jul 9, 2012 13:21:26 GMT 10
I'd like to see some more photos of how you're travelling Planner! Spent a good part of the weekend re-attaching the back wall to the floor and walls. I didn't take any pics, but will do before any of the handiwork gets hidden by ply. Next step was trying to sort out the dodgy wiring for the tail/brake/clearance lights. In the end I stripped all wiring from front to rear and will start again, turns out some of the clearance lights (side) were not even connected to the tangle wiring. Been pricing new LED lights today. Question: Has anyone replaced their hatches with anything else? I've pulled them out and can try to revamp them, but I'm wondering if it is a major sin to put say a skylight or something in instead? Arrow Check the local regs, I've heard that the four seasons hatch plays a role in the gas ventilation for caravans, and some states (not sure which, thankfully not VIC) require yearly inspection of gas system. Hopefully someone with better local knowledge will chime in. Planner |
|
|
|
Post by Caprinut on Jul 9, 2012 19:32:30 GMT 10
Yep I've committed that sin amongst others in the classic van bible. Removed the four -seasons hatch as the ceiling was stained all over plus it was not in quite the right position. Bought and fitted a modern Heki hatch directly above the bed ( Upping the romance stakes here).  By the way these hatches have built in ventilation as do all hatches made for caravans as per regulations. Nice touches are a retractable sun block screen as well as flyscreen and it can flip open to several positions including completely open for a hasty escape if my romantic plans don't work out -He He!  Not a big job and in my opinion adds greatly to the joy of camping. I did push in some extra timber braces between the roof and ceiling to ensure the hatch was sturdy- for the fast getaway contingence plan ( Always have a backup plan when courting- He He ) Peter |
|
Deleted
Deleted Member
Posts: 0
|
Post by Deleted on Jul 10, 2012 13:10:12 GMT 10
Thanks for your input guys :-)
I am actually considering committing another sin in regard to gas/ventilation - and am weighing up the options of removing the gas altogether and fitting electic hotplates, which would mean I don't need to worry about those annoying regulations, and in the end it will probably work out cheaper. Yes the convenience of gas totally beats electric, but at the same time I have other options for free camping (which won't be that often anyway).
Planner
Would be good to see how you managed to put it all back together. And let me know how you go with your pricing of LEDs... I'll be following suit directly!
Peter
Those hatches look very neat. I had a look for a price and yeah they aren't too exxy. I'll see how I go cleaning the existing hatches up and if it's going to be a train wreck I may have to invest in some. Thanks for the idea, and the too much information ;-) I'm slightly concerned however, why you would making the quick escape as apposed to your companion (when it's your accomodation). Here's a rough tip... if you do plan to 'meet' someone, go back to their place for the extracirricular activities - that way, when you bail, you're not leaving them with the opportunity to trash your pride and joy!
Cheers
|
|
|
|
Post by Caprinut on Jul 11, 2012 20:36:05 GMT 10
Aroww, He he - Told the wife what you said, and the doctor said the swelling should go down in a weeks' time
|
|
|
|
Post by planner on Jul 12, 2012 8:52:58 GMT 10
And let me know how you go with your pricing of LEDs... I'll be following suit directly! Autobarn Shepparton had a 20% off sale on LED's yesterday, got the taillights for $40/pr. Will be shopping around to replace the internal 12V globes today, if a reasonable price can't be found in town I'll order online. Would be good to see how you managed to put it all back together Put some dodgey photos up yesterday, will get some better shots on the weekend. Planner |
|
Deleted
Deleted Member
Posts: 0
|
Post by Deleted on Jul 13, 2012 14:52:24 GMT 10
Photos look good Planner. Gives me an idea of how to tackle the back wall at least... The rest is purely going to be trial and error! I'm not sure if I'm going to get much done this wkend, have been bloody crook with a dose of man-flu (your worse than average cold :-) ) but I'll be trying my hardest to get the rest of the ply off and replace the bottom wall timber. I've got the ute loaded with timber and all my new tools :-) :-) can't wait to start reassembling the old fella.
Peter! You're married! And still considering bailing! No wonder you copped a flogging (I hope it hurt!).
|
|
Deleted
Deleted Member
Posts: 0
|
Post by Deleted on Jul 30, 2012 8:30:54 GMT 10
I finally had what felt like a productive weekend! I managed to remove all bar a little bit of ply… oh what a fun job, and I thought staples were my arch enemy, water damaged ply has replaced it at the top of my hate list! Has anyone had any experience using a borax/anti freeze mix for treating timber rot? My father gave me a recipe he used on his boat resto but I would like opinions if anyone has any? I’m going to replace the timber that is too damaged – but he suggested I treat the remaining timber to stop any rot in its tracks. I drilled out about 500 pop rivets to get the floor up (ok so I could be exaggerating, but that’s what it felt like!), so I’m going to make friends with the grinder again next weekend and get the chassis all cleaned up once and for all! Progress so far:  |
|


 )
)


