|
|
Post by kiwijim on Jan 15, 2013 5:21:52 GMT 10
Howdy Al, Well like your-self, I have taken the plunge into L.E.D. lighting for the Coromal. I ran into a Mate in the weekend who sold me a roll of L.E.D. strip lighting, this roll is 5m long, 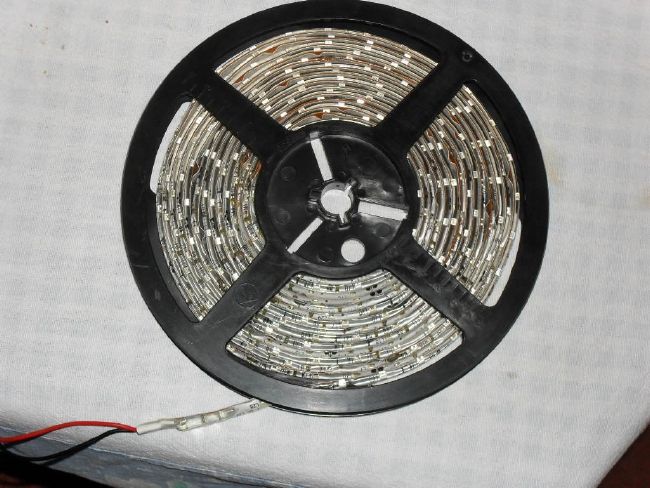 Now the fun begins, First question, Could you kindly pop in a picture of the transformer you use in your van for the strip light, I would like to see the specs on the transformer, such as 12v x how many amp, or whatever there is printed on the back of the transformer. Before I go cutting the strip, I can see that the scissor mark is every 3 Led's apart and going by what I can read on the Internet, you can solder wires at the end of these 3 led and still run them off 12v DC  I also see that the LED's seem to be in banks of 30 LED's in a group then there is a soldered joint......  It looks like it could be cut there but, I better only cut where the scissor make is. 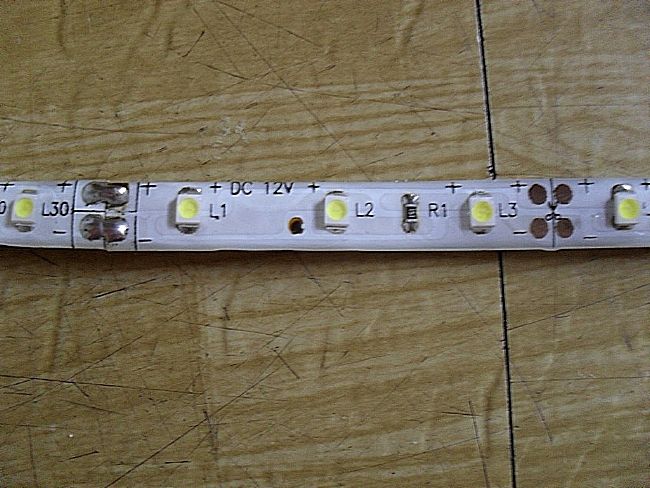 I am wondering how many LED's there are on that strip you bought for your van. ? they seem plenty bright enough, so as soon as you give me some idea how many you have, I will attempt to do the same as you, Hee Hee, should be fun. kiwijim ;D |
|
Deleted
Deleted Member
Posts: 0
|
Post by Deleted on Jan 15, 2013 6:06:15 GMT 10
Jim there would be no worries cutting at the solder joint if you need, each 3 LEDs is a seperate unit.
LEDs draw so little you should be right with just about any 12V transformer, you are unlikely to get anywhere near the limits - is there a currentrating on the lights themselves?
Cheers
Doug
|
|
|
|
Post by ForumMod on Jan 15, 2013 9:56:33 GMT 10
G'day kiwijim, Ugh!...now you have to educate yourself a bit about these fang-dangled LED lights.  I'm only a novice at the moment, but here's what I've discovered so far... 1.The LED light strips: There are two sizes of the actual led "globes" along the strip - a 5050 size (which means each globe is 5.0mm x 5.0mm), and a 3528 size (which means 3.5mm x 2.8mm). For the same length of strip, a 5050 size will give out more light than a 3528 size. The 5050 size may also draw more current than the smaller size, but I haven't looked into that side of things yet. How's your brain going so far?  2. Cutting the strip: 2. Cutting the strip: You can cut at any point where the scissor marks are (every third LED globe) 3. Making a new light strip: You can cut and melt the solder at the soldered joints, and solder new wires into those joints to create a new strip section. Note that +ve and -ve polarity is important when you're connecting all the wiring up. 4. The transformer: Obviously, the more LED globes in the strip, the more current it will draw. You have to check some of the ebay listings to see what current they claim the strip length draws for your size LED globes. What you have to do: * Check what LED globe size you have (in your photo, they look like the 3528 size). * Search ebay for the globe size and length of strip you want to use (they list them in 1m, 2m, and 5m lengths from memory), and then read the specifications in the listing to see what the current rating is for that length . * Search ebay for a transformer that delivers at least the current your strip requires. The LED strip I bought: * 60 LEDS of 5050 size in the 1 metre length * the 1m strip is rated at 1.2 - 1.26 Amps working current * voltage is 12V * the transformer I bought is rated 12V, 2A. (from here ) * this photo shows a couple of quirky things about the transformer (such as how it covers the powerpoint switch when you plug it in  )... 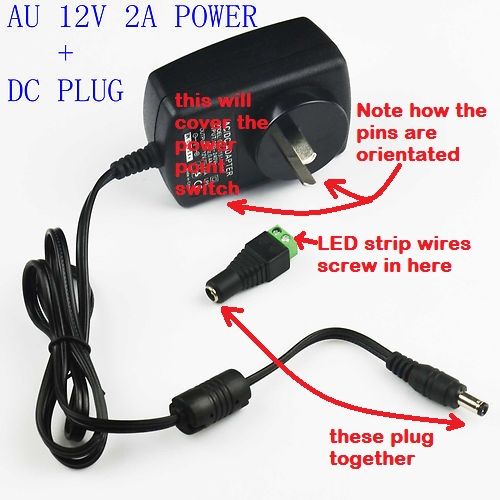 If you decide you want to put another switch into the wiring circuit because the transformer covers the powerpoint switch, look on ebay for "DPST switch ". DPST means Double Pole Single Throw, and the colours available are red, orange, green, and plain black. The cheapest I found were the plain black from this seller , so these did the job for me (left me with one switch spare  ). ).
Best of luck with it. We're very happy with how it all turned out, and 20 bucks all up was pretty comparable with buying any other type of 240V light fitting.
cheers,
Al. |
|
|
|
Post by kiwijim on Jan 15, 2013 10:00:05 GMT 10
Howdy Doug, Thanks for the good news, Unfortunately there was no information with the LED's The only thing is a label on the reel, which is written in Chinese.... 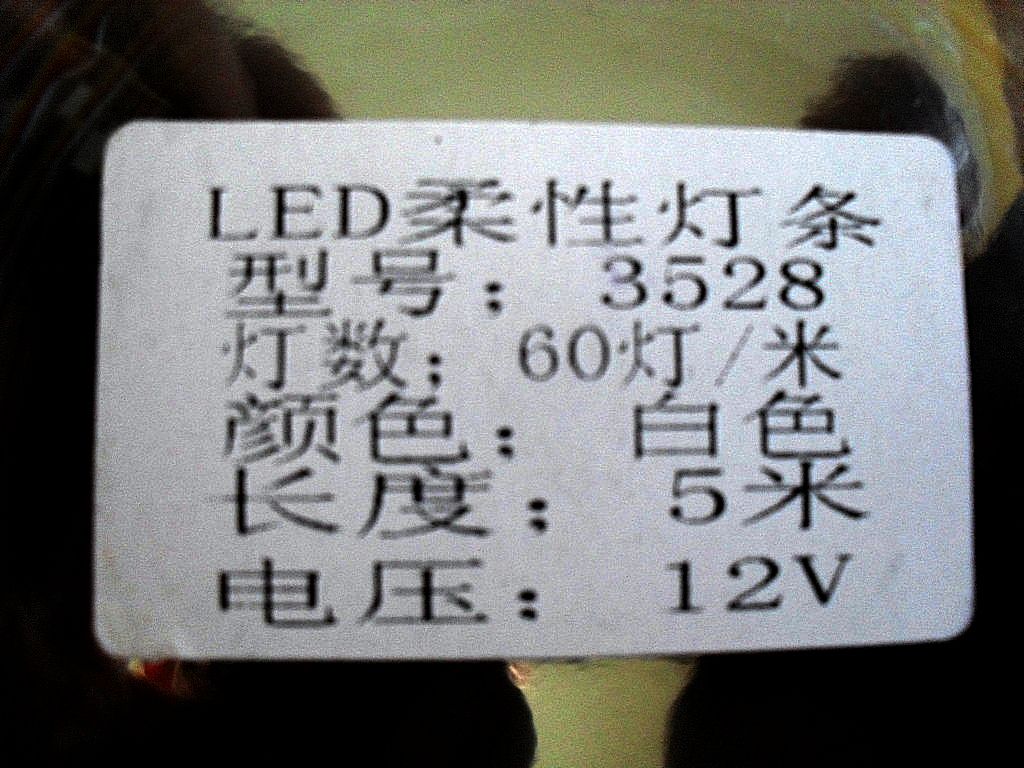 Just going by what I've seen on EBay, almost every reel of LED's offered there, quote the number 3528, I would say the 5 * would be the meters on the reel and it's obviously 12v. If you can read any more, it would sure be handy ? ;D cheers kiwijim |
|
|
|
Post by ForumMod on Jan 15, 2013 10:11:11 GMT 10
Kiwijim, I've just posted a couple of minutes before you did.  |
|
|
|
Post by kiwijim on Jan 15, 2013 10:50:03 GMT 10
Howdy Al,
Looks like we crossed wires when posting then,
Thought you may have been out fighting Bush Fires or something ;D
Thanks for all that info, "Yer" the brain hasn't worked so hard since I left work, ;D ;D ;D.
With all the good Guff now on hand, I'm sure I will come up with some light in the end, I'll show you how it goes in the near future, that is when it cools down enough to go back into the van.
Perth Temp..... still 30.2c at 4.30 AM today. " GEZZZZ"
kiwijim ;D
|
|
Deleted
Deleted Member
Posts: 0
|
Post by Deleted on Jan 15, 2013 19:30:44 GMT 10
Jim, can't read Chinese but you will probably find the numbers on your specs are 60 Watt, 5 Amp and 12 Volt. Power (Watts) equals Volts times current is how I came up with those numbers, and they probably relate to the entire strip. So if you have say a hundred lights in the strip, divide the 5 amps by 100 and you come up with 0.05amps per LED, times three per section gives 0.15 amps per section. But like I said, I don't speak Orange ... errr Mandarin
|
|
|
|
Post by kiwijim on Jan 16, 2013 1:45:35 GMT 10
Thanks for that info Doug.
Not being a Wiz on Electronics, it's still a bit of a mystery,
I have sort of gone on the theory..... plug it in and see if it works ??
If you have a look at my tread (A COROMAL BETWEEN CLASSICS ) in this section, you can what happened when I connected a 12v x 0.7a Transformer to the lights, not a bad display for such a small amount of power.
cheers kiwiim.
|
|
|
|
Post by ForumMod on Jan 16, 2013 16:33:02 GMT 10
G'day All, Here's a project we've been working on-and-off over the last couple of months... We wanted to find a space for the porta potty, to get it out from under our feet. Did some measuring, and the seat just inside the door was the obvious location. Had to do a little bit of demolition work to begin with... 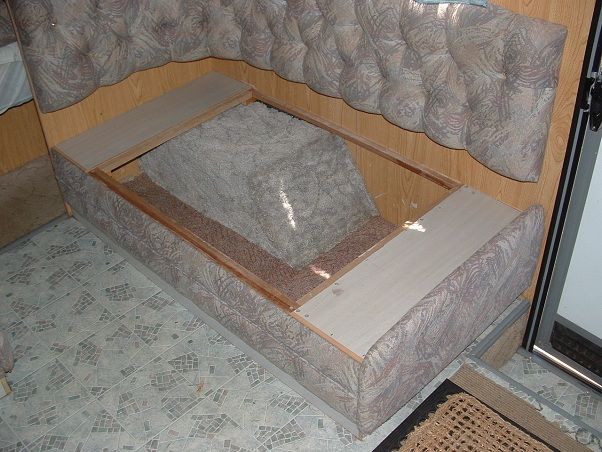 Gotta love those staples  ... 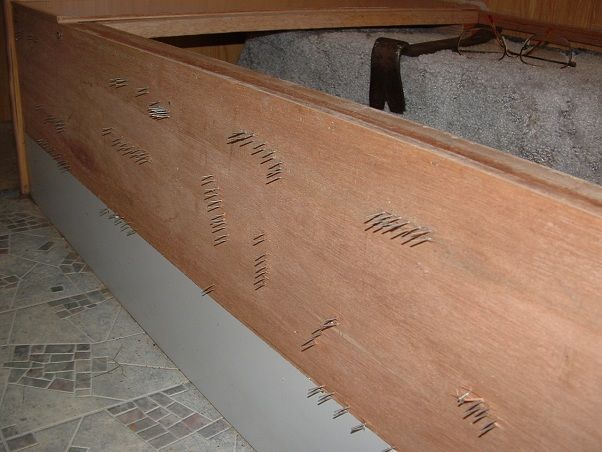 New framework in place... 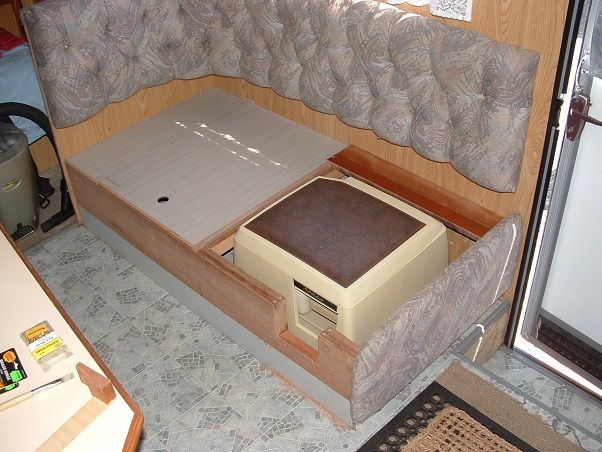 Original cushion cut in half, and the cut ends upholstered in grey material... 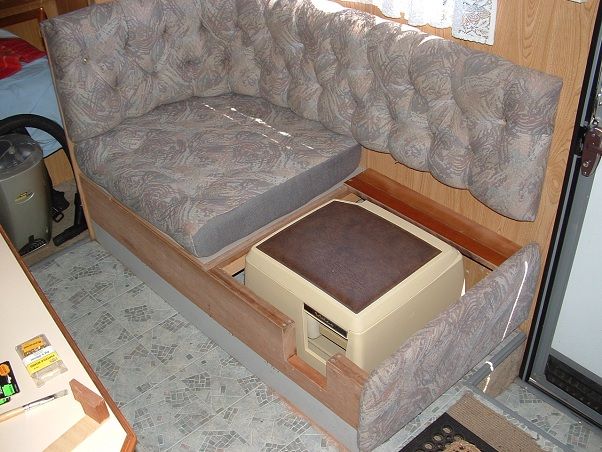 The cushion on the porta potty side needed not only a new end covering, but the "boss" spent some time excavating the foam out of the seat cushion, and covering it with fabric... 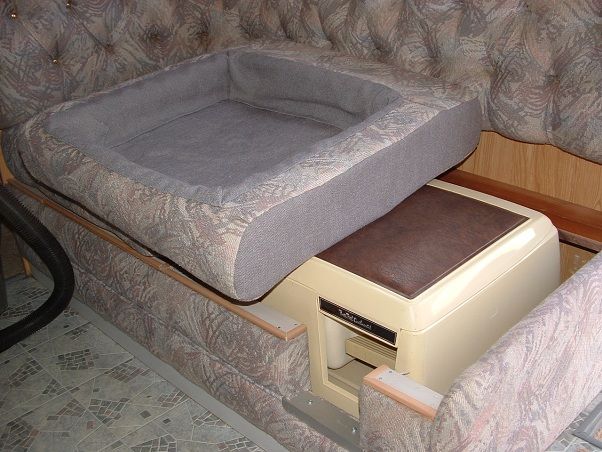 A bit of work required to create a footwell for the potty foot pedal... 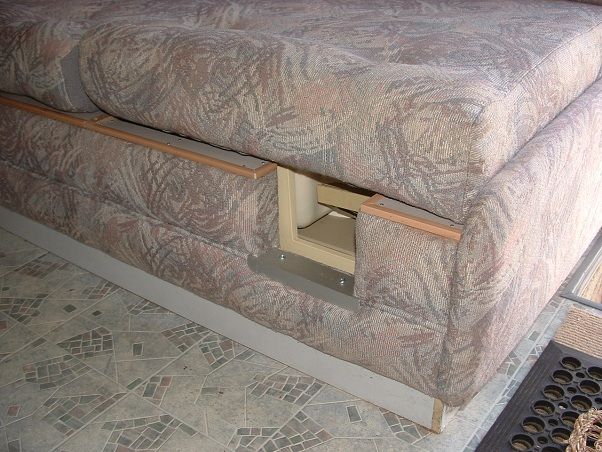 Job completed. The cushion on the potty side fits over the potty like a wide-brimmed hat. We can still use that side as a seat if necessary... 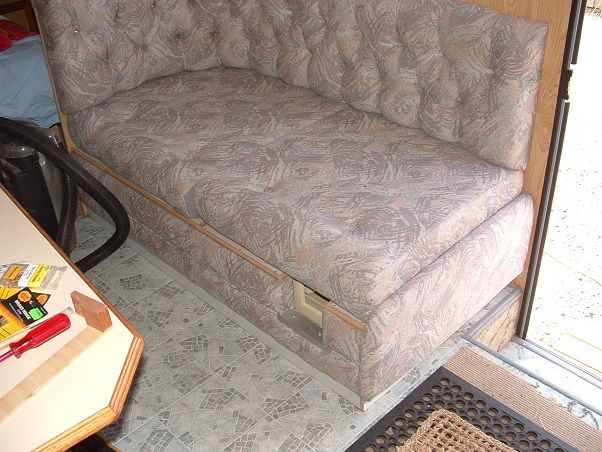 cheers, Al. |
|
Deleted
Deleted Member
Posts: 0
|
Post by Deleted on Jan 16, 2013 19:09:38 GMT 10
Nice and neat "job" there Al! ;D ;D |
|
|
|
Post by kiwijim on Jan 17, 2013 2:17:30 GMT 10
Looks very nice Al, Your "BOSS" could get a job on my Coromal anytime, I'm still waiting for the new upholstery and the curtains to be sewn up here, We have three sewing machines here and none of them seem to be working right at the moment......... &#@**$## kiwijim  P.S. Gotta love those staples. |
|
Deleted
Deleted Member
Posts: 0
|
Post by Deleted on Jan 18, 2013 8:01:27 GMT 10
Hi Al  What a job you & the Boss have done on the toilet Well done on the lights too. I found when camping on the river , that the led lights i put in gave off a slightly blue light = less insects than the other vans Cheers Gav |
|
|
|
Post by ForumMod on Jan 18, 2013 12:31:56 GMT 10
Thanks for all the positive comments guys. ;D gav, the LED strip light I put in the van is the "warm white" colour, which gives out a sort of orange/yellow colour, something like a normal light globe. I'm wondering if the colour has any effect on insects, or whether LED lights don't attract insects because they don't give out very much heat?? ----------------------------------------------------- Here's a separate story about a bargain I won on ebay yesterday... The background story is that the other day when we were working on the seat cushion, we noticed the upholstery was wearing a bit thin in a couple of spots. It sort of indicated that the ol' upholstery didn't have too many years left in it. I was surfing around ebay the other night, and I stumbled across some upholstery that the Millard factory had listed, because it was redundant fabric from the early 2000's. I guess they just wanted to be rid of the stuff because they listed the starting price at $10... ...for a full 50 metre roll. Needless to say I whacked it on my "watchlist" and waited to see what happened. Somebody ended up putting a starting bid on it, about 12 hours before the end. I waited until near the end, and put in my own bid...which I ended up winning the auction with...and which was $10.50 ;D ;D I had to drive up there today to pick the roll up (55kms up there, and back), so even allowing for $30 worth of petrol, I got a 50m roll of upholstery for $40.50, or 80 cents a metre. ;D ;D This is the roll... 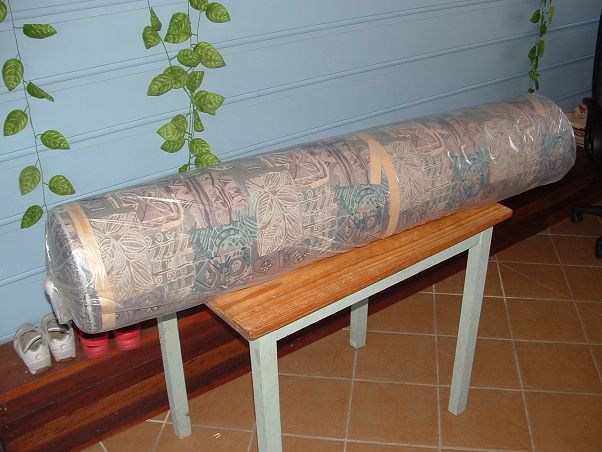 This is the colour/pattern... 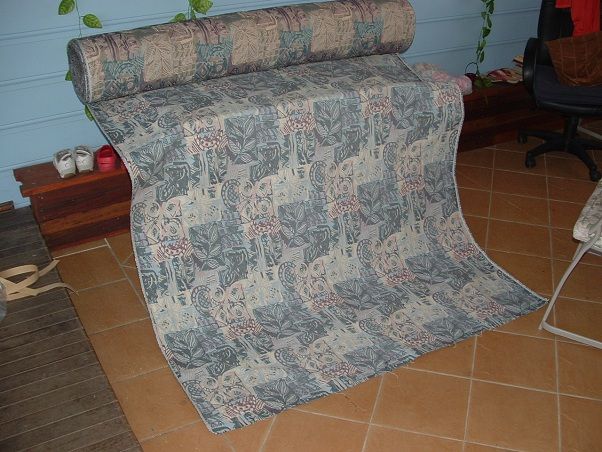 Here is a 2004 Millard I found on ebay, showing a similar style of upholstery... 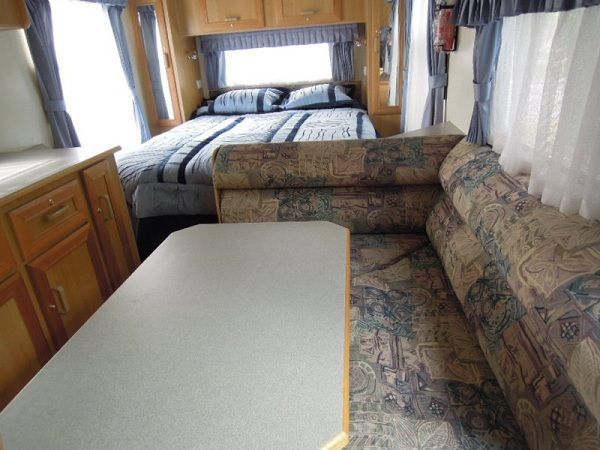 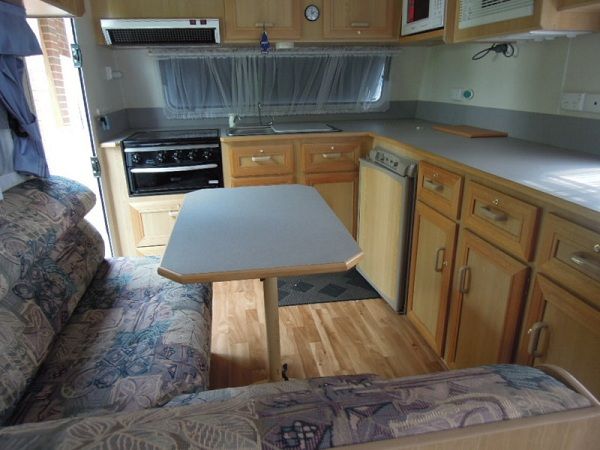 I'll shove the roll away in the shed until I get to the point where the van needs to be redone (which hopefully is a year or two or three away ) Gotta love those ebay bargains! ----------------------------------------------------- ps. Just popped into the van to check something, and the thermometer inside the door is showing 49 o Outside temp is 42 o. Total fire ban today. Need a drink. |
|
|
|
Post by kiwijim on Jan 18, 2013 19:11:53 GMT 10
"When Ya Hot, Ya Hot," You sure got a bargain with that upholstory Al, Looks like you've won the "Bargain Hunter of the month" award........ AGAIN ;D At least I know where there is some cheap Material, should some be required in the future. Cheers kiwijim ;D |
|
|
|
Post by ForumMod on Jan 22, 2013 10:27:42 GMT 10
G'day All, Today's story is about converting the 12V lights in the van to LED lights... I know you can simply buy a 12V LED globe to replace the original globe... 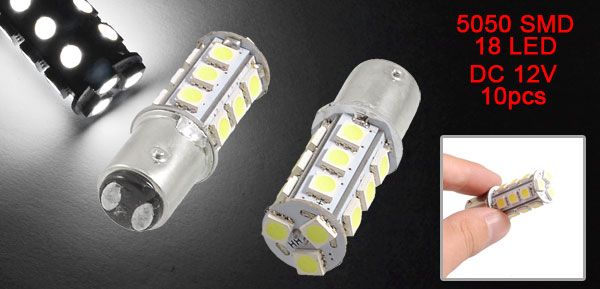 But, that's too easy! An alternative way is to buy an adapter to allow you to use a different type of LED fitting... Here's the original light: 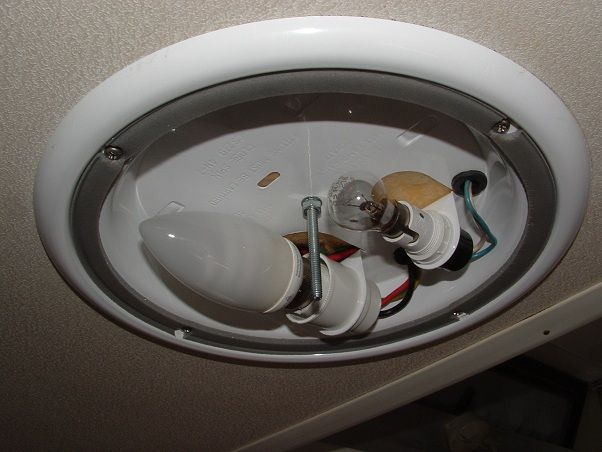 Here's the packet of adapters, and the LED light I'm using... 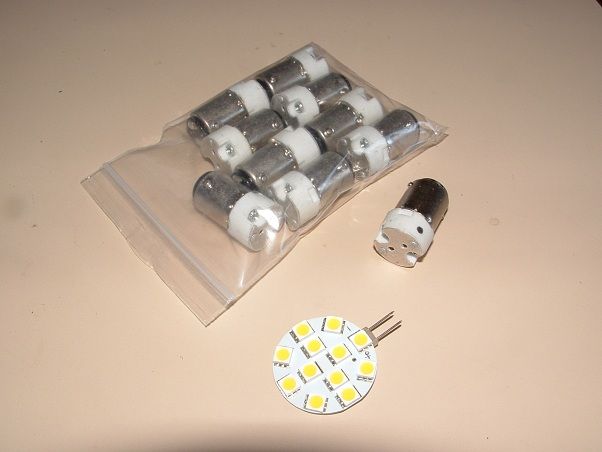 The adapter fitted in position... 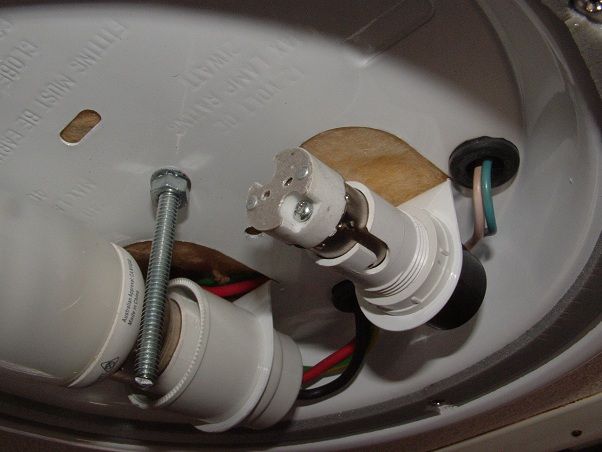 ...and the LED light in position... 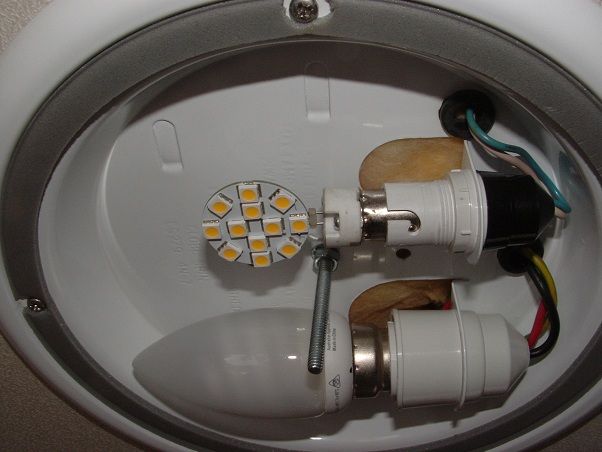 I bought 10 x adapters, and 10 x LED lights, because it was cheaper to do it that way. I wanted flatter lights to fit the thin light fittings in my vintage caravan project. I decided to use some of the adapters in the Windsor van to use the rest of them up. cheers, Al. |
|
|
|
Post by drylander on Jan 22, 2013 21:59:24 GMT 10
where did you score the adaptors and flat leds Al? also how bright are they once the cover is back on? Looks like a option for me and will save the battery even more.
Pete
|
|
|
|
Post by ForumMod on Jan 23, 2013 7:59:53 GMT 10
G'day Pete, Ok, first a bit of education (not that you need it )... * The LEDs with two thin pins are known as G4 fittings. * G4 pins are compatible with MR16 sockets (which, obviously, take MR16 globes that have two slightly thicker pins). Adapters: I bought the adapters from this seller on ebay. Look down the list for the BA15D to MR16 socket. Buy either singly, or a pack of 10. When I was searching, I found only this bloke and one other seller in the UK that listed these. This bloke was cheaper. LED lights: Search for G4 led 10x . Sort by Price+Postage:lowestfirst . You'll see the flat style start to show up around the $4 mark, on the first page. My LEDs, as you can see, have 12 diodes in them (known as SMDs). The light is rated at 0.2A. The lighting is adequate to find your way in the dark, rather than to see what you're eating clearly. LED globes are pretty harsh on the eyes when you look directly at them, so the frosted glass in the ceiling helps to diffuse that, without decreasing the amount of light greatly. For increased lighting, look for 48 leds or something higher like that (but the trade-off will be higher amps). The strip of 60 diodes I put in the front of the van would give adequate lighting for seeing your meal clearly, I reckon. I don't need to remind you that polarity is important when fitting the LEDs. I had to loosen the socket and rotate it 180 o to get the active wire/pin lined up properly with the +ve pin on the globe when it was fitted. All make sense? cheers, Al. |
|
|
|
Post by drylander on Jan 23, 2013 22:33:45 GMT 10
Thanks Al for the info. yeh the leds are very much polarity dependant. I'm more looking for bright lights as I'm trying to do away with the 240 stuff altogether as lighting goes but I can look at running lights and phone chargers off the inverter But need a couple more panels before I go there.
Pete
|
|
Deleted
Deleted Member
Posts: 0
|
Post by Deleted on Feb 25, 2013 10:55:57 GMT 10
Hi Al
I have been reading through your thread regarding the millard and this post. You appear to be extremely talented. As I am just about to start with the sealing of my millard, I was wondering what you think so far of the selleys butyl mastic? Would you recommend it? Or is it still early days?
Thanks Clueless
|
|
|
|
Post by ForumMod on Feb 25, 2013 15:29:30 GMT 10
G'day Clueless, Yes it is early days, but so far it looks promising. It probably takes about a year before mastic sealant will start to exhibit shrinkage cracks, if it's going to show them at all. A lot also depends on how much travelling the van does (ie. how much rocking and rolling it does). The more movement a van body has to undergo, the more stress placed on any sealant used. At $22 per cartridge, the Selleys butyl mastic is certainly not cheap, but so far I've used just under 2 cartridges applying a small bead of sealant around various fittings just to reinforce the sealant that is already on the van. The beauty of the butyl mastic is that it is fairly easily removed again if necessary in the future. If you go to M48180's thread about his Millard, and look at Reply #2, you'll see how the mastic is still pliable after 35 years or so. That's exactly what I found on some parts of my old Millard poptop where the same mastic was used. For your van, though, I think the situation is rather different. You are aiming to create an "on-site" van to use for your children's accommodation, so I think you would be justified in using something a lot cheaper than the Selleys stuff. You could even (gasp!) use a cheap silicone sealant if your pocket money for the project is limited. As long as you get 5 or so years out of the sealant, your children will be thankful for a dry bed. For the project you are doing, I think the "Keep it simple" principle would be the one to follow. cheers, Al. |
|
Deleted
Deleted Member
Posts: 0
|
Post by Deleted on Feb 25, 2013 20:16:29 GMT 10
Hi Clueless, i see you live in Mackay, they have a Camec distributor up there, you can buy their Ezy caulk butyl mastic sealant for around $7.00 each.  A little cheaper than the selleys product. Scotty |
|
Deleted
Deleted Member
Posts: 0
|
Post by Deleted on Feb 25, 2013 21:19:02 GMT 10
Al, you are right about trying to keep my renos on the cheap side. I liked the link you provided as well.
Scotty, yep found the local supplier and it is on my main travel route. I also found this stuff on the caravans plus website at $5.73. If I add this to an order I have been adding to, it doesn't alter the postage cost. This provides some more food for thought.
Thanks for your help guys.
Clueless
|
|
Deleted
Deleted Member
Posts: 0
|
Post by Deleted on Feb 26, 2013 8:37:23 GMT 10
Al, Good tips that I am going to use. Where do you buy 304 Stainless Steel Screws from? Bunnings? or Marine shop?
|
|
|
|
Post by ForumMod on Feb 26, 2013 9:46:13 GMT 10
enidb, I've bought the majority of my stainless screws from Bunnings, only because they are handy to me. I buy the packs of 100 screws, which cost around $15 or $16 per pack. They are the 'cheaper' grade 302 stainless, but are good enough for caravans. No sense paying extra for 304 or 316 stainless. You can go through quite a lot of screws if you end up replacing everything on the van.
My local marine supplies shop is pretty much on par with Bunnings as far as prices go for screws, but the marine shop stuff is the higher grade 316. They also have a wider choice and I can buy just one of something if I want to. Trouble is, the marine shop is 25k away, and Bunnings is only 10k.
There are ebay suppliers as well. I've never bought from them, but a search for 'stainless steel 304 self tapping screws' shows they are on par with the Bunnings 302 prices. Ebay includes free postage, so that would be a handy alternative if you can't get to a shop.
cheers,
Al.
|
|
|
|
Post by viscountofmydomain on Mar 1, 2013 9:09:17 GMT 10
What a fantastic read, I must say that the threads on this forum, especially yours Al are very impressive, repairing caravans 101. Sealing methods, screw types, weight distribution, LED lighting, and general examples of how to complete quality repairs.
Stu
|
|


 )...
)... ).
).


 What a job you & the Boss have done on the toilet
