Deleted
Deleted Member
Posts: 0
|
Post by Deleted on Jan 5, 2013 21:22:37 GMT 10
Hi all Thanks for having a look at my van. Had it 5 years now and slowly improving it. Outside is pretty good at photo distance but there are a few blemishes from the many years on the road. Screw holes where they shouldn't be and damage at the back from a bad reverse park into tree or something (before my time). I have reupholstered the seating, new ceiling, new vinyl slats on the floor, new bench tops etc. Mainly just fixing up the bits that made the van inhabitable for the wife and kids. Lots more to fix up yet, you should see my list. Anyway, here are some outside shots for your viewing pleasure.. 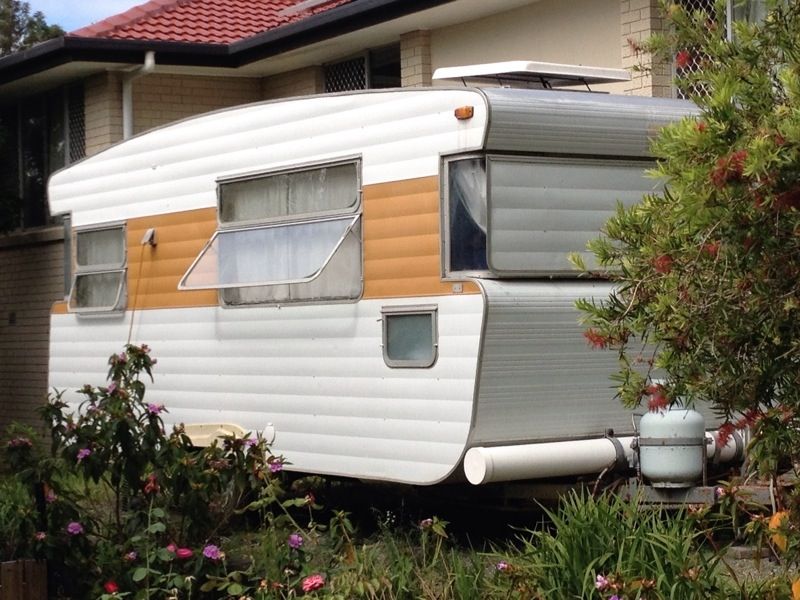 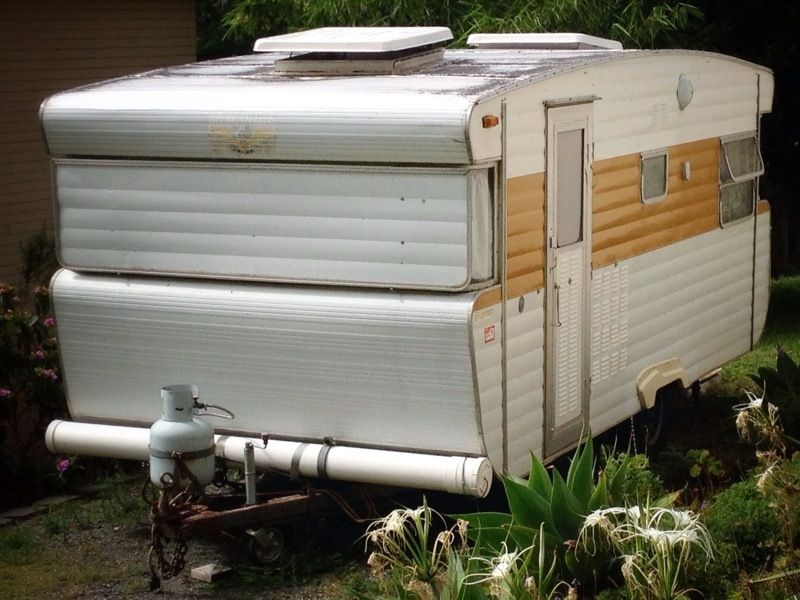 I will post some more once I clean up inside.. Cheers all LoonJigger |
|
|
|
Post by ForumMod on Jan 5, 2013 22:02:16 GMT 10
G'day LoonJigger, Not a bad looking van.  Just out of curiosity, does your chassis number have the letter 'S' at the start of the numbers, or is it just the numbers? cheers, Al. |
|
Deleted
Deleted Member
Posts: 0
|
Post by Deleted on Jan 6, 2013 6:37:48 GMT 10
Hi Al
The man at the factory must have forgotten to weld it on.. Only numbers. Maybe they were undecided what to build at the time hey!
I have a plate on the inside of the door as well that only mentions the number.
Mike
|
|
Deleted
Deleted Member
Posts: 0
|
Post by Deleted on Jan 28, 2013 19:21:24 GMT 10
Wow, looks like the rain is easing but my van has leaked in new places and damaged some interior ply. Looks like I have some sealing to do when I can..
Now contemplating removing the damaged ply and see what can be done to keep my van hospitable for the family. Any suggestions? Should I attempt such a task?
We have just spent the last week down at the Gold Coast, came back home just in time.
Hope you guys on the east coast have safe drives and dry vans.
All the best..
Loonjigger
|
|
|
|
Post by ForumMod on Jan 28, 2013 20:32:29 GMT 10
When you say the leaks have "damaged some ply", do you mean the ply has just got wet, or has the ply fallen apart or something? If it's just wet, then all you have to do is let it dry out properly when the rain stops. If it's actually damaged, then the temporary fix is even easier...just drill holes in the damaged area and let the air circulate into the wall cavity and dry it out. You can always worry about replacing the sheets at a later date. Get the leaks fixed now, though.  cheers, Al. |
|
Deleted
Deleted Member
Posts: 0
|
Post by Deleted on Jan 29, 2013 5:53:38 GMT 10
Hi Al
Thanks for the tip. It should be dry in a few days and I will survey the damage. Hopefully it's not too bad, but I have a bad feeling. I kind of morbidly like the idea of drilling holes. It will force me to then fix it properly and make another improvement to the old girl (I feel the van is a him though ;D)
Cheers
Mike
|
|
Deleted
Deleted Member
Posts: 0
|
Post by Deleted on Feb 2, 2013 20:19:12 GMT 10
Oh oh, what have I done! Pulled the front window out. To get it out I had to remove the front stone shield which also took out the top window which took out the fly screen. This has become a big job.. Now I'm scared I have taken on a bit too much for my ability. Maybe I should have just bogged it all up from the outside with copious amounts of sealant. Too late now. Hopefully it all goes back together ok. Oh, and doesn't leak of course. You can see in the last photo below the timber shelf damage. Been leaking for a while it looks. I may need to get something a bit more secure attached so I can refit my sons top bunk and not worry about it collapsing. The old sealant was hard and flaky, no wonder they start leaking. Wish me luck this may take a while. 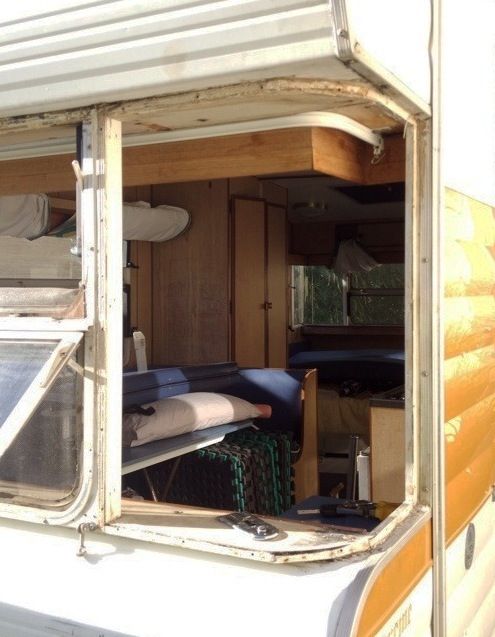 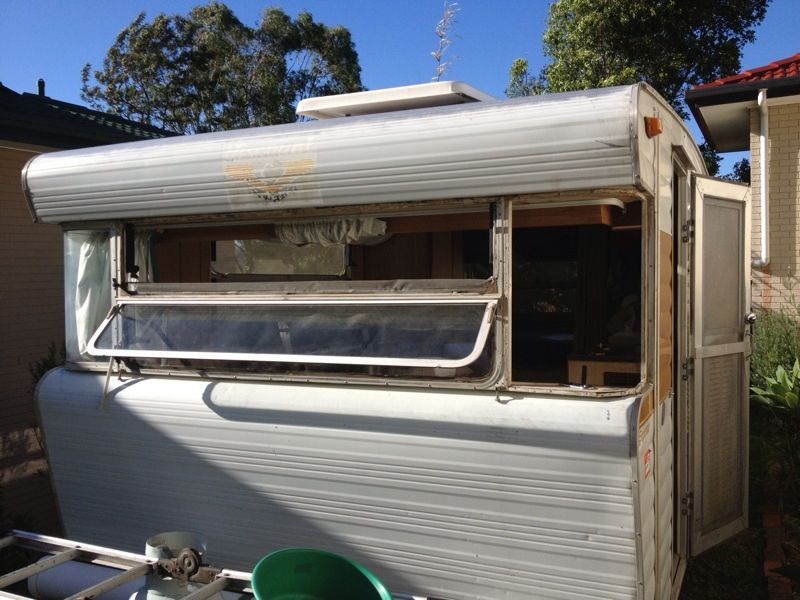 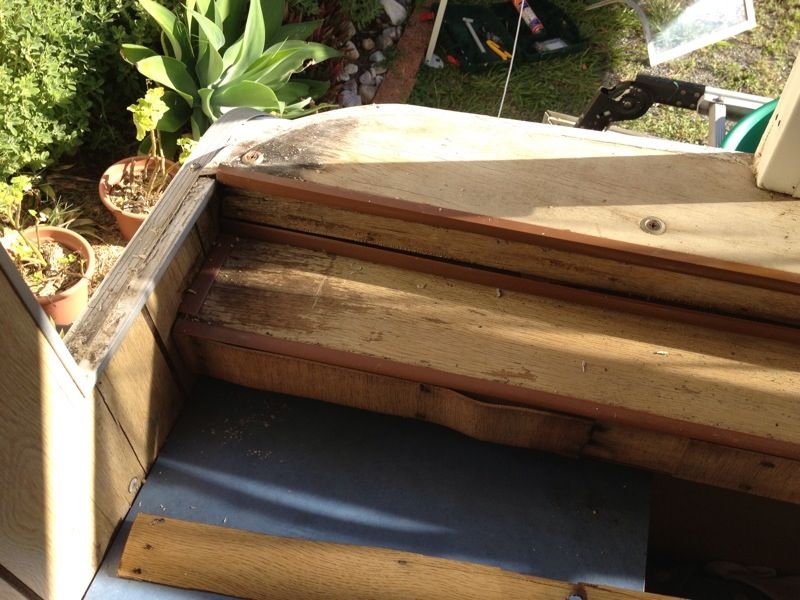 Cheers Mike |
|
|
|
Post by ForumMod on Feb 3, 2013 15:01:40 GMT 10
G'day Mike, Looks like you've discovered the usual issues associated with Viscount wrap-around windows. It would be the first part of any Viscount caravan I inspected, after seeing this sort of problem in many threads on this forum. I think there's a fundamental design fault with this type of window arrangement. Water cascading off the roof at both ends will want to run around the "nose roll" above the window and veer in towards the windows themselves. I've come to the conclusion that Viscounts would be vastly improved by having a deflector strip fitted above the windows, such as I did on the back of my Windsor van... 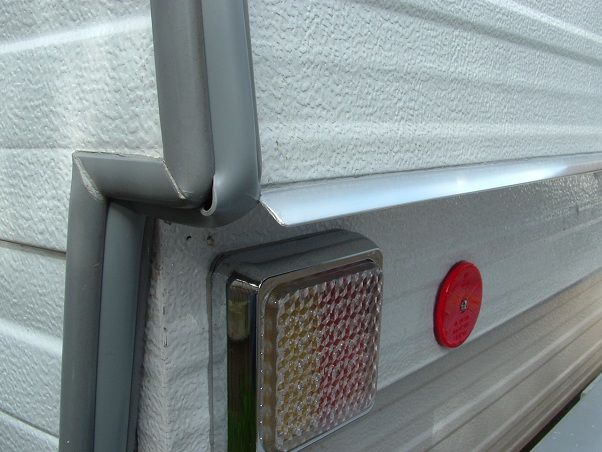 In heavy rain, the water cascades down the back of my van, and the deflector I fitted forces the water away from the van, rather than in towards to the tail lights the way it did... 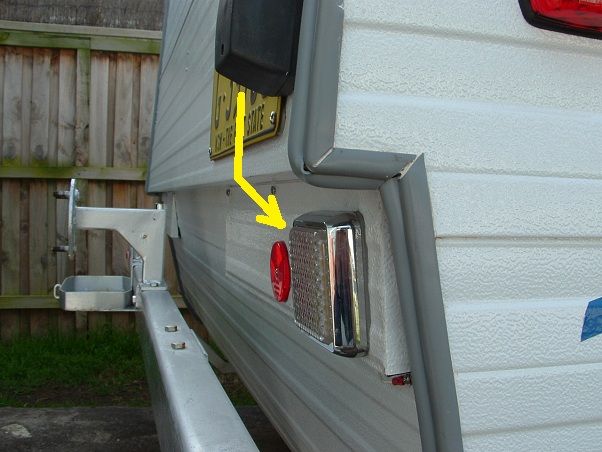 The other dumb design feature is the "flat deck" at the bottom of the Viscount windows. Why they didn't design this section with a 5 or 10 o slope away from the van is beyond me. Did anybody in the Viscount design department do any water trials when they came up with this design on paper?! Good luck with the repairs. There are plenty of others scattered throughout this Hall Of Fame section that have done what you're doing, and as far as I know none of them ended up jumping off a cliff, so the job must be reasonably easy to accomplish. cheers, Al. |
|
Deleted
Deleted Member
Posts: 0
|
Post by Deleted on Feb 3, 2013 17:19:15 GMT 10
Hi Al The wife reckons she told me to fit a flashing like yours months go.. I don't remember but she enjoyed reminding me. Ha ha! It's a great idea thanks and I will give it a go. Now's the time to do it.. Cleaning things up at the moment along with creating shade to work and a tarp to keep things dry. Going ok so far. I decided on a general purpose sealant from Sikaflex. I just don't see why there are so many choices, it's just bewildering and probably just a big marketing exercise in my opinion. Anyway, here's a picture of my "workshop".. I will be doing this over a few weekends and preparation is the key right? 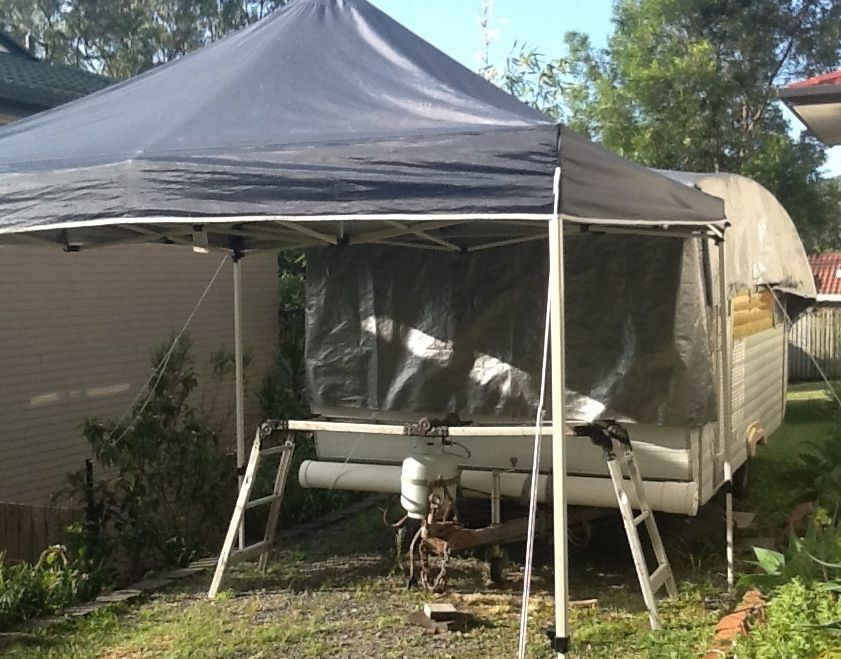 Cheers Mike |
|
|
|
Post by ForumMod on Feb 3, 2013 19:47:46 GMT 10
Mike, picture is now the right way up. That darn Photobucket can throw a spanner in the works sometimes.  Looks like you've got a good setup there to do the job. We'll keep our fingers crossed you don't cop a few weekends of rain. That's the worst thing about doing these repairs outside - you have to do a lot of praying to the weather gods.  cheers, Al. |
|


