|
|
Post by philouise on Apr 7, 2009 13:02:07 GMT 10
hello cc'ers. this is my second effort at posting. i have attached the link for our mid 70's 16ft millard which we were using for holidays but am now renovating a mid 70's 10ft 6in franklin hunter. 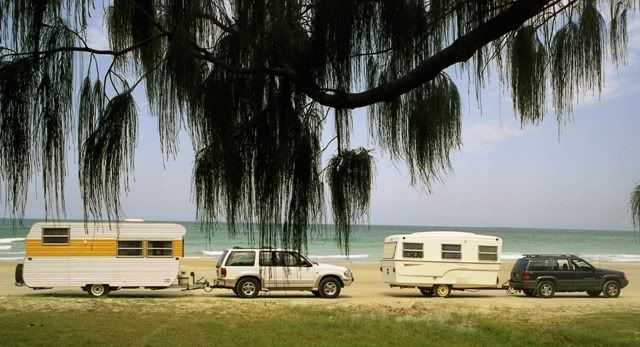 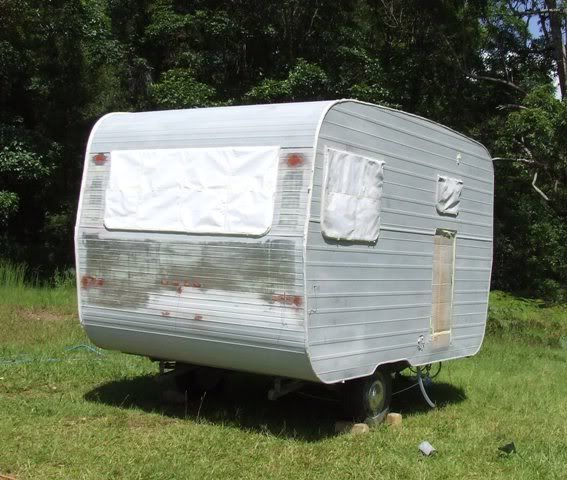 we notice the difference between towing 1.35 tonne and 740 kg so the millard is now out of rego for a while and the franklin is getting close to rego (what an effort!) i enjoy reading all your posts and checking out the photos. all the best to all. phil. p.s. the olympic belongs to my brother in law |
|
Deleted
Deleted Member
Posts: 0
|
Post by Deleted on Apr 7, 2009 15:18:38 GMT 10
|
|
|
|
Post by atouchofglass on Apr 7, 2009 17:58:11 GMT 10
Hey All Dual windows over the area that is normally the kitchen.   Unusual for an Olympic Nice looking van none the less cheers Atog |
|
Deleted
Deleted Member
Posts: 0
|
Post by Deleted on Apr 7, 2009 21:34:06 GMT 10
philou hi can you tell us how you are painting your van please as i am about to paint mine soon would love some tips as i have not done much painting
Thanks gary
|
|
|
|
Post by philouise on Apr 8, 2009 14:28:41 GMT 10
hi gary.
wish i had some good advice for you. the millard was ok on the walls so to stop leaks in corrosion pin holes in the roof we used silver shield ( the bitumen style paint with a silver finish). sealed well but doesn't set like paint so it leaves run stains down the walls when it rains. will try and paint over the silver shield one day. (then clean the walls).
Interior walls were painted with all purpose undercoat then dulux suede (this hid all the faults) with the clear coat finish.
Any plastic strips etc were first coated with white knight grip lock.
Ceiling was undercoated then overcoated with wall paint, not ceiling paint.(the cupboards were left original)
The Franklin's interior was replaced with bunnings pre coated ply.
We had to completely sand off the coating just to get the grip lock to stick. Same problem with the original sections of walls and ceiling.
Then suede paint with cupboards left original.
The exterior paint was bad back & front and got worse while cleaning with metho. So we ended up removing all the paint with metho and sanding the hand painted side stripes and bogging the numerous dents.
Etch primer was spray painted to the exterior aluminium but the hire equipment (or me) left the coating like coarse 80 sandpaper so more major sanding. (ended up finishing off with an old "little beaver" and light sanding.)
I will paint the roof with wattyl solar guard ( therma shield would be better).
The walls were going to be automotive enamel with enamel add. (2 pac would be better) but the etch primer finish is so bad that i will probably do the whole van in solar guard to try to hide the faults. (all my faults,too)
well, thats a lot of rambling with no good advice except to check on everyone else's painting comments.
regards from phil
p.s. my other brother in law who works for smash repairs suggested i just use a scourer on all the original paint (no sanding or priming) and spray with the automotive enamel. (but i am told that acrylic is better)
|
|
|
|
Post by millard1399 on Apr 8, 2009 15:50:16 GMT 10
G'day philou and welcome to the forum (...I'm a bit late...   ) Would you mind posting the chassis numbers of both your Millard and Hunter vans, so I can include them in the new Chronicles section we are developing? The more chassis numbers we can collect, the more chance we have of nailing down the build date of vans. ps. The Millard still looks in pretty good nick! cheers, Al. |
|
|
|
Post by philouise on Apr 9, 2009 9:20:53 GMT 10
hello Al. The millard has a state energy commision cert dated 1978 in west aus. for Bi-Tone Caravan Sales the number M53664 is on a plate rivotted to the A frame. Chassis is galv. with aluminium frame. The franklin has the number 2039 welded on the a frame. this number was also hand written on the back every piece of interior lining i replaced, even the kitchen sink.(no known date yet) and is similar but different interior layout to this one ditzygypsy.proboards.com/index.cgi?board=photos&action=display&thread=109all the best in your chronicle endeavour. Phil. |
|
|
|
Post by philouise on Apr 9, 2009 9:32:15 GMT 10
thanks Atog.
the olympic is a 12 ft debonair with fridge to the left of the door and the robe to the right. the sink and bench is at the front. the dinette is on the other side toward the front. the beds were a L shape singles, one down the other side & one at the back.
The wheels are 15" volvo on the holden 13" stubs for extra clearance.
I wouldnt mind a fibreglass myself. (did have a chesney long ago)
have fun & games at the olympics
phil.
|
|
|
|
Post by millard1399 on Apr 9, 2009 10:48:44 GMT 10
Phil, I've changed the original heading of your thread so I can find it more easily later when I want to retrieve your chassis numbers.
cheers,
Al.
|
|
|
|
Post by philouise on Jul 6, 2009 17:03:44 GMT 10
hello again c.c.ers well, its been 1 year of weekends and the better half of philou has said "thats it!-time to take her out" so we travelled 40klm to kingscliff caravan park for the test run. the franklin is leaving home.(cut the bonnet off the astra & thats the size of the van.) 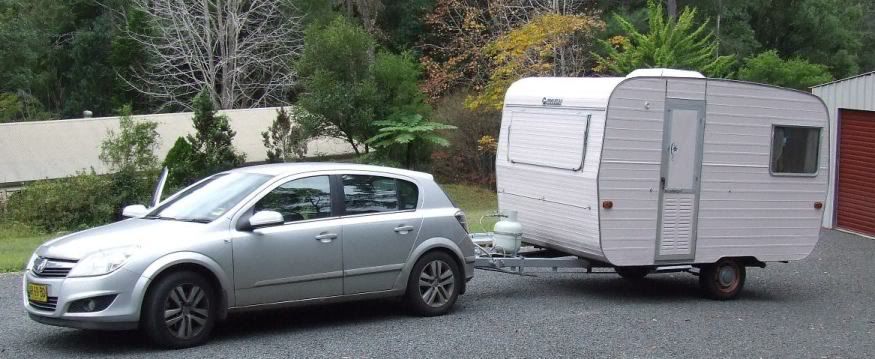 woke up in the morning and had to run outside - had a funny feeling-where is the shed? 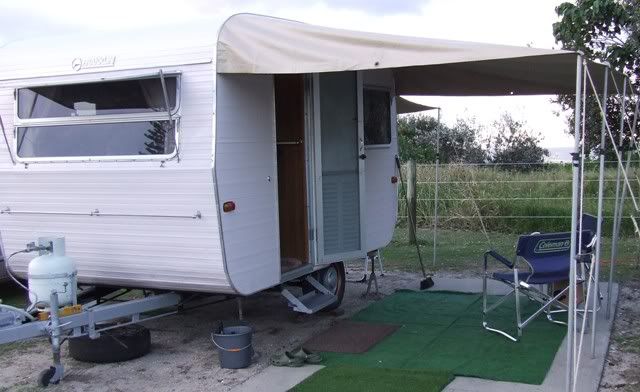 inside front 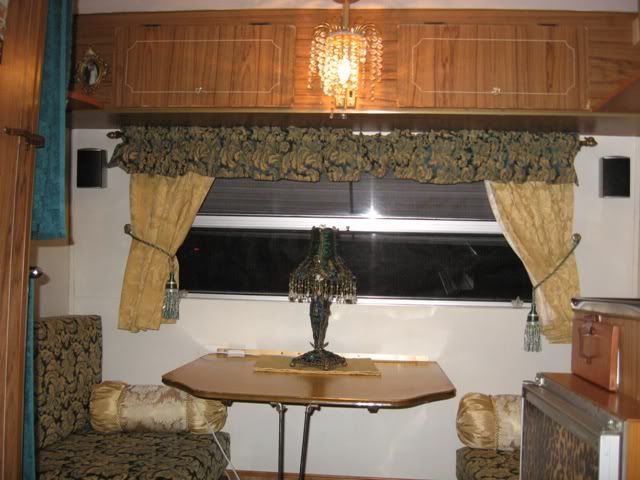 inside back 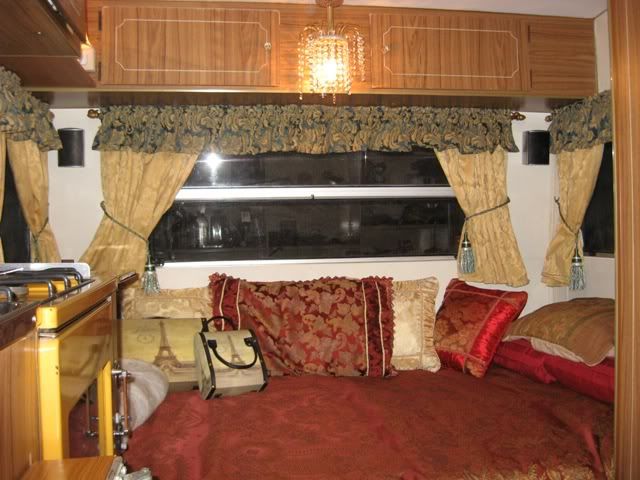 the side shots 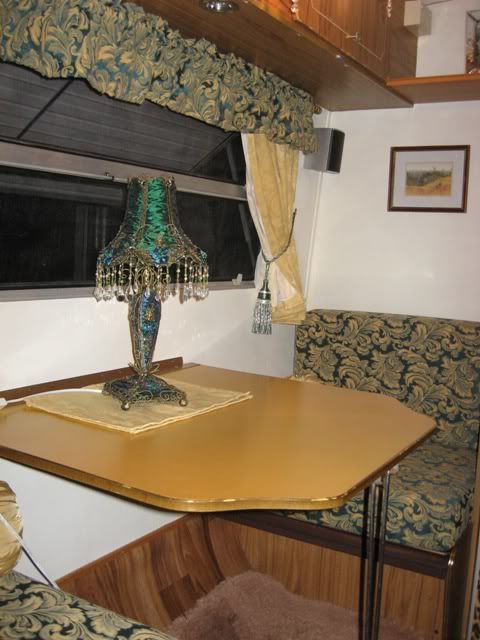 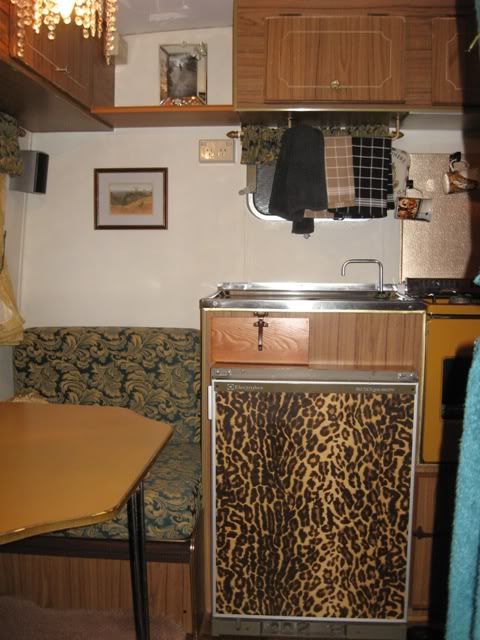 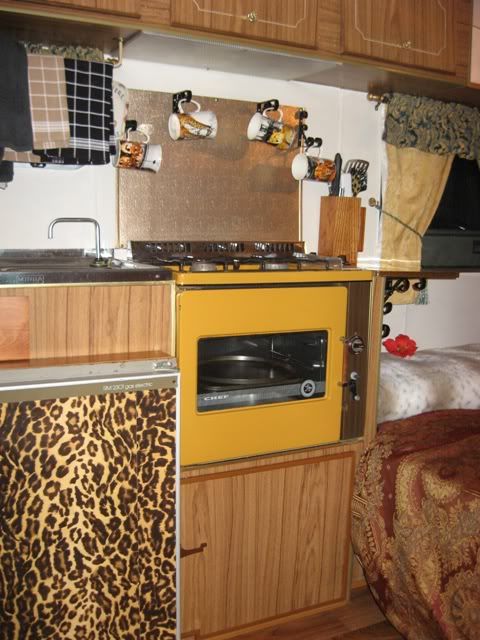 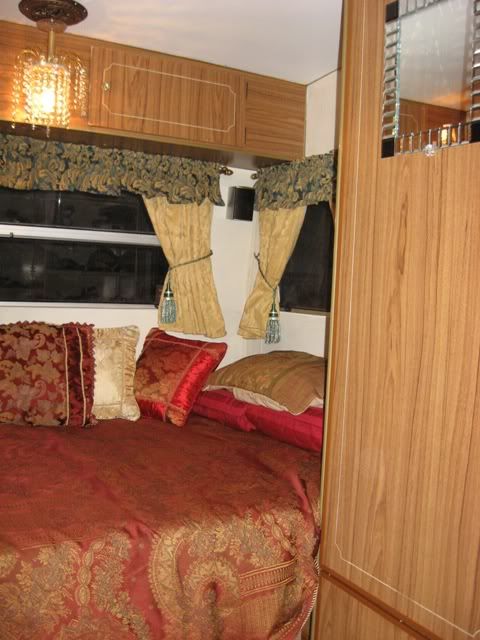 a shot of the van doubled in size with an oz tent and annexe adaptor (fit the grand kids in) 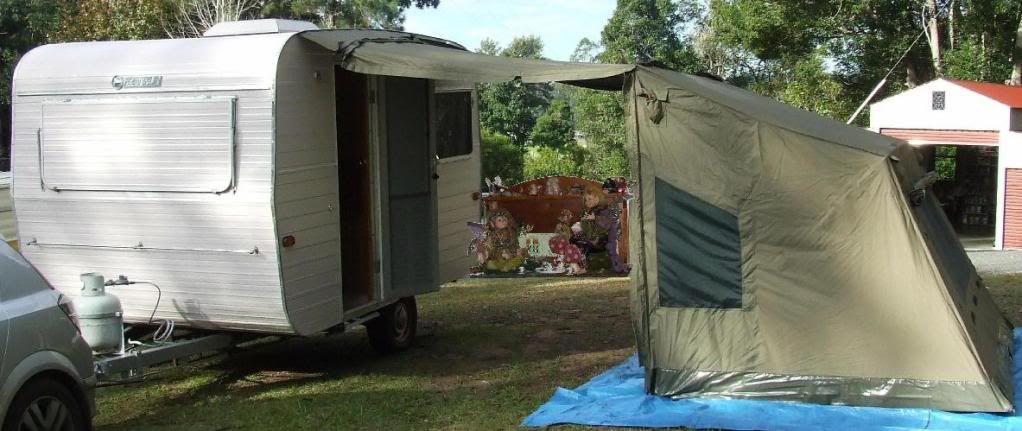 i will add a little more later philou p.s. here is the inside of the millard 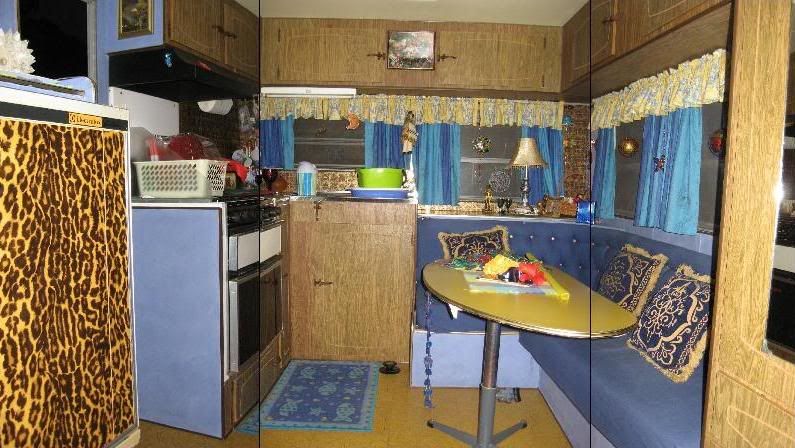 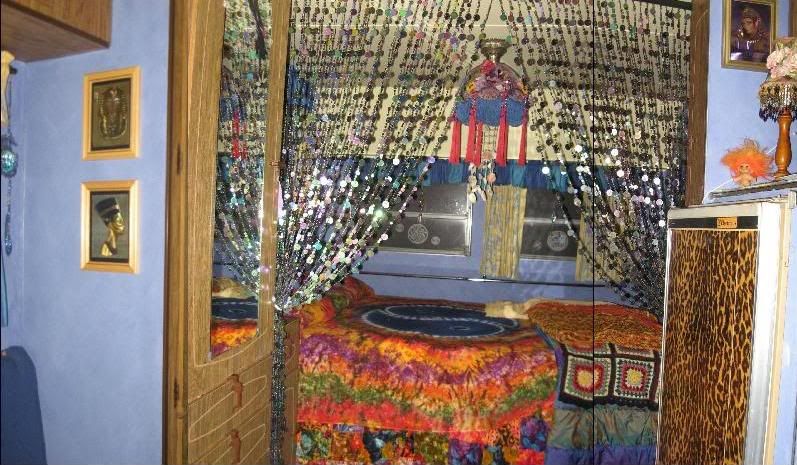 |
|
|
|
Post by philouise on Jul 7, 2009 16:57:27 GMT 10
hello c.c.ers. Here are the words to go with the photos.
Outside was paint stripped back to aluminium then numerous dents fixed with body filler.
All aluminium strips around the van edges were removed, cleaned and resealed with…..silicone….
Aluminium was coated with etch primer, left 2 weeks then coated with – yes, afraid so – solar guard.
Started first, though, on the inside. Lots of rotten window/door framework replaced and lots of internal ply removed but leaving the last thickness still glued to the foam which is in turn glued to the aluminium walls.
Replaced with ply from bunnings using the plastic joining strips. (had to do some ceiling as well).The ply bent well around the curve back and front.
Had to put in a new door jam using aluminium angle etc from a supplier. (franklins door jam was non existent).
New soft lino was placed over the existing tiles after some flooring was fixed with body filler.
Original broken fridge was replaced with a 2nd hand 3 way from the tender centre.
Rear nite & day lounge and dinette cushions were taken to a professional upholsterer using our material. (quite well priced too).
All windows were removed, cleaned and resealed using caulk (sort of plasticine in rolls) This was chosen after much differing advice from van repair yards. (had to remove the windows to get the fridge & lounge out)
Replaced the window dust seals, insect screens, and numerous broken pieces (winders etc) with similar parts from van repair shop. All window holes were not cut very well by franklin so windows had lotsa gaps.
Cupboard handles were replaced where needed with similar ones from same repair shop.
Louise did all the internal fixes like puttying numerous screw and nail holes in the cupboards and painting the walls with grip lock as the undercoat and then suede paint effects to hide the blemishes. Ceiling was ordinary wall paint over grip lock.
Still had to really sand the old and the new ply before painting. (She did a lot of the external sanding too, we both reckoned we had gone overboard)
We have started edging all the cupboard doors with a 5mm plastic angle to stop the chipboard from flaking more.
I have installed some 12v lighting and a car cd player that takes usb stick which run for probably 2 nights from a jump start/power pack.
That’s it. Finished (nearly). A year of weekends, too much grog and a missus who was getting over it.
(most of my time was spent trying to find where I put my glasses – and I was drinking out of a bottle)
After this, I must say that I am mighty impressed with the efforts of the cc’ers whose van rebuilds are posted on this site.
I cant believe the better than new finish you can get from your original vans state. Words escape me.
Something like that is not in my vocabulary let alone in the wife’s marriage vows.
well, its time for another one - drink that is. philou.
|
|
|
|
Post by millard1399 on Jul 7, 2009 17:59:25 GMT 10
G'day philou, well it certainly looks like a lot of blood, sweat, and tears beers have gone into the makeover of BOTH your vans!   I reckon you've done as good a job as the rest of us mugs trying to pretend we're caravan restorers ;D ;D . I for one am most impressed with how your vans have turned out, and I particularly like the expensive looking interiors. Chandeliers, no less!! I'll have to arrange to rent a tuxedo so I can come and have a good gander around the vans one day!!     Congratulations on a really fine effort!!!!! cheers, Al. |
|
|
|
Post by bobt on Jul 7, 2009 20:24:57 GMT 10
Hi philou Well done with the renno it looks good, sure like the interior decorators touches..  Bobt |
|
|
|
Post by atouchofglass on Jul 7, 2009 22:04:30 GMT 10
Hey Guys Love the interior      The lamps and chandelier .... priceless Well done Cheers Atog |
|
|
|
Post by kiwijim on Jul 7, 2009 22:31:42 GMT 10
G'day there philou, Great job on the reno, it sure looks comfy and has the definite touch of a woman there, I like the design of the fridge door patten, very different and suits the caravan perfectly, those chandeliers fit in very well with the interior design, well done and a great job. We hope to see that one in the West for the Wild-flower tour. ;D  ;D Cheers kiwijim  |
|
|
|
Post by philouise on Jul 8, 2009 16:45:35 GMT 10
thanks guys.
the painting was the worst. luckily my son put me on to coopers sparkling ale (red label) at 5.8%...that got me through.
but like i said-after that effort i still cant imagine how the rest of the cc ers have coped, particularly after viewing their posts.remarkable.
phil.
|
|
|
|
Post by philouise on Oct 20, 2009 15:41:46 GMT 10
thought i would show some extras i did on the franklin. 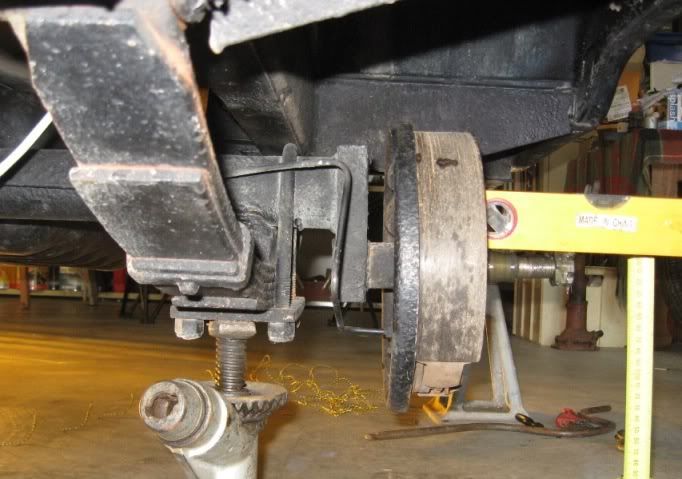 The both wheels tow in at the top but one was worse so i heated up the bar that joins the main axle to the stub axle and then levered the stub axle downward a bit. I figured it was enough but the wheel is still not correct but at least it matches the other one now instead of being worse. I also finished placing plastic angle moulding around the chip'd chipboard cupboard doors. And below are some photos i took before i found this site 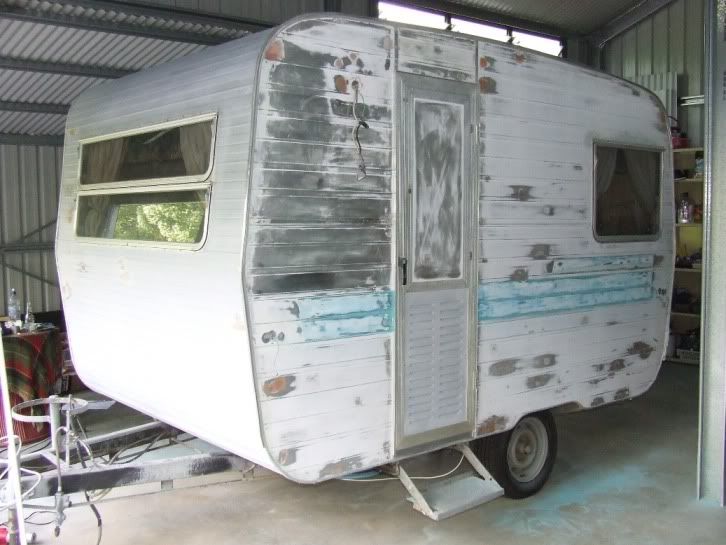 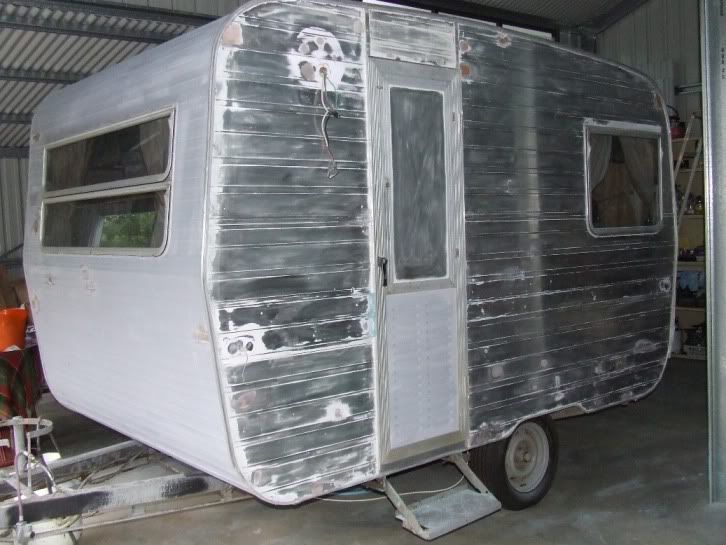 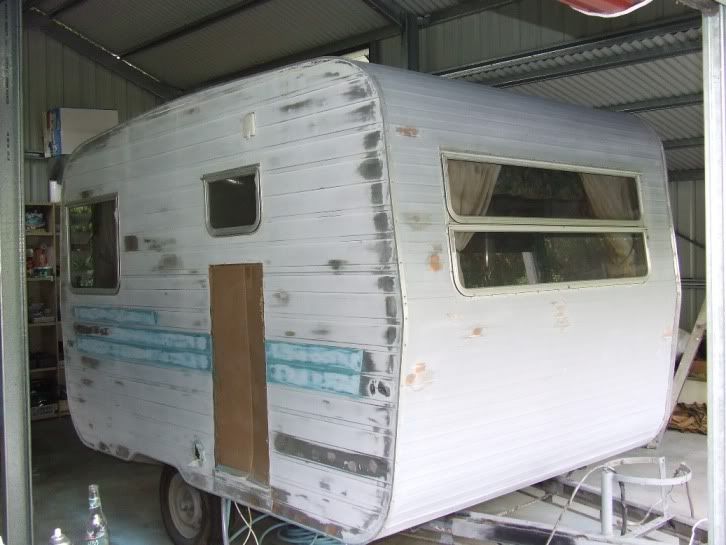 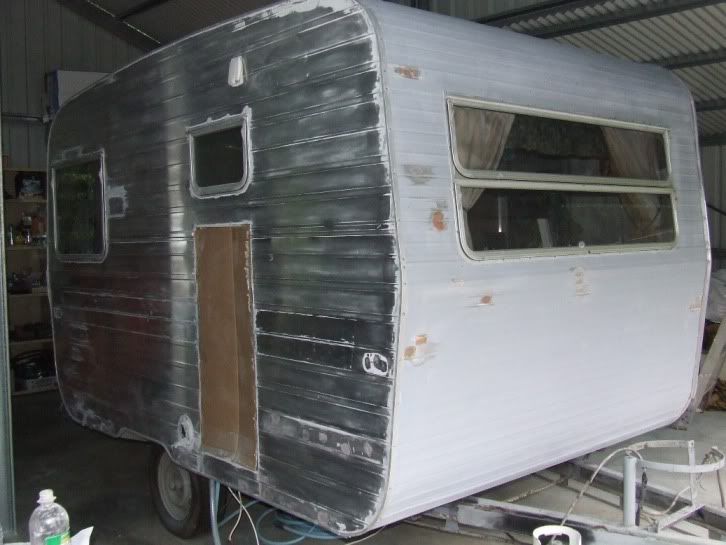 Well, thats it. The next project is to turn this old whiteant shed into a new carport for the Franklin & Millard 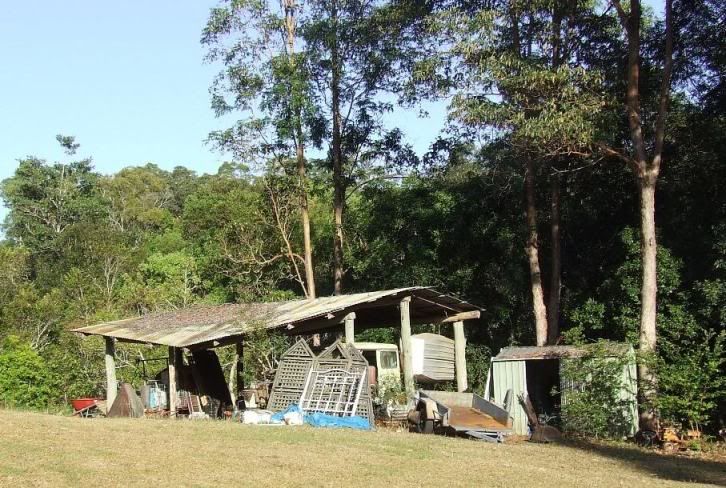 all the best to all you renovaters phil p.s. i just modified the photos smaller, they were still a bit big. |
|
|
|
Post by atouchofglass on Oct 20, 2009 16:32:54 GMT 10
Hey Philou So which shed are you fixing up? The one on the left, the one on the right or the flat packed one in the middle ;D ;D ;D ;D ;D     Cheers Atog |
|
Deleted
Deleted Member
Posts: 0
|
Post by Deleted on Oct 20, 2009 22:28:19 GMT 10
Philou,
congratulations on your 2 vans, they look great. Love the interior decorations.
In a word "WOW".
Frankidownunder.
|
|
|
|
Post by philouise on Oct 21, 2009 15:49:45 GMT 10
Thanks frankidownunder.
i prefer the more rounded shape of your franklin, which you have done really well with (shower & all). good looking paint work too.
And hi Atog.
the worst of the shed restoration is that the missus wants me to put all my "rubbish" out for the council pickup. I keep on telling her "i don't have any"
cheers
Phil
|
|
|
|
Post by bobt on Oct 21, 2009 20:12:21 GMT 10
Hi Ya Phil
You sure put a lot of effort into that little franklin. It came up a treat.. Love what you are towing it with. How does it cope?
Mate be very careful around the council clean up time. My dear beloved tried very hard to put me out for collection. She figured it would be a good start to the clean up ;D ;D
Bobt
|
|
Deleted
Deleted Member
Posts: 0
|
Post by Deleted on Oct 21, 2009 22:53:49 GMT 10
We don't have a council cleanup, ;D nor do we have a tip in our town now. ;D ;D ;D Wheee. I can keep all my goodies with no pressure on me to discard them...
frankidownunder
|
|
|
|
Post by philouise on Oct 23, 2009 15:00:52 GMT 10
thanks Bobt.
I lease the Astra from my work. The turbo diesel manual hatch is the only one with the more powerful engine and better suspension. (not the petrol and not the automatic).
Plenty of power for the approx 1 tonne total towing. (just needs a bit of rev and clutch work on a standing hill start).
Fuel goes from about 7L/100K not towing to 12L/100K towing.
The hatch also places the towball closer to the back axle better than car or wagon and i use weight distribution/stabilizer bars.
cheers.
no rubbish Phil.
|
|
|
|
Post by bobt on Oct 23, 2009 21:23:07 GMT 10
hi ya phil Well I would not complain too loud about the fuel consumption especially with such a high front on the caravan. Thats a lot of air it has to push against. I am just amazed the Astra has the towing capacity (weight wise) but then I have never looked. It certainly appears to be sitting correctly when it is all hooked up. I take it you have electric brakes too. good to see your out and about using it..  bobt |
|
|
|
Post by philouise on Oct 26, 2009 11:51:28 GMT 10
g'day Bobt.
Electric what?? - just kidding.
I am only using the original hydraulic over ride brakes. The tare weight was 740 kg and i use a 4 bar stabilizer/weight distribution thing which creates a total drop in the towball of about 25mm and eliminates the sway (so far). I havent calculated the ball weight - will have to soon. (the astra can tow 1300kg braked)
I did have to put a different tongue on the towbar (to get the van level) which is well above the number plate so that is a pain having to remove it when not towing.
cheers. Phil.
P.S. and sumfin else, last weekend i discovered sumfin worse than having no rubbish to cleanup and that was having my perfectly clean and arranged shed declared to be untidy and messy with everything everywhere. So the missus gets in to it and now everything is nowhere (that i can find anyway - but then, i couldnt find anything before anyway.
Cheers.
|
|