Deleted
Deleted Member
Posts: 0
|
Post by Deleted on Sept 30, 2011 15:22:12 GMT 10
Hi everyone, I'm looking for some help locating external cladding for a 1974 Vicount which needs replacing due to a spot of rust. I'm in Perth.  |
|
Deleted
Deleted Member
Posts: 0
|
Post by Deleted on Sept 30, 2011 16:20:51 GMT 10
We've just bought a 1974 Viscount with the intention of making her into a home.  We have christened her Katy, her number plate really told us what her name was!  First job was to totally gut her, as she really was in a sorry state inside and had been neglected for quite a while.   Looking forward to the next few months as we fix her up. Will be spending quite a lot of time on this forum I think looking for tips.  |
|
|
|
Post by millard1399 on Sept 30, 2011 16:30:34 GMT 10
G'day scotia59, and welcome to the forum! ;D Oooh...that's a nasty bit of corrosion in the aluminium there!  We have a forum member, kiwijim, who used to work in the caravan repair industry, and who lives somewhere in the Perth region, and who might be able to point you in the right direction. The only problem is that he might actually be out on the road at the moment in his fixed-up motorhome, giving it a good test.  Let's see if he answers your question over the next 24 hours. I know another member in Brisbane was able to get new sheets of that cladding to fully reclad his Viscount, so it must still be available, and hopefully in Perth as well. The chassis on the inside of that section of corrosion must be well and truly shot with rust. Usually you would expect the steel chassis to be badly affected if the aluminium cladding has got corrosion to that degree. cheers, Al. |
|
Deleted
Deleted Member
Posts: 0
|
Post by Deleted on Sept 30, 2011 16:40:43 GMT 10
thanks for the welcome, hopefully kiwijim will be in touch.
Yes the framework inside is totally shot at that section, but we've got some new aluminium angle to fix that up with - planned for doing this weekend!
We did think of putting lightweight checkerplate on the lower half of the van but that is hard to get too.
Going to Camec tomorrow but I believe they are expensive!
|
|
|
|
Post by millard1399 on Oct 1, 2011 17:32:14 GMT 10
G'day again scotia59, Well it doesn't seem like kiwijim is anywhere near a computer at the moment, so we'll have to see how else we can help you. There's a major Camec store in Welshpool... Camec Pty Ltd WA. Unit1, 175 Welshpool Road Welshpool WA 6106. Tel: 08 9351 0000 ...who might be able to point you in the right direction towards finding some. The other member who chased up some new stuff in Brisbane called it the "log cabin profile". You can read all about the restoration of his van by clicking on this linkIf Camec can't help you, it might be worth tracking down the nearest caravan repairer to you, and seeing if they know of any supplier. If all else fails, you could do a temporary repair by getting a patch of aluminium sheeting and pop-rivetting it over the corroded section (putting lots of sealant under the patch). If you can't find any aluminium sheeting, maybe even an old aluminium cake tin from the nearest Charity Shop could be cut up and used as a patch. A bit of white paint over the top, and it'll be "brand new". Hopefully somewhere in amongst that info there will be a little success story for you. Good luck  cheers, Al. ps. after I posted this reply, I realised you'd already said above that you were "Going to Camec tomorrow", so you probably know already whether they can help with the cladding or not. |
|
|
|
Post by jeff on Oct 1, 2011 18:30:25 GMT 10
Hi scotia59,
I had a similar problem a few years ago with a van, could'nt get the right profile replacement so I removed the panel, repaired and rustproofed the chassis underneith I then fibreglassed the inner surface put the panel back on the van, applied builders bog on the outer surface, then sanded to equal profile, came up a treat, cheers
|
|
Deleted
Deleted Member
Posts: 0
|
Post by Deleted on Oct 2, 2011 17:37:01 GMT 10
thanks for the suggestions. We went to Camec yesterday and while they couldn't help us they did give us the name of a caravan repair place that might. Anyway we decided to take part of the rusted panel off and repair the framework underneath.   After cutting the corroded framework we (Alex) grinded back the chassis and luckily found it to be very sound.   So a coat of 'Chassis Black' was applied and it has come up a treat.    So now we just have to get the rest of that side done, then we will lift the rest of the floor and do the rest of the chassis. |
|
Deleted
Deleted Member
Posts: 0
|
Post by Deleted on Oct 2, 2011 18:28:02 GMT 10
Hi Scotia and welcome, I'm sure you'll enjoy this site as much as I am  We had rust in the chassis rail in the exact same spot as you, behind the wheel on the driver's side, fortunately we found it and had a welder do a home visit and cut it out and weld a new piece in ... before it could go further up like yours has  Obviously a weak point in 70's Viscounts  Good luck with your reno ... you must be very good with DIY to attack this job. Look forward to the 'after' photos, Cheers, Subbie |
|
|
|
Post by millard1399 on Oct 3, 2011 9:55:27 GMT 10
G'day scotia59, Struth, that's some major surgery being done there! It does seem like the Viscounts have a common problem in that area. I've seen other photos on the forum showing similar issues with corrosion in the framework behind the wheels. But, by gees, whoever that fella is, in your photos, that's doing the work is doing a great job! Tell him I said he looks like a "professional"!!   Your van is gonna look like it just rolled off the production line! Excellent effort!! ;D cheers, Al. |
|
Deleted
Deleted Member
Posts: 0
|
Post by Deleted on Oct 4, 2011 10:35:27 GMT 10
Thanks Subbie, I am looking forward to the 'after' photos too!!! The clever guy in the photos is my husband Alex, a carpenter by trade but a jack of all trades. He laughed when he read your post as this is the first attempt at renovating a caravan, and was pleased you think it looks professional, always good to get comments from people in the know. Jean  |
|
Deleted
Deleted Member
Posts: 0
|
Post by Deleted on Oct 13, 2011 8:34:48 GMT 10
I'm looking for some advice - we want to fit checkerplate to the lower half of the van where we have had to cut it away. Anyone got any suggestions on the best way to do this, we did think of h channel but are finding it quite hard to source.
|
|
|
|
Post by Rattles on Oct 13, 2011 11:56:55 GMT 10
It appears from your photo that the cladding is joined where the colour changes to Blue any chance of jamming it into the bottom of the fold of the blue.
or if the bottom of the Blue sheet is a J section then pop rivet a strip of Aluminum with a 1mm spacer between the Checkerplate and aluminum strip or use the top of the the old white sheet pop riveted to the inside top edge.
I did this on a later profile on the front as a stone protector on my previous caravan.
Rattles
|
|
|
|
Post by millard1399 on Oct 13, 2011 21:34:35 GMT 10
G'day scotia59, I've seen photos of vans that have had the aluminium checkerplate added to the bottom, but I have no idea how it is done. These photos are of a professionally rebuilt 1978 Chesney, and show the checkerplate...  You can see the original cladding profile on the sides, so somehow they are able to blend in the checkerplate with the existing cladding. I think for the log cabin profile cladding on your van, you would maybe tuck the checkerplate up behind one of the ridges in the cladding profile. Maybe you cut along the centre-line of the ridge, and tuck the plate up behind it. The ridges in the profile must sit out from the framework by a couple of millimetres, so there would be room to tuck the plate in behind it. But, what do I know??...nothing!!...so don't go cutting anything until you check with other experts.     cheers, Al. |
|
|
|
Post by atouchofglass on Oct 14, 2011 5:44:00 GMT 10
G'day scotia59, I've seen photos of vans that have had the aluminium checkerplate added to the bottom, but I have no idea how it is done. These photos are of a professionally rebuilt 1978 Chesney, and show the checkerplate... You can see the original cladding profile on the sides, so somehow they are able to blend in the checkerplate with the existing cladding. I think for the log cabin profile cladding on your van, you would maybe tuck the checkerplate up behind one of the ridges in the cladding profile. Maybe you cut along the centre-line of the ridge, and tuck the plate up behind it. The ridges in the profile must sit out from the framework by a couple of millimetres, so there would be room to tuck the plate in behind it. But, what do I know??...nothing!!...so don't go cutting anything until you check with other experts.     cheers, Al. Many of the checkerplate stoneguards I've seen are sikaflexed on. Yep just glued straight onto the aluminium. I'm looking for some advice - we want to fit checkerplate to the lower half of the van where we have had to cut it away. Anyone got any suggestions on the best way to do this, we did think of h channel but are finding it quite hard to source. On a similar note to Al's Seeing you already have the siding cut out, is there a possiblity of turning/rolling the edge of the aluminium siding to create a straight edge? Under that - attach the checkerplate. It would have to run up behind the existing siding far enough to be attached to internal frame work. Also would need sealing to stop water entering via capillary action. Again sikaflex would be a good choice. OR There would need to be some internal support directly behind the checkerplate. Perhaps welding angle iron to the existing framework and attaching via pop rivets and sikaflex. Just a thought Cheers Atog |
|
|
|
Post by kiwijim on Oct 15, 2011 6:03:25 GMT 10
Howdy Scotia59, Welcome to the Forum, It's always good to see another very enthusiastic member who lives in the West. You are sure doing a great job on your Viscount, She'll look a million bucks when finished. I'm sorry I couldn't get back before now, to answer your question regarding new cladding for your van, I have been having all sorts of problems with this old Computer lately, just won't do what I want it to do. While it is firing I shall try and be of some help, 1st off, the cladding you are looking for is called "LOG CABIN" this has not been available for some years, So what we did while I was doing the repairs, was to find a Repairer who had a 2.5 mt metal bender, Then we would buy flat aluminum ( Camec ) and measure and mark the sheets for bending, slip them a block or two of the good oil (Beer) and get them to do the bending for us. there are some Caravan Repairers in Perth who might do the bending for you, (If they are in a good mood) there is... PDA Repairs in Maddington PH 9493 5891 Perth C/V Repair Centre Maddington PH 9351 9232 Ken Pearcy Repairs Belmont PH 9277 1944 Another place that could help is any sheet metal worker, Yellow Pages has 139 listed in the greater Perth area. Hope this is of some help. cheers kiwijim  |
|
Deleted
Deleted Member
Posts: 0
|
Post by Deleted on Oct 16, 2011 11:30:33 GMT 10
Rattles, thanks, something to think about.
Millard1399, pics look good, we have looked at quite a few of the new vans to see how they are attached so have a few ideas now.
Atog, sikaflex was an option we thought of.
Kiwijim, good to hear from you. We gave up on trying to get the same profile and Camec suggested PDA at Maddington to us.
We have decided to go with checkerplate which we got from Capral and we are going to fix it to the existing aluminium with 'H' section which we eventually managed to get from 'Robert Cameron & Co' at Burswood, if you ever need anything metal these guys, we spoke to Arron, are extremely helpful and knowledgable, can't reccommend them enough.
Right, off to tear down the ceiling, will post some more photos tonight.
Alex
|
|
Deleted
Deleted Member
Posts: 0
|
Post by Deleted on Oct 16, 2011 15:34:51 GMT 10
Hi Scotia59,
I am new to this forum but have been looking for a while.
I have a 70 Viscount Dura 18 ft .
I am putting some axsis door in the side & will have some cladding that has been cutout,
size is aprox 1100 x 500, 750 x 750 & 750 x 600, if this would be any help to you.
I am in northern Vic.
Cheers viscounta4749
|
|
Deleted
Deleted Member
Posts: 0
|
Post by Deleted on Oct 16, 2011 16:15:56 GMT 10
thanks viscounta4749, but I think we are sorted now - even though I would have loved a trip over to Victoria to get it. lol.
|
|
Deleted
Deleted Member
Posts: 0
|
Post by Deleted on Oct 16, 2011 16:48:32 GMT 10
progress report... a few photos of the new and improved channel with new corner brackets for extra strength. 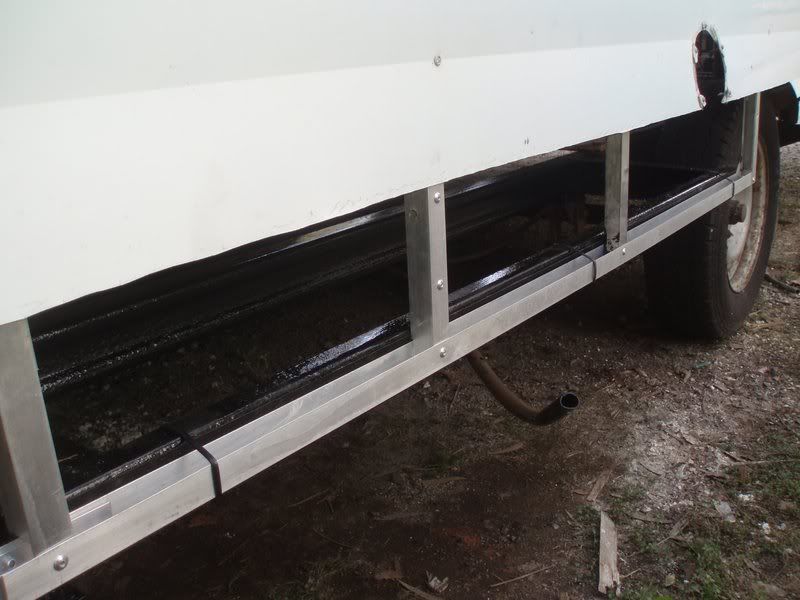 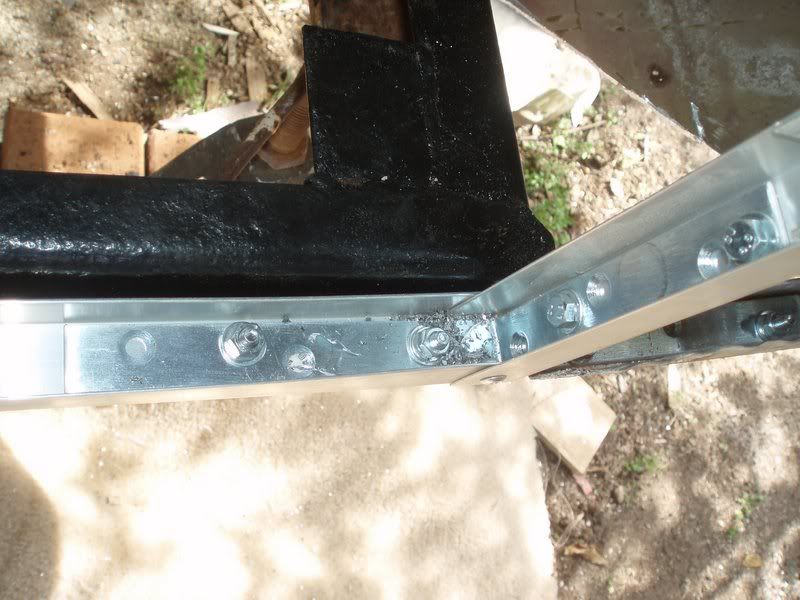 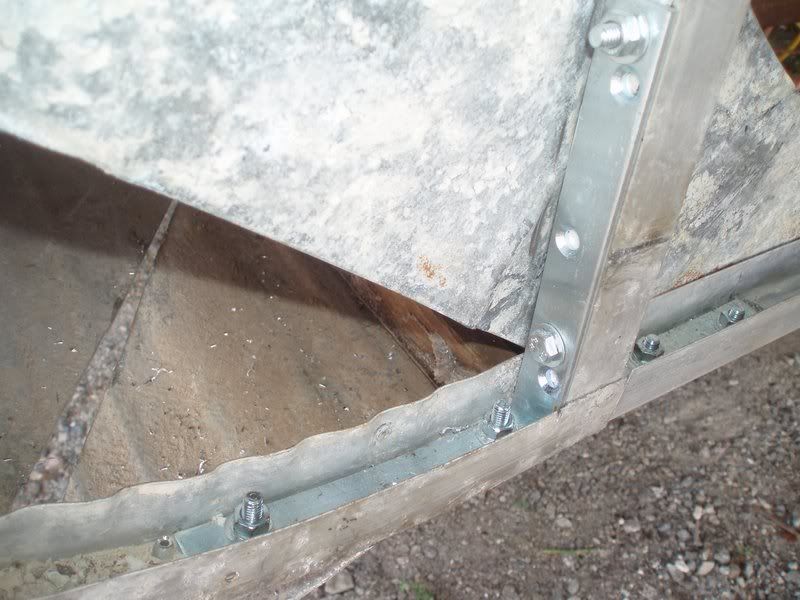 |
|
Deleted
Deleted Member
Posts: 0
|
Post by Deleted on Oct 16, 2011 17:23:02 GMT 10
|
|
|
|
Post by peter92 on Oct 24, 2011 8:20:17 GMT 10
you are doing a great job on your van, its the same as i am doing. will be nice to see how you do things
some updates on it would also be great so me and others can see the improvements your upto
keep up the good work
regards peter
|
|
Deleted
Deleted Member
Posts: 0
|
Post by Deleted on Oct 24, 2011 13:49:46 GMT 10
thanks Peter, we can only work on KTY at the weekends due to work  but I will definately keep updating as we go along. Look forward to seeing lots of photos from your project. Had a good weekend though we only worked on KTY on Sunday (got mixed up with our day of rest lol). Got the rest of the chassis stripped and painted, and even though I say so myself - It looks great!. 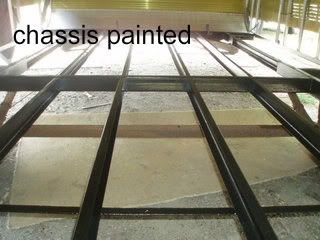 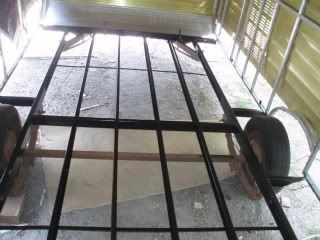 I am so excited, it is the start of the real fix up, no more destruction. Alex sanded the step back and it is in better condition than we thought so that will get put back on next weekend. Think we might put some rubber grip on it. 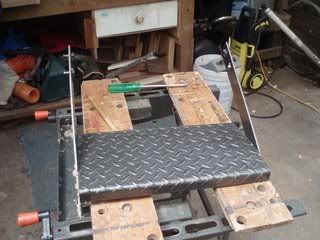 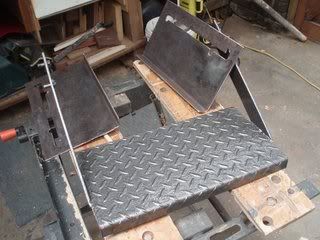 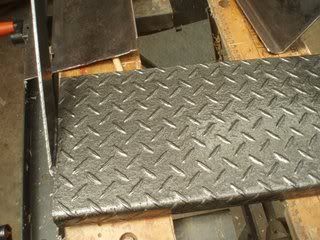 and now its time to start on the wheels etc. 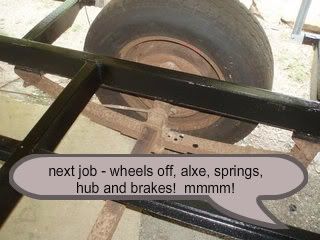 We thought of replacing them with bigger wheels to match the 4WD but decided to leave the same size - this decision might still change! We are going to move the springs though, which will give a little more height, we're not planning any off road but it will line up better with the 4WD. No work on her next weekend  Alex is putting in some decking at our sons place.   I have to remember - patience is a virtue! |
|
|
|
Post by millard1399 on Oct 24, 2011 15:43:09 GMT 10
G'day Jean, Wow!! You guys are certainly getting stuck into it!   Isn't it amazing what a good clean can do to the appearance of a van, even if it IS just a shell!   Congratulations on the great job you guys are doing. I can see this Viscount ending up being the talk of the town wherever you take it. ;D Before Alex gets to the stage of putting the new flooring in, I wouldn't mind talking with you about the roof a bit more. Can you get Alex to have a look on the top of the van, and see if there are any "lock-seam joints" where the roof sheeting is joined together? They look like this... 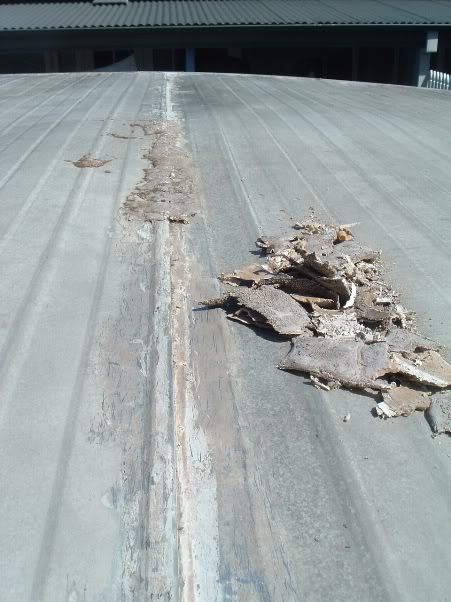 Can you let me know please, because I'd like to get you to do a couple of things to these joints to ensure you end up with a leak-proof van. cheers, Al. |
|
|
|
Post by peter92 on Oct 24, 2011 18:50:56 GMT 10
hi alex and jean, the van so far looks great, it would be good to see how you are doing things as your one step ahead of me
i have to take out my z piece as well, any tips on any of it, i love the brace plate you put on, will be doing that to mine
my van is the 13' viscount if you hit new topics
look forwards to talking to you again with any help you can give to make things easier
regards peter
|
|
Deleted
Deleted Member
Posts: 0
|
Post by Deleted on Oct 24, 2011 19:23:28 GMT 10
thanks Al, Just had a quick look and there are some folded seams but we've got the caravan covered up with the world's biggest tarp at the moment so we haven't got that far yet! but we will bear it in mind and talk to you when we uncover her again. 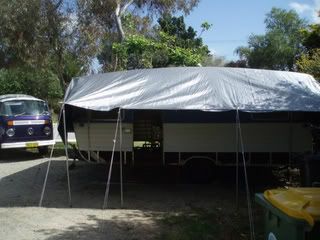 the workspace and Jean's kombi in the background. Peter - not too sure what you mean by 'z peice'? but we don't know any proper terms! Are you talking about the steel that is under the aluminium wall frames? cheers Alex |
|