Deleted
Deleted Member
Posts: 0
|
Post by Deleted on Jul 24, 2011 13:39:29 GMT 10
|
|
|
|
Post by millard1399 on Jul 28, 2011 22:20:11 GMT 10
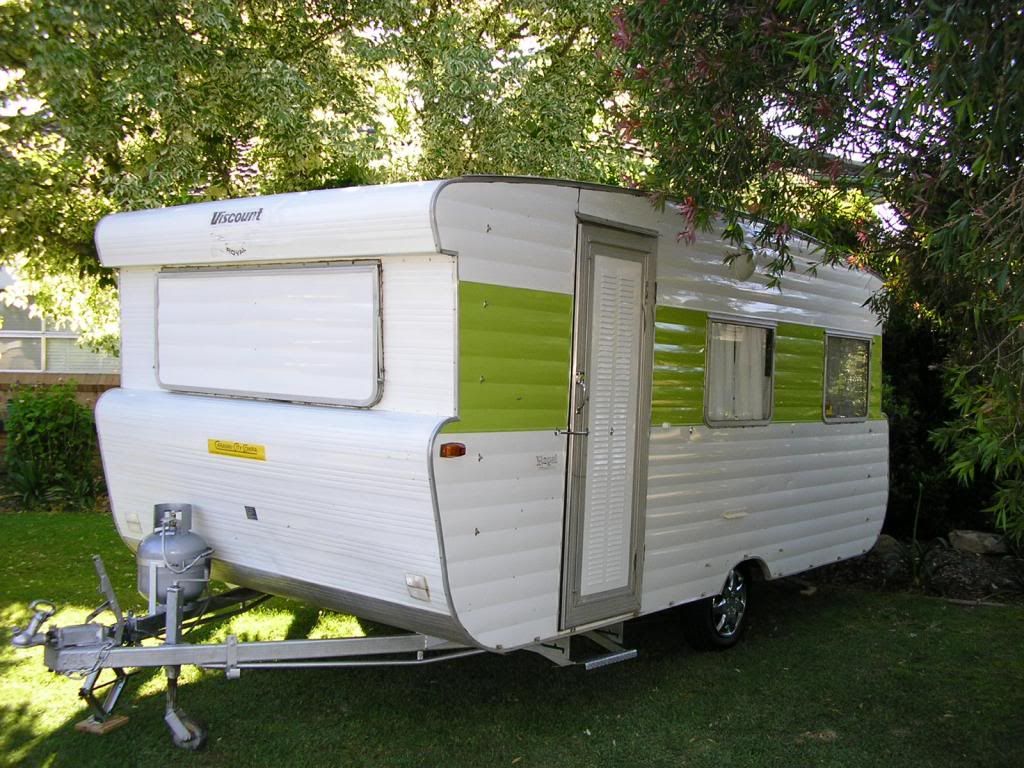
G'day griswalds, and apologies for this late welcome to the forum. ;D
You certainly did well to get a van in such good condition for that price from a dealer. It's amazing how much the price of good Classic vans has gone up in the last year or so. A dealer not far from me would have a price of up around $8000 on a van like yours these days.
It's a bit unusual to see a Royal model without the wrap-around windows front and rear, but seeing as how you've got the double bunks at the front, it would be hard to fit those windows to the van.
I shouldn't think you'd have to do much to the van to keep it in good shape. By the look of the shiny outside paintwork, the van has been well looked after over the years. Lucky you!! ;D
cheers,
Al.
|
|
Deleted
Deleted Member
Posts: 0
|
Post by Deleted on Jul 29, 2011 21:08:06 GMT 10
Thanks Al ! Yes, we were lucky, we were told that there had only been 1 or 2 previous owners and the condition seemed to bear that out. We have been looking at newer vans but find it very hard to seriously think about selling our gem.
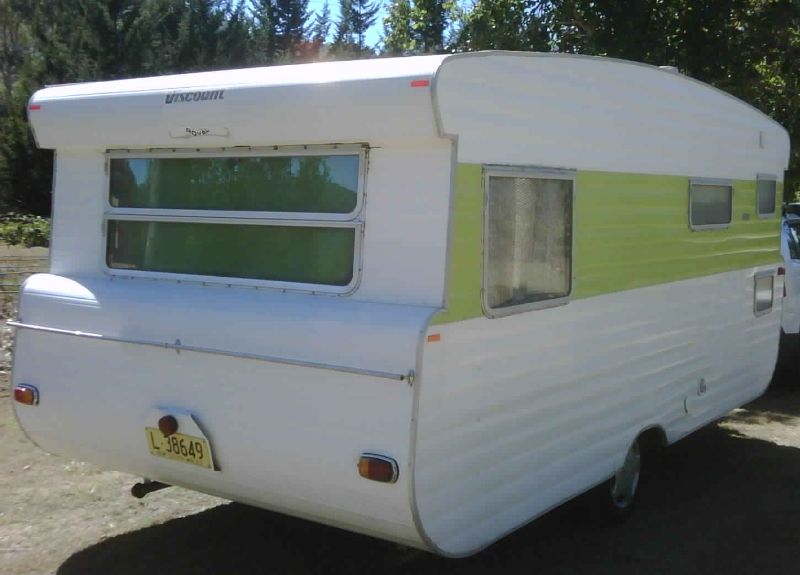
I am looking for advice on repainting the van as a few years of travelling and storage in a paddock has led to paint fade and a few scratches and dents (mostly from sheep using it as a rubbing post !) We now have it stored at our new house on a proper slab and will be putting it under a cover. How hard would it be to do ourselves or would you suggest a pro job ? Cheers Mick. ;D
|
|
|
|
Post by millard1399 on Jul 30, 2011 10:07:48 GMT 10
G'day Mick, Gees, looking at your photos, I wouldn't think the paintwork would need much done to it! I've been-there-and-done-that with spray painting the panels, and found the quality of the cheap paint cans I bought to be sadly crap. Up close, you can see the blue paint on my van is pretty 'ordinary', but from a distance the van always looks pretty good. I learnt on this forum that the "10 metre rule" is a pretty good way of determining whether it's worth doing anything about the paint coating or not. If you stand 10 metres away from the van, and the paint looks pretty good, then you can consider the paintwork to be ok, and not need any further work. Personally, based on your photos, I would just go over the van and scrub off the oxidised chalky layer on the paint, and then polish what remains. I wouldn't bother doing any repainting. Even any bald spots or scratches on the paintwork can be considered "beauty spots" in a 35 year old van. I bought a Capricorn van last year for a project that ended up not happening (sold it again). During the week or two that I had it, I mucked around cleaning it up a bit. Got one of those nylon scouring pads they use in the kitchen, and with a bit of liquid cleaner from the kitchen cupboard, I spent a bit of time seeing how good the old paintwork would come up. Even though the old paint was fairly dull, you could see a big difference after the clean-up. Not sure if these photos show my efforts clearly, but it'll give you an idea of the result... This is the van... 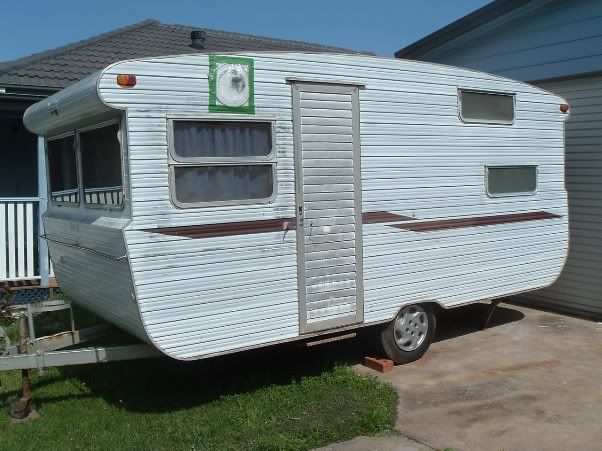 ...and this is the section of the brown stripe I cleaned, to compare with the other part of the stripe that I left alone... 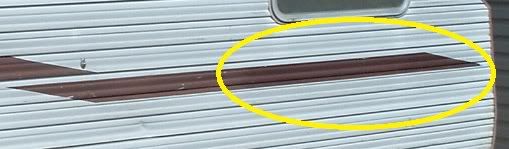 When I did the Millard restoration, I had a lot of brown crap on the surface of the white cladding on the roof. I spent a lot of time with the nylon scourer and liquid cleaner to get the marks off. It was time well spent, because the marks disappeared (eventually) and the paintwork underneath came up looking pretty good. These photos show the 'before' (top) and 'after' (bottom)... 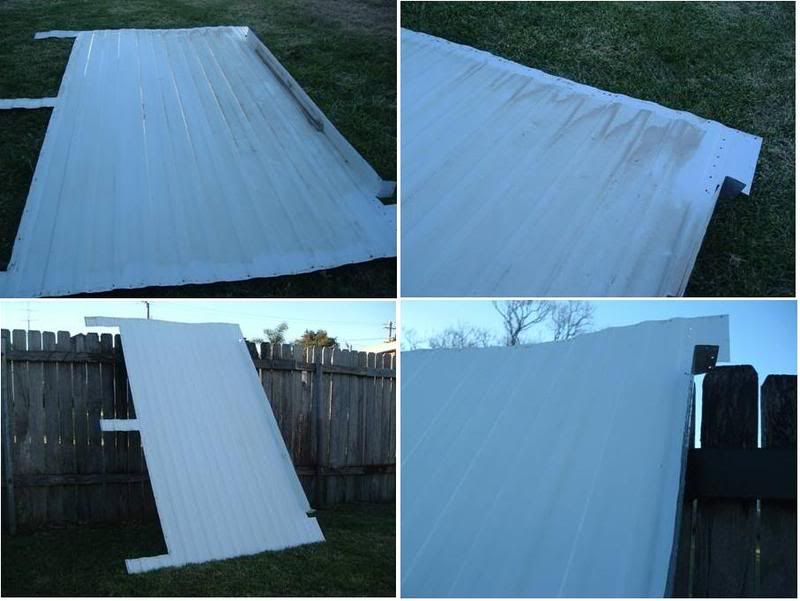 So...long story short, I would clean up and polish what you've got there already, and then go and proudly show your "antique" van to the rest of the world.  ;D cheers, Al. |
|
Deleted
Deleted Member
Posts: 0
|
Post by Deleted on Aug 2, 2011 22:21:06 GMT 10
Thanks Al, sounds well worth a try. After reading your tip the better half has already suggested using Jif liquid cleaner which has a small component of grit which should act as a mild cut 'n polish ! The top photo is from 2006 on day we brought her home and that's why she looks so good. She has a bit more wear and tear now.
cheers Mick
|
|
|
|
Post by millard1399 on Aug 2, 2011 23:17:22 GMT 10
G'day Mick,
Yeah, I reckon "Jif" would be the go, if you've already got some in the cupboard. I used the various "house brands" from the Supermarket. The Coles brand is called "Cream Cleanser", and from memory the other house brands had the word "cream" in the name, or something like that. A 500ml plastic bottle of the stuff costs about $1.50 or thereabouts.
It's the gritty stuff in the cleaner that does the hard work, so don't try and spread the cleaner out too thinly. I found that one squirt of cleanser out of the bottle (a blob about the size of a 50 cent piece) was enough to do about one square foot of cladding, and then another squirt to do the next square foot, and so on. If you try to make each squirt spread further than that, you end up rubbing hard for no real effect. Conversely, if you squirt too much on in one go, you end up wasting it unnecessarily. You'll soon get the hang of how much to apply and how far that will take you.
cheers,
Al.
|
|
Deleted
Deleted Member
Posts: 0
|
Post by Deleted on Jun 19, 2013 21:51:05 GMT 10
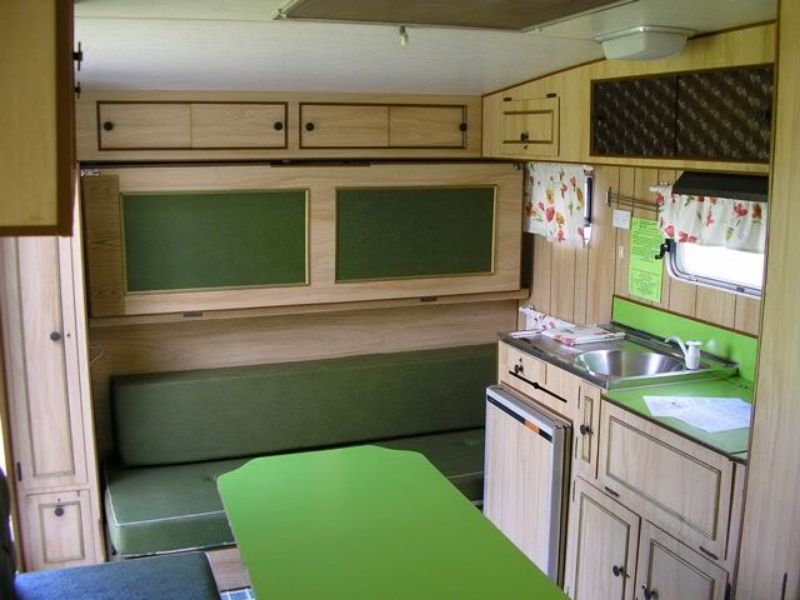
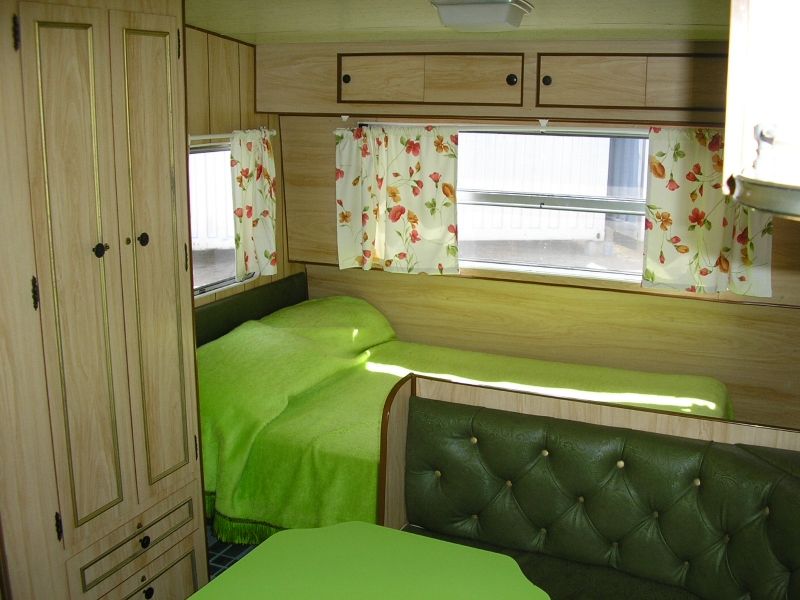
Time for a long overdue update ! We have started a few repairs and modifications to keep our Vicky rolling along and comfy for a few more years yet. We are trying to stay fairly original but with mod cons where we an manage it. Some of the jobs done so far:- *cleaned up the A-Frame, adding a pole carrier and small toolbox *cleaned and repainted the roof hatch *installed a microwave hidden where the old oven used to be *found a new reading lamp at Bunnings to replace the old one that had never worked since we bought the van. The new lamp actually looks a bit 70's so fits well ! *installed tv connections for an outside aerial. *installed a mains pressure tap on the sink with inlet in the van side to connect up water in van parks. Next jobs will be repainting the front panel, replacing the side and tail lights (I have found a Hella range that looks very close to the original available at Autobarn) replacing all window rubbers and repainting/sealing the roof. A 2013 photo update, the A-Frame tizzed up ! 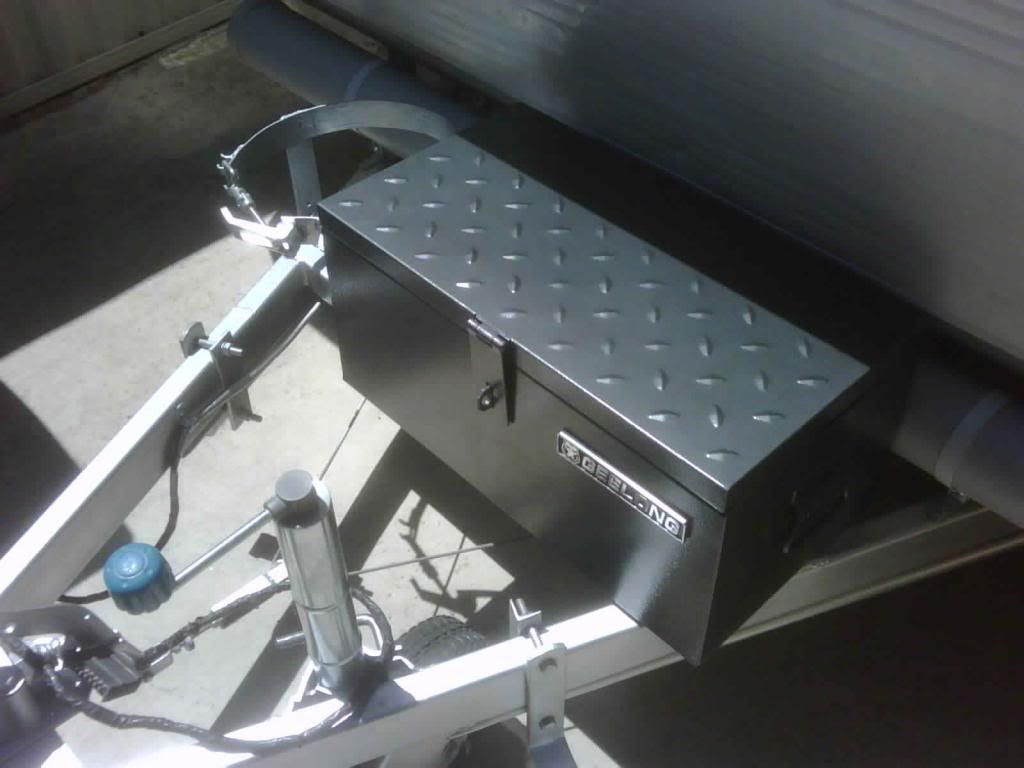 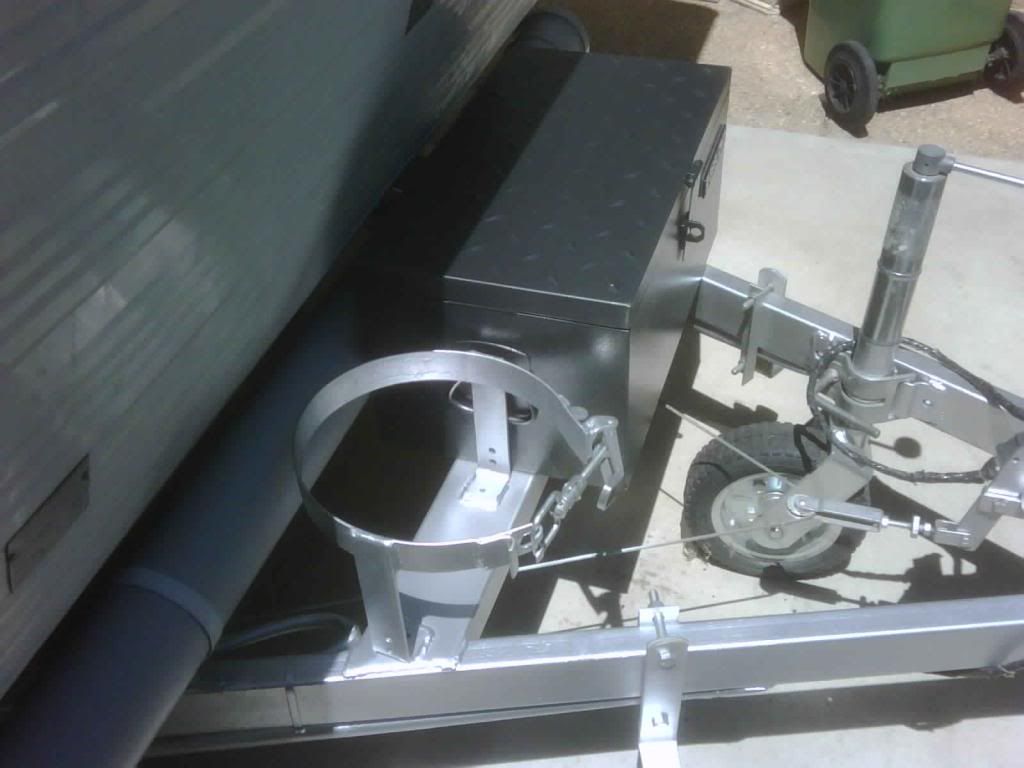 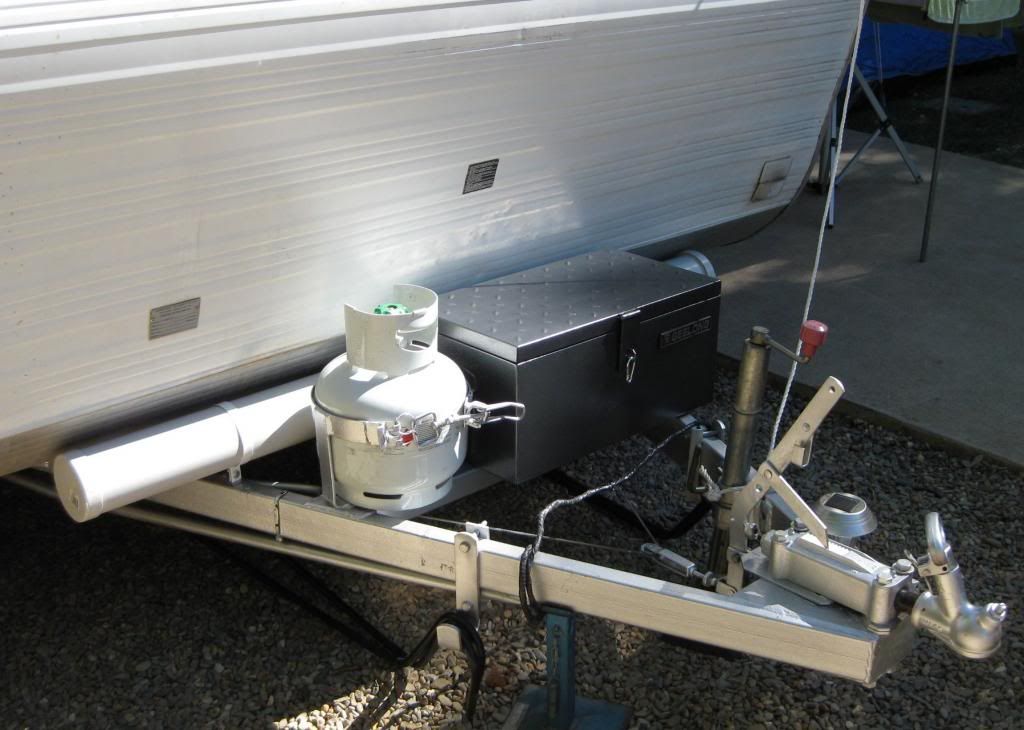 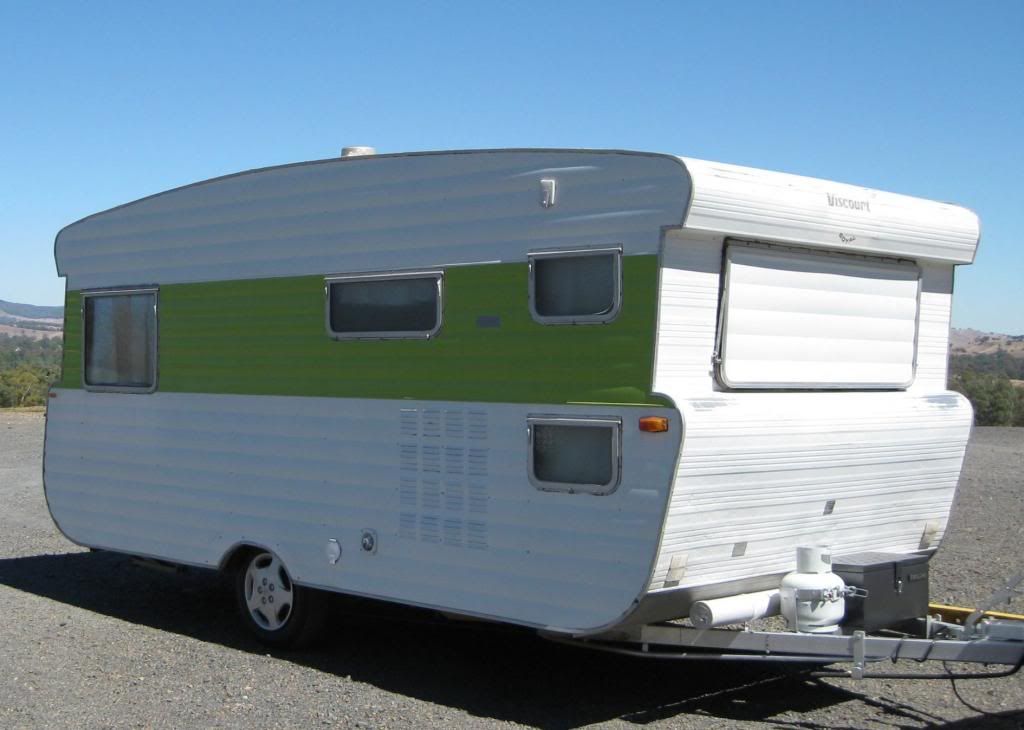 The Hatch after removal and during cleaning up. 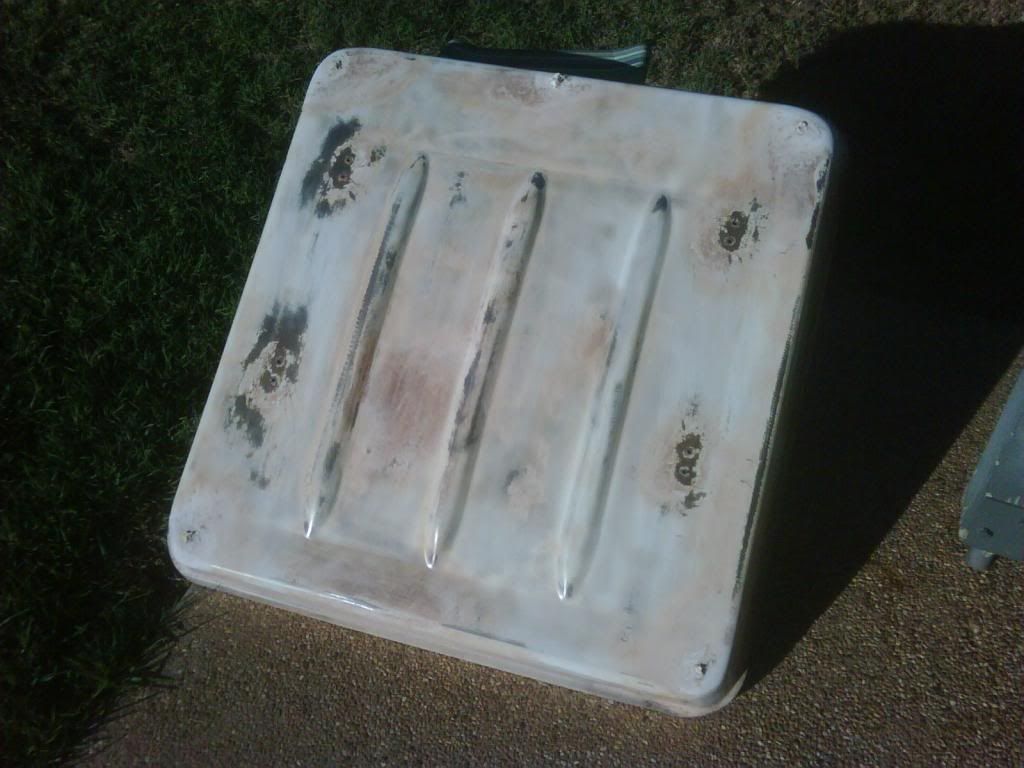 |
|
Deleted
Deleted Member
Posts: 0
|
Post by Deleted on Jun 19, 2013 22:41:36 GMT 10
Hi Griswalds,
your Viscount is looking good.
I see you also have the original Viscount windows!I can tell by the little clips holding them shut!
Cheers
hughdeani
|
|
Deleted
Deleted Member
Posts: 0
|
Post by Deleted on Jun 20, 2013 22:59:32 GMT 10
Thanks Hughdeani ! Those little clips are particularly annoying as they seem to require regular tightening to keep the windows secure !!
Cheers Mick & Connie (The Griswalds)
|
|