Deleted
Deleted Member
Posts: 0
|
Post by Deleted on Jan 22, 2012 16:11:11 GMT 10
Hi All. Ive joined this forum so I can share my experience here and also hopefully get some feedback. We were out for a walk the other day and came across this old caravan for sale, thought about it for about 5 minutes, knocked on the door and had a quick look. The next night after an exchange of a few $, it had taken up residence in our backyard. It really seemed like a good idea at the time. After I spent a hour or so with the gurnie washer blasting all the spiders and leaves and moss and grime off it I only then sat back and considered what i had really gone and done. The van is as best I can work out a 1973 or 74 Viscount Royal. The overall condition is rough The plan is to totally strip the old gal, rebuild and fit out inside, replace the running gear, add in some modern touches but try and maintain the existing overall external feel of course on a budget. and then go touring Attachments:
|
|
Deleted
Deleted Member
Posts: 0
|
Post by Deleted on Jan 22, 2012 16:39:29 GMT 10
Hi Camich, Welcome to the forum  Your new acquisition looks pretty good on the outside. What condition is the inside? Look forward to seeing more photos, Subbie |
|
|
|
Post by gavo on Jan 22, 2012 18:19:50 GMT 10
Hi Camich
Sounds like something I did around a month or so ago. Your plan also sounds similar to ours, keep the outside looking as close to original as possible but refit the interior to our needs. Enjoy the resto, I will watch the progress intently knowing the joy and fun that you will benefit from doing up a classic van.
O yeah, more pics please.
Cheers
Gav.
|
|
Deleted
Deleted Member
Posts: 0
|
Post by Deleted on Jan 22, 2012 18:33:22 GMT 10
The interior is pretty rough, it has single beds and someone has made a double bed using MDF that weighs a tonne Attachments:
|
|
Deleted
Deleted Member
Posts: 0
|
Post by Deleted on Jan 22, 2012 18:33:55 GMT 10
Kitchen and front Attachments:
|
|
Deleted
Deleted Member
Posts: 0
|
Post by Deleted on Jan 22, 2012 18:34:33 GMT 10
even got some groovy wheel skirts Attachments:
|
|
Deleted
Deleted Member
Posts: 0
|
Post by Deleted on Jan 22, 2012 18:44:11 GMT 10
can anyone tell me how to add multiple photos to a post  |
|
|
|
Post by millard1399 on Jan 22, 2012 19:24:48 GMT 10
G'day camich,
There'll be a chassis number welded on the front drawbar, just beside the jockey wheel clamp somewhere. It'll be an "R" followed by some numbers. The first number is the year number. 3 = 1973; 4 = 1974
Let us know what the full number is and I'll include it in your first heading above.
Posting multiple photos requires you to open a free account with a photo hosting website known as "Photobucket". You upload your photos from your computer to Photobucket, and then copy a coding from the picture album and paste that coding into the text box on this forum. To read more about it, click on the POSTING PHOTOS thread that's stickied at the top of the General Board index.
cheers,
Al.
|
|
Deleted
Deleted Member
Posts: 0
|
Post by Deleted on Jan 24, 2012 19:52:27 GMT 10
OK so here goes, work has begun Dismantling the interior... 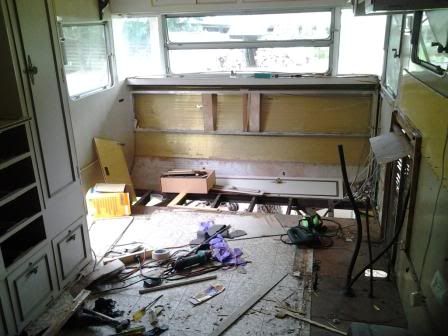 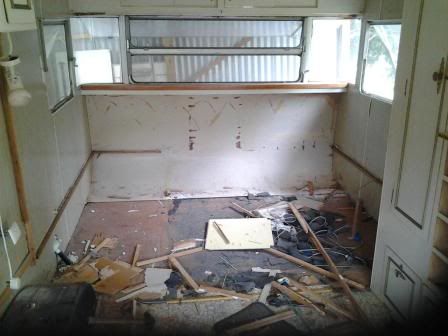 Removing the Gun rack !! 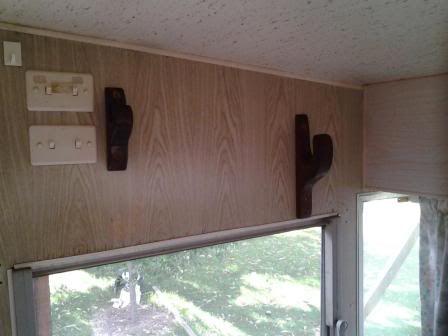 I thought rather than just rip everything out I would try and dismantle the interior, so this is what I have done. The whole van has been stripped but I have been careful in the dismantle. That is the cupboards I jigsawed the front off, the kitchen the same. I have left the overhead cupboards in. Apart from the front RHS wall which was rotten I carefully pulled the walls and the same as the roof and both ends, and floor. The intent is that I might be able to use the peaces as templates, maybe I wont, but the little bit of extra care and patience gives me the option. So its down to its socks and undies now. will post some pics soon |
|
|
|
Post by millard1399 on Jan 24, 2012 22:33:06 GMT 10
G'day camich, Firstly, congratulations on mastering the "Photobucket challenge".   Now you can give us as many photos as you like!! ;D Good to see you getting down and getting dirty. Nothing like a bit of demolition work to help get all your life frustrations out of your system (...to be replaced by all the caravan frustrations!     ) I think your plan to keep some of the fixtures for templates is a very good idea. Even if you don't end up using them, they can help with understanding how it all fitted together originally when your memory has gone belly-up.   Keep feeding us photos. We thrive on a diet of photos and ...more photos. ;D ;D cheers, Al. |
|
Deleted
Deleted Member
Posts: 0
|
Post by Deleted on Feb 20, 2012 20:32:27 GMT 10
Ok so I have been busy on the van. Once the van had been completely stripped inside, my thoughts were to clean up the chassis, paint and refloor so I started to check out the chassis thoroughly The chassis was actually pretty solid with only surface rust so that was a good start but The main rails and main end and rear beams are only constructed of 75mm x 35mm C channel which flexes enormously at locations were there is any force on it such as the side wall supports, the entry step and of course the drawbar. Someone, maybe factory, had fitted a rear bumper and the spare wheel was attached on the LHS of that, the weight of the spare wheel had over time resulted in the LH rail bending down at the rear by over 50mm Measuring diagonally the whole chassis was out of square approx 50mm I suspect caused by the drawbar twisting the front half of the main rails. I really didn’t want to go to the effort of rebuilding the van itself if the basis of the van wasn’t structurally square and solid. The factory chassis is of very light construction and really in my mind simply just not strong enough. There is certainly no way anything can be mounted on the rear of the van such as a rear bar. I would also think it reasonable that most of the leaks that occur around the windows on these vans are probably originally caused by chassis flex. I don’t know if this van has just had a hard time or whether most vans of this construction suffer similar issues. So anyway enough said, I set about constructing a new chassis that would be square, straight, strong and allow a rear bumper if needed. Photos Getting it square 100mm x 50mm Gal 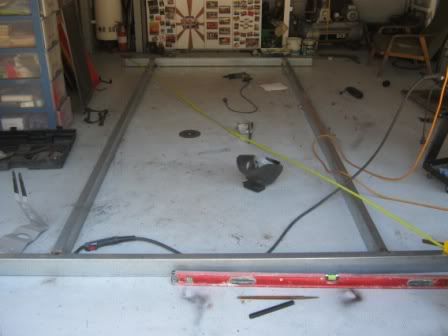 I cut the centre out of the factory chassis and trimmed it up to fit the new chassis. I figured with some additional cross-sectioanl bracing this would be solid enough 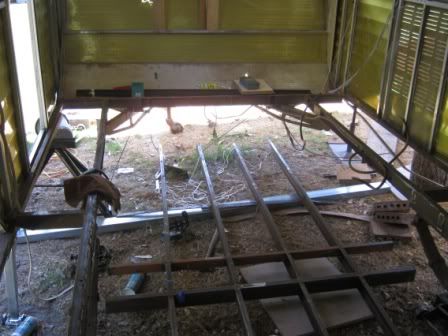 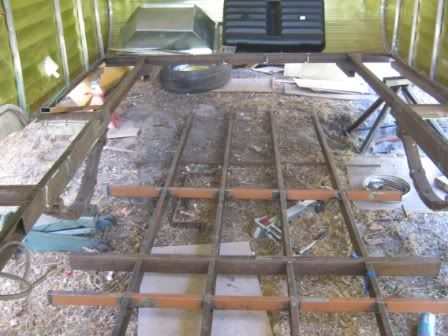 Drawbar bracing using 50mm x 25mm square tubing. Nice strong gussets 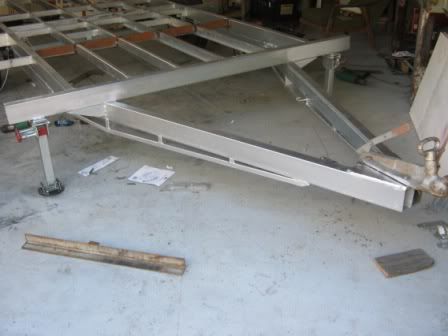 Cross sectional bracing for wall supports 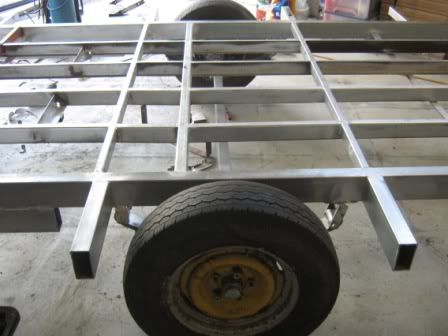 New Axle and Electric brakes, 7 leaf eye to eye leaf springs. Set up the handbrake. 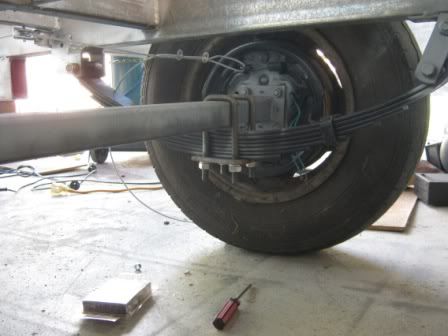 Finished chassis 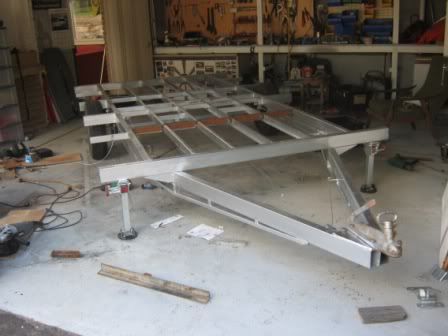 Fitting the new chassis under the old girl. Fair job lifting the van up and cutting the old rails out, blocked the new chassis in under the van and used the new corner stands to lift the chassis and level it. The lowered the van down onto the chassis and welded in place. 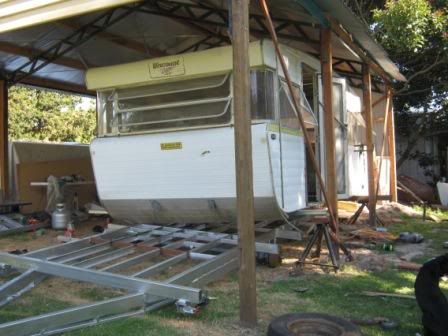 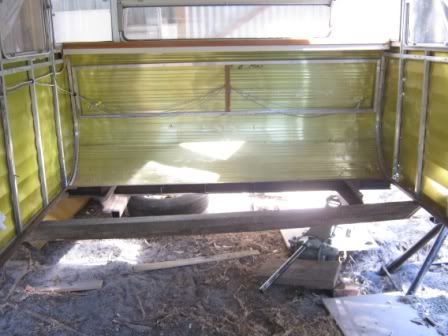 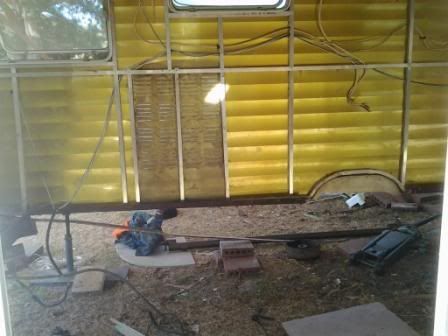 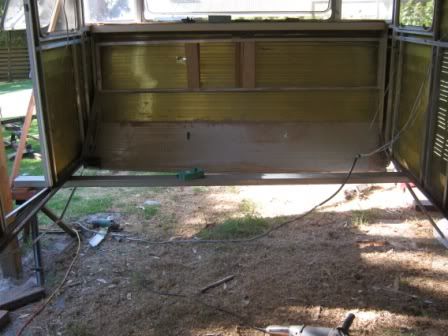 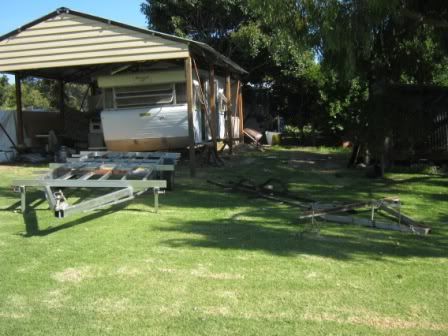 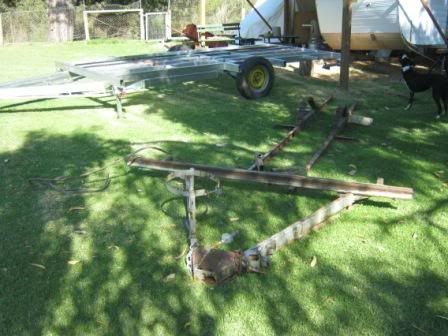 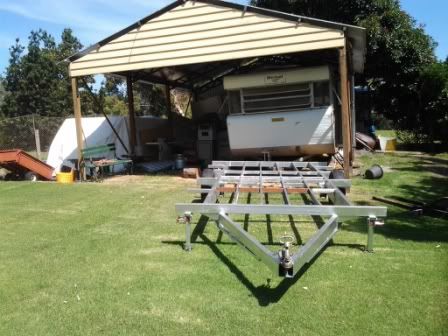 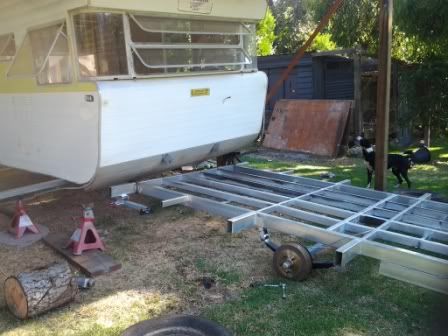 Finally repaired and welded in the original step with cross-sectional bracing 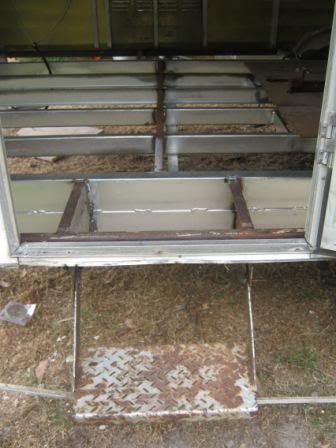 All finished, added weight approx 80kg. Now I can begin the rebuild 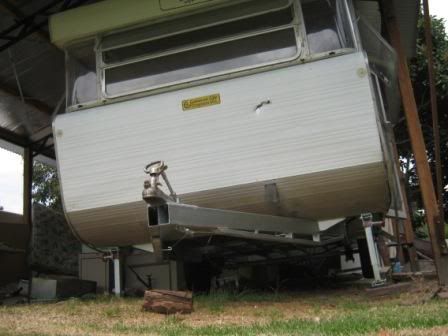 |
|
Deleted
Deleted Member
Posts: 0
|
Post by Deleted on Feb 20, 2012 20:47:47 GMT 10
Now thats what you call a ground up rebuild ....
Nice work!
|
|
Deleted
Deleted Member
Posts: 0
|
Post by Deleted on Feb 20, 2012 21:21:54 GMT 10
great job you are doing there, keep up the good work and keep the pictures coming. Looks so much like ours except our chassis was sound. We are just in the process of doing all the windows.
|
|
Deleted
Deleted Member
Posts: 0
|
Post by Deleted on Feb 26, 2012 19:29:37 GMT 10
|
|
|
|
Post by greedy53 on Feb 26, 2012 19:40:56 GMT 10
I gotta say you boys and girls never cease to amaze me with the into it boots and all some with litte or no experance in the field of welding carpentry paint it really is a great forum if for no other reason but to aide others
JOLLY GOOD SHOW ALL
|
|
Deleted
Deleted Member
Posts: 0
|
Post by Deleted on Feb 27, 2012 11:59:53 GMT 10
its just like looking at our windows!!! lol great to watch your progress.
We thought it was ridiculous using chipboard too, what were they thinking of?
Any idea why there is that little shelf on the window, shown in your second last photo?
|
|
Deleted
Deleted Member
Posts: 0
|
Post by Deleted on Feb 27, 2012 17:30:55 GMT 10
I imagine that the builders didnt expect the windows to ever leak !!, Chipboard is also cheaper than timber or plyboard so from a manufacturing point of view over the number of vans built would probably be more attractive
Observing how the window is screwed in place and the fact that the upright supports between the curved windows and the inside windows are screwed from underneath I would take a guess that the whole window (2 outside and central) was constructed and installed as one piece, hence you end up with that strange gap under the whole window. So the bottom shelf is actually being supported by the top shelf via the central window. It is little wonder that the window starts to leak over time with some unavoidable movement of the whole frame and chassis flex combined with the chipboard both top plate and bottom plate/shelf swelling and drying out over and over, and the outside bottom starts to drop away from the top.
I am now considering recreating the original method and remove the whole frame, rebuild and reinstall as one unit. I think that a better seal would be achieved, but I need to think this one through a bit more
Cameron
|
|
|
|
Post by andycam on Feb 28, 2012 18:02:51 GMT 10
Hi Camich, Mate you must be loving that aluminium framework............... That is really what I was hoping to see when I started removing the panelling from our van. But no, all timber as as the eye can see....... Quite rotten timber at that. Nothing like a challenge  Andy |
|
Deleted
Deleted Member
Posts: 0
|
Post by Deleted on Feb 28, 2012 23:34:04 GMT 10
Hi Camich,
I was also thinking of making the windows up in one unit, maybe replace those strange tin wrapped uprights with alluminium box tube and plate it all top and bottom so that I am sealing metal to metal.
Sealing timber to wood is never a good move IMHO!
I haven't quite got my head round it yet either, but there's no hurry!
Alex
|
|
Deleted
Deleted Member
Posts: 0
|
Post by Deleted on Mar 1, 2012 19:07:12 GMT 10
mm ok while I think the window through and all ideas are welcome , I have moved on to another really really scary place - The roof
So far i have removed both hatches and ground out all the silicone and filler. Interestiingly as i was grinding out the filler i was coming across rust that I thought was strange ( ALu doesnt rust) and discovered left over pop rivet shafts embedded in the filler. As the rivet shaft has rusted and expanded it has cracked the filler and let water in, Mr Viscount has a bit to answer for (again) haha.
Anyway i am wondering what people are using to reseal the roof,
|
|
|
|
Post by gavo on Mar 1, 2012 20:12:31 GMT 10
Yeah, interesting that with the rivets, my roof hatches were the same with rivet tails left in the sealer, naughty Mr Viscount.  To reseal the roof I have gone with sikaflex, this stuff wont let go and seals wel, we used it on everything when I was coach building and rarely got anything back with water leaks. Check the use first and prime the surface before applying the sikaflex. Cheers Gav. |
|
Deleted
Deleted Member
Posts: 0
|
Post by Deleted on Mar 8, 2012 19:41:04 GMT 10
thanks Gav Been busy sikaflexing, sealing all panels and the roof this week, getting there slowly. Then I will be panel beating all dents out and fixing any other holes getting ready to paint. Need to pull the back window out too. Does anyone know if the Viscount Decals are available anywhere ? 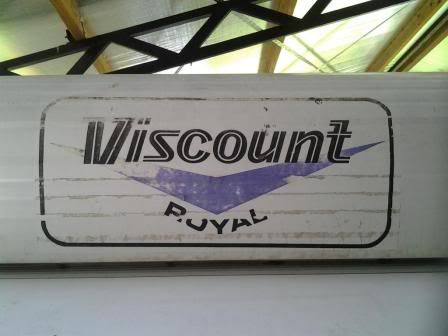 Cameron |
|
|
|
Post by millard1399 on Mar 8, 2012 21:10:41 GMT 10
G'day Cameron,
You won't find these Viscount stickers around anymore. People have got replacements for other brands of vans, made by the vinyl sign makers, but they ain't cheap. I wonder whether a can of black paint and a steady hand might give an acceptable result, by touching up what you already have?
cheers,
Al.
|
|
Deleted
Deleted Member
Posts: 0
|
Post by Deleted on Apr 9, 2012 9:35:45 GMT 10
So the whole van has been totally sealed.. The factory method really relies on the aluminium trimming with sealant to make a waterproof seal. From Factory the panels are riveted only every 600mm or so. The front panel only has 3 rivets holding it to the frame. I understand that the trim also screws through the panel to hold it in place but I think if the same approach to using staples on the interior (ie they are everywhere) the structural intergretity of the van would be much better and would therfore reduce overall flex and aid in maintaining a waterproof seal 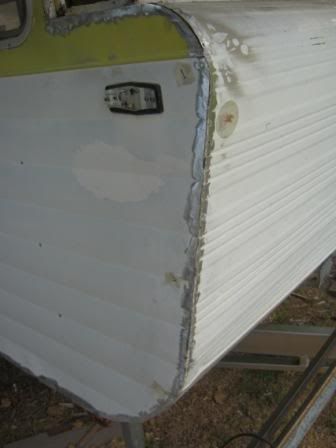 The intention is to use this van on all types of roads, hence the strengthened Chassis. I therefore want to obviously achieve a waterproof seal but also achieve a Dustproof seal – nothing worse than a van full of red dust !!! So I drilled out all the side wall rivets cleaned up the frame underneath, and revitted and sealed the cladding with sikaflex to the frame. To provide a mechanical seal as best as possible I have riveted every 80mm or so, combined with sikaflex underneath then a smear in the rivet hole and over the top of the rivet I think a good overall seal has been achieved and at the same time strengthening the overall body. Obviosly the trim goes over the top but as a secondary seal only. 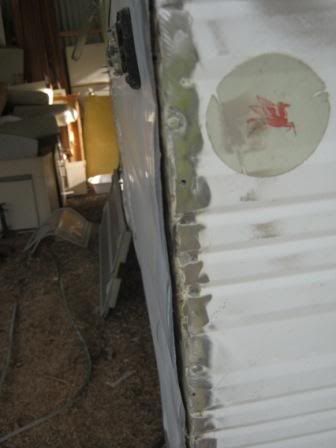  |
|
Deleted
Deleted Member
Posts: 0
|
Post by Deleted on Apr 9, 2012 20:33:58 GMT 10
Just caught up on this one. Fantastic reno. Thank goodness for my (newer) York with it's ali frame + hot dipped gal chassis. Still as sound as new. The Viscount 'engineer' and those crummy chassis ... have an awful lot to answer for.  |
|